background image

EN

Quick guide

1

THANK YOU FOR BUYING A WHIRLPOOL PRODUCT

In order to receive a more complete assistance, please 

register your product on 

www . whirlpool . eu/ register

Before using the appliance carefully read the Safety 

Instruction.

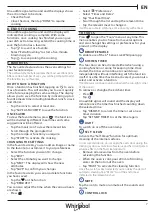
PRODUCT DESCRIPTION

5

4

3

2

1

5

4

3

2

1

1

2

3

4

7

8

6

5

1.  Control panel
2.  Fan and Circular heating 

element  

(not visible)

3.  Shelf guides  

(the level is indicated on the 

front of the oven)

4.  Door
5.  Upper heating element/grill
6.  Lamp
7.  Identification plate  

(do not remove)

8.  Lower heating element  

(not visible)

CONTROL PANEL DESCRIPTION

1

2

3

4

6

5

7

1. ON / OFF

For switching the oven on and off.

2. HOME

For gaining quick access to the 

main menu.

3. FAVORITE

For retrieving up the list of your 

favorite functions.

4. DISPLAY
5. TOOLS

To choose from several options 

and also change the oven settings 

and preferences.

6. REMOTE CONTROL

To enable use of the 6

th

 Sense Live 

Whirlpool app.

7. CANCEL

To stop any oven function except 

the Clock, Kitchen Timer and 

Control Lock.

Summary of Contents for W9I OM2 4S1 H

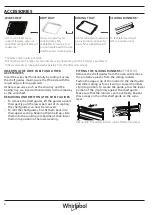
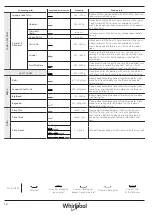
Page 1: ...on the front of the oven 4 Door 5 Upper heating element grill 6 Lamp 7 Identification plate do not remove 8 Lower heating element not visible CONTROL PANEL DESCRIPTION 1 2 3 4 6 5 7 1 ON OFF For switching the oven on and off 2 HOME For gaining quick access to the main menu 3 FAVORITE For retrieving up the list of your favorite functions 4 DISPLAY 5 TOOLS To choose from several options and also cha...

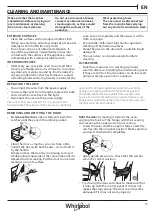
Page 2: ...s Other accessories such as the drip tray and the baking tray are inserted horizontally in the same way as the wire shelf REMOVING AND REFITTING THE SHELF GUIDES To remove the shelf guides lift the guides up and then gently pull the lower part out of its seating The shelf guides can now be removed To refit the shelf guides first fit them back into their upper seating Keeping them held up slide the...

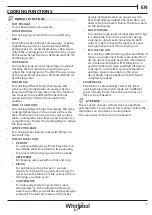
Page 3: ... drying out on the outside KEEP WARM For keeping just cooked food hot and crisp RISING For optimal proving of sweet or savoury dough To maintain the quality of proving do not activate the function if the oven is still hot following a cooking cycle CONVENIENCE To cook ready made food stored at room temperature or in the refrigerator biscuits cake mix muffins pasta dishes and bread type products The...

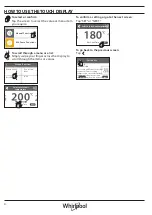
Page 4: ...or values Manual Functions Conventional Forced Air Grill Convection Bake Set Cook Time Select a forced air temperature NEXT To confirm a setting or go to the next screen Tap SET or NEXT Set Cook Time Select a forced air temperature NEXT To go back to the previous screen Tap COOKING INSTRUCTION For cooking different foods that require the same cooking temperature on several shelves maximum three at...

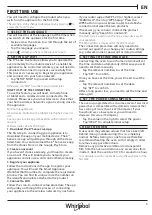
Page 5: ...rt Appliance IDentifier SAID number to complete the registration process You can find its unique code the number on the identification plate attached to the product 4 Connect to WiFi Follow the scan to connect setup procedure The app will guide you through the process of connecting your appliance to the wireless network in your home If your router supports WPS 2 0 or higher select MANUALLY then ta...

Page 6: ...y tap START DELAY to start the waiting time Place the food in the oven and close the door The function will start automatically after the period of time that has been calculated Programming a delayed cooking start time will disable the oven preheating phase The oven will reach the temperature your require gradually meaning that cooking times will be slightly longer than those listed in the cooking...

Page 7: ...o delete functions you have saved Tap the on the function Tap REMOVE IT You can also adjust the time when the various meals are shown Press Select Preferences Select Times and Dates Tap Your Meal Times Scroll through the list and tap the relevant time Tap the relevant meal to change it It will be possible to combine a time slot only with a meal 10 TOOLS Press to open the Tools menu at any time Thi...

Page 8: ...vate the lock Tap the display Swipe up on the message shown MORE MODES For selecting Sabath mode and accessing Power Management PREFERENCES For changing several oven settings WI FI For changing settings or configuring a new home network INFO For switching off Store Demo Mode resetting the product and obtaining further information about the product ...

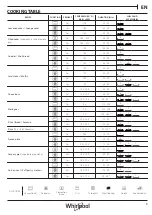
Page 9: ...60 5 3 1 Choux buns Yes 180 200 30 40 3 Yes 180 190 35 45 4 1 Yes 180 190 35 45 5 3 1 Meringues Yes 90 110 150 3 Yes 90 130 150 4 1 Yes 90 140 160 5 3 1 Pizza Bread Focaccia Yes 190 250 15 50 2 Yes 190 230 20 50 4 1 Pizza Thin thick focaccia Yes 220 240 25 50 5 3 1 Frozen pizza Yes 250 10 15 3 Yes 250 10 20 4 1 Yes 220 240 15 30 5 3 1 Savoury pies vegetable pie quiche Yes 180 190 45 55 3 Yes 180 1...

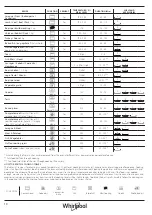
Page 10: ... 4 1 Fish Vegetebles Yes 180 30 50 4 1 Stuffed roasting joints 200 80 120 3 Cuts of meat rabbit chicken lamb 200 50 100 3 Estimated length of time dishes can be removed from the oven at different times depending on personal preference Turn food halfway through cooking Turn food two thirds of the way through cooking if necessary HOW TO READ THE COOKING TABLES The tables list recipes if preheating i...

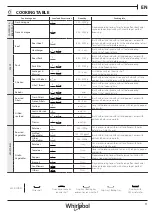
Page 11: ...the oven with the breast side up Fillet Breast 5 4 1 5 cm Brush with oil and sprinkle with salt before cooking Turn at 2 3 of cooking time Kebabs 5 4 1 grid Brush with oil and sprinkle with salt before cooking Turn at 1 2 of cooking time Roasted Fillets Fresh Fillets 3 2 0 5 3 cm Brush with oil and rub with salt and pepper Season with garlic and herbs as you prefer Frozen Fillets 3 2 0 5 3 cm Gril...

Page 12: ...h sugar and cinnamon SALTY CAKES 2 800 1200 g Line a pie dish for 8 10 portions with a pastry and pierce it with a fork Fill the pastry according to your favorite recipe BREAD Rolls 3 60 150 g each Prepare dough according to your favorite recipe for a light bread Form to rolls before rise Use the oven dedicated function to rise Sandwich Loaf in Tin 2 400 600g each Prepare dough according to your f...

Page 13: ... using a washing up brush or a sponge REPLACING THE LAMP Disconnect the oven from the power supply Unscrew the cover from the light replace the bulb and screw the cover back on the light Reconnect the oven to the power supply Please note Only use 20 40 W 230 V type G9 T300 C halogen bulbs The bulb used in the product is specifically designed for domestic appliances and is not suitable for general ...

Page 14: ...u can check the signal strength by placing your smart device next to the appliance What can I do if my wireless connection does not reach the appliance You can use specific devices to extend your home WiFi coverage such as access points WiFi repeaters and power line bridges not provided with appliance How can I find out the name of and password for my wireless network See the router documentation ...

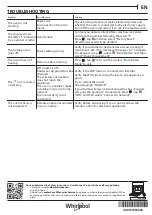
Page 15: ...shown on display WiFi router is off Router set up properties has changed The wireless connections does not reach the appliance The oven is unable to make a stable provision to home network The connectivity is not supported Verify if the WiFi router is connected to internet Verify the WiFi signal strength close to the appliance is good Try to restart the router See paragraph FAQ WiFi If your home w...

Reviews: