background image

Ku nst sto ffschweißtec hni k

WIDOS


Einsteinstr. 5 


Phone  +49 (0) 71 52 99 39 - 0 

W. Dommer Söhne GmbH  D-71254  Ditzingen-Heimerdingen  Fax  

+49 (0) 71 52 99 39 - 40 


Website: www.widos.de 


Email: info@widos.de 

Headquarters: D-71254 Ditzingen-Heimerdingen Country court Stuttgart HRB 200973 Managing director: Jürgen Dommer 


Working Instructions 

Translation 


Heating element butt welding machine 

with CNC control unit 


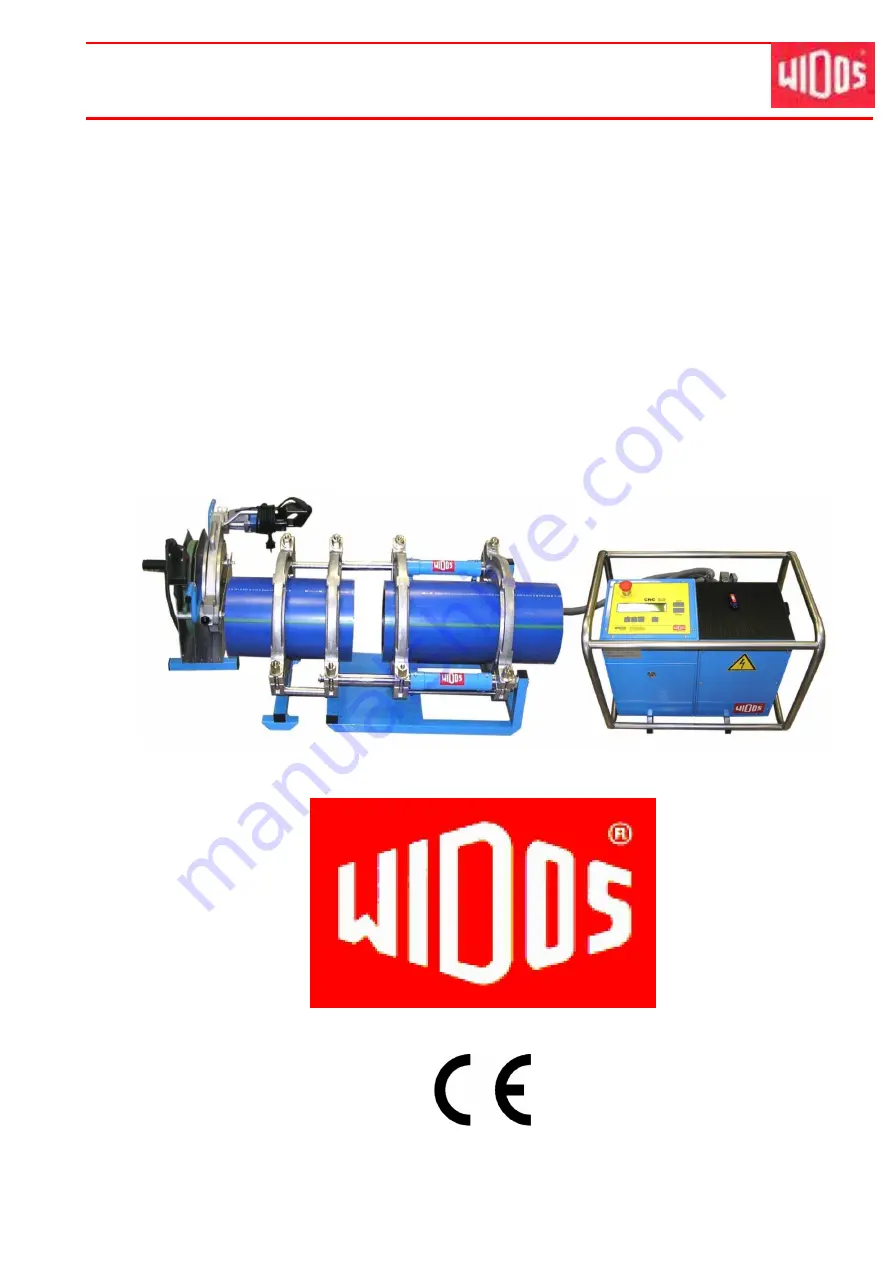
WIDOS  4900 CNC 3.5 


Keep for further use! 

Summary of Contents for 4900 CNC 3.5

Page 1: ...rdingen Fax 49 0 71 52 99 39 40 Website www widos de Email info widos de Headquarters D 71254 Ditzingen Heimerdingen Country court Stuttgart HRB 200973 Managing director Jürgen Dommer Working Instructions Translation Heating element butt welding machine with CNC control unit WIDOS 4900 CNC 3 5 Keep for further use ...

Page 2: ...ries Inventory no Place of working Order of spare parts and sales service Address of Manufacturer WIDOS W Dommer Söhne GmbH Einsteinstr 5 D 71254 Ditzingen Heimerdingen Phone 49 7152 99 39 0 Fax 49 7152 99 39 40 Address of the Subsidiary Companies WIDOS GmbH WIDOS An der Wiesenmühle 15 W Dommer Söhne AG St Gallerstr 93 D 09224 Grüna Sachsen CH 9201 Gossau Telefon 49 0 3 71 8 15 73 0 Telefon 41 0 7...

Page 3: ...vice team in the factory or in our subsidiary companies We will help you with pleasure According to our interest to continuously improve our products and working instructions we kindly ask you to inform us about problems and defects which occur in exercise Thank you Structure of the working instructions This manual is arranged in chapters which belong to the different using phases of the machine D...

Page 4: ...on 11 2 5 Information about safety precautions 11 2 6 Instructions for the staff 11 2 7 Dangers while handling the machine 12 2 8 Specific dangers 12 2 8 1 Danger of stumbling over hydraulic and electric wires 12 2 8 2 Danger of catching clothes by the planer 13 2 8 3 Danger of being burnt by heating element and welding area 13 2 8 4 Danger of squeezing by clamping devices and guideways 13 2 9 Str...

Page 5: ...ore adjustemends 35 5 14 1 Setting the time and the date 35 5 14 2 Setting the language 36 5 14 3 Setting information of traceability and lenght of pipe 37 5 14 4 Setting of shortened cooling time 38 6 Diagnosis program 39 7 Equipment care maintenance repair 41 7 1 Storage 41 7 2 Cleaning the machine 41 7 3 Clamping elements 41 7 4 Checking the hydraulic oil level 41 7 5 Venting the hydraulic cyli...

Page 6: ...epaired by persons who are trained and informed about the dangers The manufacturer is not responsible for any damages caused by inexpert handling or operation For personal injuries material and immaterial damages resulting herefrom only the user is responsible The control unit is reliable in the use when it is used according to the prescriptions in connection with a welding machine designed by WID...

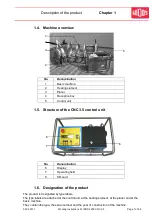
Page 7: ...4 Reception box 5 Control unit 1 5 Structure of the CNC 3 5 control unit No Denomination 6 Display 7 Operating field 8 SD card 1 6 Designation of the product The product is designated by type labels The type labels are attached at the control unit at the heating element at the planer and at the basic machine They contain the type the serial number and the year of construction of the machine 1 3 4 ...

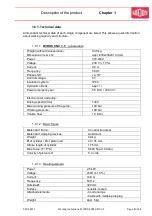
Page 8: ...oltage 5 V Insulation system IP 44 Hydraulic oil tank appr 1 l Power emergency set 5 5 kVA 230 V 1 Electro motor and pump Driving speed t min 1340 Max working pressure of the pump 120 bar Working pressure 100 bar Volume flow 1 9 l min 1 6 1 2 Basic frame Material of frame Construction steel Material of clamping devices Aluminium Weight 48 kg Ø of cylinder Ø of piston rod 40 35 mm Stroke length of ...

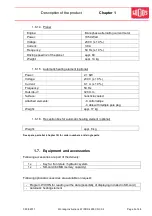
Page 9: ... Frequency 50 Hz Outside 320 mm Surface nonstick coated Attached elements Control lamps Cable with multiple pole plug Weight appr 17 kg 1 6 1 6 Reception box for automatic heating element optional Weight appr 6 kg See spare parts list chapter 10 for order numbers and single parts 1 7 Equipment and accessories Following accessories are part of the delivery 1 x Key for front plate hydraulic system 1...

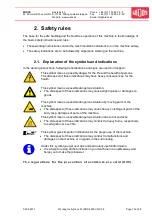
Page 10: ...ations may have heavy consequences for the health This symbol means a possible dangerous situation The disrespect of these indications may cause slight injuries or damages on goods This symbol means a possible dangerous situation by moving parts of the machine The disrespect of these indications may cause heavy crushings of parts of the body resp damages of parts of the machine This symbol means a...

Page 11: ...required for personal safety is to be provided by the owner All available safety equipment is to be inspected regularly 2 5 Information about safety precautions The working instructions have to be permanently kept at the place of use of the machine They are to be at the operator s disposal at any time and without effort In addition to the manual the common valid and the local accident protection r...

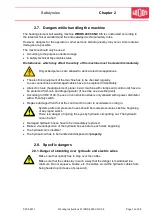
Page 12: ...r basic machine with clamps and control unit have to be protected from rain and dropping water if need be use a welding tent According to VDE 0100 the use on construction sites is only allowed with a power distributor with a FI safety switch Replace damaged front foil at the control unit in order to avoid water coming in System parts and pressure hoses should be made pressureless before beginning ...

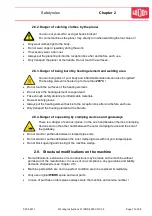
Page 13: ... inflammable materials Do wear safety gloves Always put the heating element back into the reception box after and before each use Only transport the heating element at the handle 2 8 4 Danger of squeezing by clamping devices and guideways There is a danger of serious injuries on the one hand between the inner clamping devices and on the other hand between the outer clamping device and the end of t...

Page 14: ...s on objects are excluded if they are caused by one or several of the following reasons not using the machine according to the prescriptions inexpert building up starting operating maintenance and transport of the machine running the machine with defective or not orderly mounted safety appliances ignoring the information given in this manual structural modifications on the machine without permissi...

Page 15: ...ture prescribed by the DVS must have been reached The clamped pipes drive under pressure in direction of the heating element and are heated up under the defined adjustment pressure adjusting the duration of the adjustment is called adjusting time During the adjustment the bead prescribed by the DVS is performed After reaching the prescribed bead height the control unit automatically switches into ...

Page 16: ... Operating and indicating elements 4 1 Elements on the CNC 3 5 control unit No Name 1 Operation field with display 2 Reading unit for SD card 3 Main switch 4 Outside temperature sensor 5 Plug box fuse protection 1 A 6 Mains connection cable for the control unit 7 EMERGENCY Stop push button 8 Plug box with safety stirrup for heating element 9 Connection for the travel sensor 10 Plug for planer 11 C...

Page 17: ... Turn the main switch off or unplug the main connector The EMERGENCY Stop push button snaps when it is operated In case the EMERGENCY Stop push button was pushed the system is pressure less and the sledge can only be moved manually After elimination of the danger the EMERGENCY Stop push button must be unlocked again by turning it in clockwise direction and the functions of buttons and open and clo...

Page 18: ...yed alternating on the display of the control blinking the temperature of the heating element is maintained by a pulse position ratio off the desired temperature has been exceeded the heating element is cooled automatically onto desired temperature or the heating element is switched off Safety micro switch Planer The planer starts only when the safety micro switch is pressed Locking device of the ...

Page 19: ...urther be sure that no unauthorized person has access According to VDE 0100 the use on construction sites is only allowed with a power distributor with a FI safety switch Check the oil level of the hydraulic system before each starting of the control unit in order to avoid damages on the pump If necessary add hydraulic oil of the quality HLPD 32 The heating element surfaces should be clean especia...

Page 20: ...hree hexagon socket screws Dismantling of the outer fixed clamping device 5 2 1 Using small and large reduction inserts Small reduction inserts Pipe fittings often have only a short straight surface area on which they can be clamped Fittings mostly need to be clamped in the inner clamping devices with the small reduction inserts When fittings are to be welded bends T pieces etc the inner small red...

Page 21: ...nt Optional For inserting the heating element please use in any case the handle provided for this purpose A and B Pressing the handle B in the direction of the heating element plate will lock or release the heating element in the protection box or on the basic machine The rollers D have to be supported on the guideway E before the heating element is locked by releasing the handle B For welding the...

Page 22: ...Connect the power line plug No 5 of the CNC 3 5 to the mains and be sure to have a correct mains voltage 230 V 50 Hz 5 5 Operation with emergency power supply Do not connect any other current consumers to the emergency power supply Current consumers such as drilling machines fluorescent lamps or motors can generate spikes more than 1000 V which can disturb the welding process and might destroy the...

Page 23: ...tics menu 5 7 SD card and drive The unit CNC 3 5 has a drive for a SD card The machine stores the welding data in the internal memory as well as on the SD card if a card is in the drive On a card with 64 MB memory capacity the welding data of about 32000 weldings can have place The SD card must be formatted by FAT 16 necessarily before usage Insert the card with its inscription to the top carefull...

Page 24: ...S folder there you will find WICON2000 viewer for considering and printing the welding data working instructions for WICON2000 viewer as PDF file 5 9 Switching the CNC 3 5 on As soon as the control unit CNC 3 5 is connected to the mains and switched on at the main switch the display is lightened the computer is being initialised Display 2nd line WIDOS GmbH Germany after a few seconds the display c...

Page 25: ...line WIDOS 4900 CNC 22 11 2000 10 10 The type of the machine is displayed Current date and time B a s i c m e n u 5 10 Programming and welding As soon as the control unit CNC 3 5 is switched on you can start welding Display 2nd line WIDOS 4900 CNC 22 11 2000 10 10 The type of the machine is displayed Current date and time In the basic menu following functions are possible button and moving the sle...

Page 26: ...ge the respective value button Start confirm and jump to the next parameter Display 2nd line mat diam wall temp PE80 225 20 5 206 button or change the respective value button Start confirm and jump to the next parameter Display 2nd line mat diam wall temp PE80 225 20 5 206 button or change the respective value button Start confirm and jump to the next parameter Display 2nd line mat diam wall temp ...

Page 27: ...ton C if need be basic menu Only appears in case shortened cooling time is entered Chapter 5 14 4 Display 2 line Attn shortened cooling time In case you have selected shortened cooling time it is reduced by appr 40 compared to the one of DVS Activate the shortened cooling time with button Abort with button C if need be basic menu Display 2nd line name of project WIDOS Enter name of project button ...

Page 28: ...to the right by pressing button Enter confirm by pressing button Start Abort with button C if need be basic menu Display 2nd line opening machine This message appears only if the machine is not opened completely button Start confirm machine opens Display 2nd line insert pipes clean pipes Insert clean and clamp the pipes button Start confirm Display 2nd line closing machine measuring dragpress The ...

Page 29: ...Start alignment check is started Display 2nd line closing machine Machine closes after a few seconds the display changes Display 2nd line confirm alignment test pressure Keep pressed button to check the pressure build up e g whether pipes slip through If the alignment of the pipes is correct confirm with button Start The misalignment may not be higher than 10 of the wall thickness If the misalignm...

Page 30: ...ayed after the bead height being reached the display changes Display 2nd line heat up Taw 0000s heat elem t 000 C Remaining heating time Heating element temperature 5 seconds before end of the heating time you will hear several beeps Display 2nd line change over remove heating elem Take heating element out of the machine directly after a few seconds the display changes Display 2nd line change over...

Page 31: ...ter OK Welding completed unclamp the pipes button Start back to basic menu Display 2nd line WIDOS 4900 CNC 22 11 2000 10 10 Basic menu Current date and time 5 11 1 Welding process with traceability Display 2 line WIDOS 4900 CNC 22 11 2000 10 10 The type of the machine is displayed Current date and time button Start to confirm Display 2 line please read pipe code 1st pipe Simultaneously pres all bu...

Page 32: ...error message appears Display 2 line error not possible to weld those pipes Confirm the error message by pressing button Enter If the length of pipe is entered additional disapears Display 2 line length of 1 pipe 000 00 mm Enter the length of the last read in barcode pipe 1 up to the joint by buttons Enter Press button Start Display 2 line length of 2 pipe 000 00 mm Enter the length of the last re...

Page 33: ... welding data The battery buffered CNC memory RAM can store about 400 weldings Make sure not to go over this quantity in the display the error message memory full appears because otherwise the first stored welding will be over written If necessary copy the welding data on SD card and read out in time 5 13 1 Copying internal data onto SD card and deleting them RAM Abort and back to basic menu by pr...

Page 34: ...er several times or wait until the basic menu appears after a while Display 2 line WIDOS 4900 CNC 09 43 03 05 2007 Indication of the currently entered machine type current time and date alternating with 21 C HE C current ambient and heating element temperature Bas ic m enu 5 13 2 Storing data on the SD card When pressing the button Enter the stored welding parameters can be printed or stored on a ...

Page 35: ...Display 2 line WIDOS 4900 CNC 22 11 2000 10 10 Basic menu Current date and time next menu by pressing button Enter Display 2 line SD card _ next menu by pressing button Start Display 2 line Diag Clk WICON Param 10 10 next menu by pressing button Start Display 2 line Diag Clk WICON Param 10 10 Setting the time buttons and change the time button Enter confirm Display 2 line Diag Clk WICON Param 22 1...

Page 36: ...u Current date and time next menu by pressing button Enter Display 2 line copy _ next menu by pressing button Start Display 2 line Diag Clk WICON Param _ 10 10 press several times button Start until language appears Display 2 line Language german _ several languages are entered buttons and change the language button Enter confirm press several times button Start or after a short while appears auto...

Page 37: ...ton Start Display 2 line Diag Clk WICON Param _ 10 10 press several times button Start until language appears Display 2 line Traceability Yes traceability can be enterd yes or no buttons and set traceablity Select yes with if traceability is required Only appears if traceability has been selected with yes Display 2 Zeile pipe length Yes Length of pipe yes or no can be entered Wth button enter leng...

Page 38: ...n Start until shortened cooling time appears Display 2 line shorted cool time yes shortened cooling time can be entered Select yes with if shortened cooling time is required It is allowed to use the shortened cooling time under the following conditions Welding material PE and PP Prefabrikation under workshop conditions Low additional pressure at unclamp No additional pressure during further coolin...

Page 39: ...he next menu Display 2nd line Diag Clk WICON Param _ 10 10 Setting the diagnosis number The respective diagnosis number can be set with buttons and Enter No Signification 0008 The actual position of the sledge is displayed 0010 The actual temperature C of the heating element is displayed 0011 The environmental temperature C is displayed 0012 The actual pressure bar is displayed 0013 The required b...

Page 40: ...ed weldings are deleted By entering of 0001 all weldings stored in the RAM memory up to that time are deleted By reapeted entering of 0001 all weldings stored in the SD card memory up to that time are deleted 0034 Bit values from 0 1023 appear which will change together with the change of the corresponding analog values 0005 Travel 0008 Heating element temperature PT 1000 0010 Environmental temper...

Page 41: ...operly especially when cleaning with solvents 7 3 Clamping elements For a long service life clean and grease regularly the threaded spindles and the joint parts which are used for clamping the pipes 7 4 Checking the hydraulic oil level To avoid damages check the oil level of the hydraulic pump before each starting of the control unit Open front plate on the lefthand side of the control unit Unscre...

Page 42: ... unscrew the lower vent screw Z1 for closing lefthand side Connect the transparent venting hose and insert it in the collecting vessel Close by pressing button until there is no more air visible in the venting hose Tighten again the vent screw Z1 Press button and close the machine completely Then unscrew the lower vent screw A1 for opening righthand side Connect the transparent venting hose and in...

Page 43: ... be Check the function of the safety devices after completion of the maintenance works Check especially insulation and tension resistance and protective cables resistance 7 7 Saving the welding data The battery buffer for the CNC memory RAM goes empty Without current connection the batteries necessary for the storage of the welding data work for about 1 month Remedy connect the machine to power sw...

Page 44: ...nd confirm with Start error time between plan warm too long The time between inserting the heating element and closing has overgone 10min Confirm with Enter and repeat planing process pipes slipped in clamps Pipes were not properly clamped and are slipping through the clamping devices Clamp the pipes tightly heating element is still inserted After completion of the change over time the heating ele...

Page 45: ...rward nor backward Emergency stop is pressed A valve is not getting its command Travel cable is not plugged Travel cable is interrupted Unlock the Emergency stop Start Test and diagnosis program Perform diagnosis No 0008 travel test Planer works the whole time or not at all Button at the planer is not pressed Semi conductive relais defective Check the button Perform diagnosis No 0003 planer After ...

Page 46: ...olders The hydraulic hoses at the basic machine should not be unscrewed air penetration Make sure that they are not being squeezed The sensors integrated in the machine are sensitive high precision devices which need to be handled carefully in order to reach a longer life Do not tilt the machine too much Protect the machine from heavy chocs Make sure that the box cover is closed correctly Never li...

Page 47: ...nsteinstr 5 Phone 49 0 71 52 99 39 0 W Dommer Söhne GmbH D 71254 Ditzingen Heimerdingen Fax 49 0 71 52 99 39 40 Website www widos de Email info widos de 02 08 2011 Working Instructions WIDOS 4900 CNC 3 5 Page 47 of 68 9 Wiring diagrams ...

Page 48: ...Kunststoffschweißtechni k Wiring diagrams Chapter 9 02 08 2011 Working Instructions WIDOS 4900 CNC 3 5 Page 48 of 68 ...

Page 49: ...Kunststoffschweißtechni k Wiring diagrams Chapter 9 02 08 2011 Working Instructions WIDOS 4900 CNC 3 5 Page 49 of 68 Rear Panel Adapter X7 CNC 3 5 ...

Page 50: ...Kunststoffschweißtechni k Wiring diagrams Chapter 9 02 08 2011 Working Instructions WIDOS 4900 CNC 3 5 Page 50 of 68 ...

Page 51: ...Kunststoffschweißtechni k Wiring diagrams Chapter 9 02 08 2011 Working Instructions WIDOS 4900 CNC 3 5 Page 51 of 68 ...

Page 52: ...Kunststoffschweißtechni k Wiring diagrams Chapter 9 02 08 2011 Working Instructions WIDOS 4900 CNC 3 5 Page 52 of 68 Rear Panel X 12 ...

Page 53: ...Kunststoffschweißtechni k Wiring diagrams Chapter 9 02 08 2011 Working Instructions WIDOS 4900 CNC 3 5 Page 53 of 68 ...

Page 54: ...Kunststoffschweißtechni k Wiring diagrams Chapter 9 02 08 2011 Working Instructions WIDOS 4900 CNC 3 5 Page 54 of 68 ...

Page 55: ...Kunststoffschweißtechni k Wiring diagrams Chapter 9 02 08 2011 Working Instructions WIDOS 4900 CNC 3 5 Page 55 of 68 Mounting Plate ...

Page 56: ...Kunststoffschweißtechni k Wiring diagrams Chapter 9 02 08 2011 Working Instructions WIDOS 4900 CNC 3 5 Page 56 of 68 ...

Page 57: ... 0 W Dommer Söhne GmbH D 71254 Ditzingen Heimerdingen Fax 49 0 71 52 99 39 40 Website www widos de Email info widos de 02 08 2011 Working Instructions WIDOS 4900 CNC 3 5 Page 57 of 68 10 Spare parts list 10 1 CNC contol unit 3 5 12 14 7 8 9 10 11 18 19 20 1 2 3 6 17 16 ...

Page 58: ... panel 1 EF0601 8 Flat head screw M 4x10 DIN 7991 8 7991D010 9 Rosette M4 8 ROSM4 10 Lock for front panel 1 J1001 Key 1 on request 11 Front panel for hydraulic 1 105011 12 Filler pipe 1 C1002002 13 Oil dip rod 1 C102001 14 Conical nipple for filler pipe 1 D24x18 5 15 Hydraulic oil 1 l HLPD032 16 Protecting cover position sensor 1 EST0508 17 Protecting cover for 16 chanel plug 1 EST0548 18 Rubber p...

Page 59: ...chni k Spare parts list Chapter 10 02 08 2011 Working Instructions WIDOS 4900 CNC 3 5 Page 59 of 68 10 2 Basic machine 1 6 2 6 3 6 4 6 5 6 7 11 7 11 12 13 14 15 17 18 19 21 23 22 23 24 32 36 37 25 31 58 59 33 35 38 40 20 ...

Page 60: ...toffschweißtechni k Spare parts list Chapter 10 02 08 2011 Working Instructions WIDOS 4900 CNC 3 5 Page 60 of 68 Illustration without rail for the travel sensor 41 42 43 44 54 45 56 55 46 48 49 50 51 52 53 57 ...

Page 61: ...010 19 Shaft 3 091131 20 Flat head screw M 12x30 DIN 7991 6 7991L030 21 Base frame 1 216118 22 Base plate for base frame 1 2161182 23 Pan head screw M 8x30 DIN 912 2 0912H030 24 Support 1 216141 25 Hydraulic tube 2 VSCHL61 26 Quick coupling spigot 1 VST14 27 Quick coupling socket 1 VMU14 28 Screwed connection GE 8 LR 3 8 2 VXGE8L38 29 Compressing collar 4 VP256 30 Threaded nippel 1 4 2 VN856 31 El...

Page 62: ...F020 51 Washer M 6 DIN 125 1 0125F 52 Rail for travel sensor 1 216171 53 Magnetic belt 240 mm 1 EE0735 54 Hexagon head screw M 8x12 DIN 933 2 0933H012 55 Holder for sensor 1 091172 56 Sensor digital 1 EE0724 57 Slotted pan head srew M 3x12 DIN 85 2 0085C012 58 Reducer inserts OD 90 280 1 set 3808 59 Pan head screw M 6x30 DIN 912 to OD 90 225 8 0912F30X Pan head screw M 6x25 DIN 912 to OD 280 8 091...

Page 63: ...tstoffschweißtechni k Spare parts list Chapter 10 02 08 2011 Working Instructions WIDOS 4900 CNC 3 5 Page 62 of 68 10 3 Planer 11 12 14 15 26 2 4 19 42 41 6 10 5 34 30 31 33 16 18 1 20 21 25 13 27 29 35 40 ...

Page 64: ...rew M 8x30 DIN 912 2 0912H030 20 Ball button C32 M 8 DIN 319 1 0319 C32 21 Locking bolt 1 091422 22 Grooved taper pin 4x16 DIN 1471 1 1471D016 23 Pressure spring 1 FE006 24 Bush 1 216421 25 Lock nut 1 091423 26 Pan head screw M 10x30 DIN 912 2 0912H030 27 End sleeve for strands with ring M 4 1 EA05425 28 Tooth lock washer M 4 DIN 6797 1 6797D 29 Pan head screw M 4x6 DIN 84 1 0084D006 30 Connecting...

Page 65: ...Kunststoffschweißtechni k Spare parts list Chapter 10 02 08 2011 Working Instructions WIDOS 4900 CNC 3 5 Page 64 of 68 10 4 Heating element 12 13 14 10 11 23 22 17 21 15 16 3 5 1 6 8 9 2 24 ...

Page 66: ...w M 3x5 DIN 7985 7 7985C005 11 Joining disc PTFE 1 211505 12 Flat head screw M 6x12 DIN 7991 4 7991F012 13 Heating element H 4900 230 V 1 H4900C2 Heating plate new 1 HP4900C2 Heating plate for change 1 HPT4900C2 14 Temperature probe PT1000 1 H09082 15 Handle 2 H0205 16 Handlebar 2 H0206 17 Cable socket 16 15 f Pg 16 1 EVK1615 18 Rubber cable 5x1 5 mm 1 EL02515 19 Nozzle housing 16 pins 1 EST0542 2...

Page 67: ...Kunststoffschweißtechni k Spare parts list Chapter 10 02 08 2011 Working Instructions WIDOS 4900 CNC 3 5 Page 66 of 68 10 5 Reception box 1 2 3 4 9 11 12 13 6 8 7 5 ...

Page 68: ...ng cap Ø20x2 2 J5401 5 Spacing bolt for heating element 2 214525 6 Spacing bolt for planer 2 216524 7 Foot mounting 2 214521 8 Blind rivet 4x10 DIN 7337 8 7337D010 9 Hexagon bolt M 8x160 DIN 933 2 0933H180 10 Hexagon domed cap nuts 6AU M 8 DIN 1587 2 1587H 11 Washer M 8 DIN 125 2 0125H 12 Insertion for planer 1 214522 13 Fitting cap 40x30x2 4 J0203 02 08 2011 Working instructions WIDOS 4900 CNC 3 ...

Page 69: ...welding machine with CNC control unit WIDOS 4900 CNC 3 5 to which this declaration refers corresponds to the following norms and norming documents 1 DIN EN ISO 12100 1 and 2 Replacement for DIN EN 292 part 1 and 2 Safety of machines basic terminology general guidelines for design 2 DIN EN 60204 1 Electric equipment of industrial machines 3 DIN EN 60950 Safety of equipments of the information techn...

Reviews: