background image


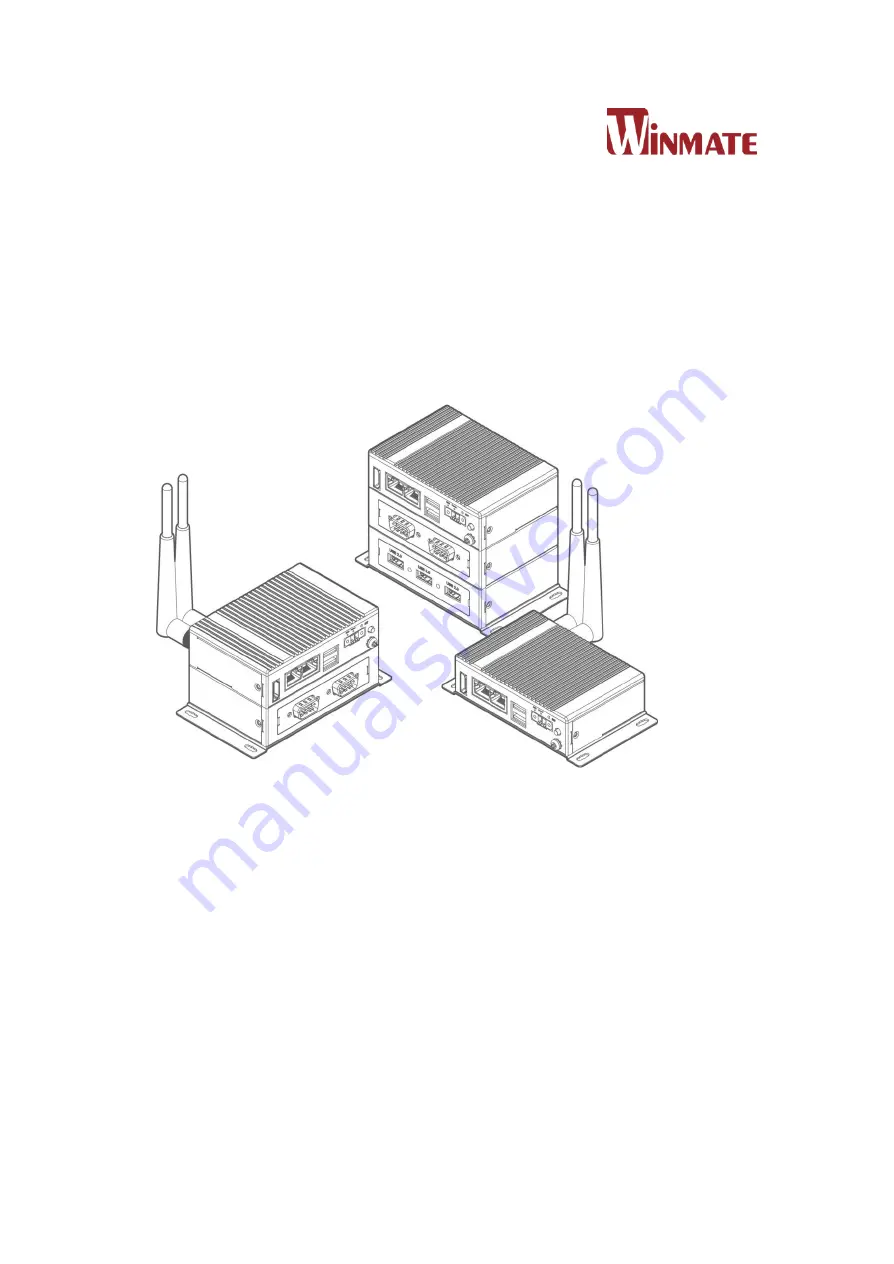
IoT Gateway 

Intel® Apollo Lake N3350 1.1 GHz 


EAC Mini I


L20EAC-N


User Manual


Version 1.0 


Summary of Contents for EAC Mini IL20EAC-N

Page 1: ...IoT Gateway Intel Apollo Lake N3350 1 1 GHz EAC Mini IL20EAC N User Manual Version 1 0 ...

Page 2: ......

Page 3: ...onnectors 20 2 1 1 HDMI Connector 20 2 1 2 Ethernet Connector 20 2 1 3 USB Connector 21 2 1 4 Power Connector 21 2 2 Hardware Installation 22 2 2 1 mSATA Installation 22 2 2 2 External Antenna Installation 22 2 2 3 Expansion Module Installation 23 2 3 Connecting the Power 24 2 3 1 Connecting the Power 24 2 3 2 Chassis Grounding 24 CHAPTER 3 MOUNTING 26 3 1 Wall Desk Mount 26 3 2 DIN Rail Mount 27 ...

Page 4: ...puter 58 4 4 How to Enable Watchdog 59 CHAPTER 5 DRIVER INSTALLATION 62 5 1 Chipset Driver Installation 62 5 2 Graphic Driver Installation 64 5 3 TXE Trusted Execution Engine Driver Installation 67 5 4 Serial IO Driver Installation 70 5 5 LAN Driver Installation 73 CHAPTER 6 TECHNICAL SUPPORT 77 6 1 Software Developer Support 77 6 2 Problem Report Form 77 APPENDIX A ORDERING INFORMATION 79 ...

Page 5: ...d Applications that are described in this manual are for illustration purposes only We make no representation or guarantee that such application will be suitable for the specified use without further testing or modification Warranty Our warranty guarantees that each of its products will be free from material and workmanship defects for a period of one year from the invoice date If the customer dis...

Page 6: ... for technical support if you need additional assistance You may need the following information ready before you call Product serial number Software OS version application software etc Detailed description of the problem The exact wording of error messages In addition free technical support is available from our engineers every business day We are always ready to give advice on application require...

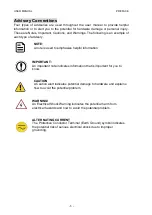
Page 7: ... is used to emphasize helpful information IMPORTANT An important note indicates information that is important for you to know CAUTION A Caution alert indicates potential damage to hardware and explains how to avoid the potential problem WARNING An Electrical Shock Warning indicates the potential harm from electrical hazards and how to avoid the potential problem ALTERNATING CURRENT The Protective ...

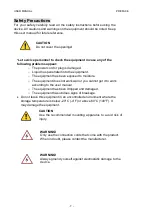
Page 8: ...open the PC chassis WARNING During heavy loading in 50 C environment the top side of the EAC Mini may be over 70 C Please do not touch these parts with your bare hands CAUTION Always ground yourself to remove any static charge before touching the CPU card Modern electronic devices are very sensitive to static electric charges As a safety precaution use a grounding wrist strap at all times Place al...

Page 9: ...e equipment has been exposed to moisture o The equipment does not work well or you cannot get it to work according to the user manual o The equipment has been dropped and damaged o The equipment has obvious signs of breakage Do not leave this equipment in an uncontrolled environment where the storage temperature is below 20 C 4 F or above 60 C 140 F It may damage the equipment CAUTION Use the reco...

Page 10: ...its are designed to provide reasonable protection against harmful interference when the equipment is operated in a commercial environment This equipment generates uses and can radiate radio frequency energy and if not installed and used in accordance with the instruction manual may cause harmful interference to radio communications Operation of this equipment in a residential area is likely to cau...

Page 11: ...ncil directions Electromagnetic Compatibility Directive 2014 30 EU EN55024 2010 A1 2015 o IEC61000 4 2 2009 o IEC61000 4 3 2006 A1 2007 A2 2010 o IEC61000 4 4 2012 o IEC61000 4 5 2014 o IEC61000 4 6 2014 o IEC61000 4 8 2010 o IEC61000 4 11 2004 EN 55032 2015 AC 2016 EN61000 3 2 2014 EN61000 3 3 2013 Low Voltage Directive 2014 35 EU EN 60950 1 2006 A11 2009 A1 2010 A12 2011 A2 2013 ...

Page 12: ...teway provides information for specific user needs and includes EAC Mini IL20EAC N Quick Start Guide describes how to get the box computer up and running EAC Mini IL20EAC N User Manual contains detailed description on how to use the display its components and features NOTE Some pictures in this guide are samples and can differ from actual product Revision History Version Date Note 1 0 6 Oct 2017 P...

Page 13: ...USER MANUAL CHAPTER 1 INTRODUCTION 11 INTRODUCTION This chapter provides the EAC Mini IL20EAC N IoT Gateway product overview describes its features and hardware specifications ...

Page 14: ...ctly to cloud server Abundant I O ports and expansion module with more than thirty different combinations make EAC Mini is suitable for smart factory and machine automation applications 1 2 Product Features Winmate EAC Mini IoT Gateway offers the following features Intel Apollo Lake N3350 1 1 GHz Fanless cooling system Compact size 100 x 70 x 31 mm w o mounting bracket Expansion module with 30 com...

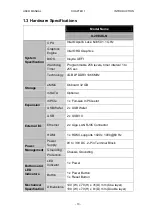
Page 15: ...MMC Onboard 32 GB mSATA Optional Expansion mPCIe 1 x Full size mPCIe slot USB Wafer 2 x USB Wafer External I O USB 2 x USB3 0 Ethernet 2 x Giga LAN RJ45 Connector HDMI 1 x HDMI supports 1920 x 1080 60 Hz Power Management Power Supply 9V to 30V DC 2 Pin Terminal Block Grounding Protection Chassis Grounding Buttons and LED Indicators LED Indicator 1 x Power Button 1 x Power Button 1 x Reset Button M...

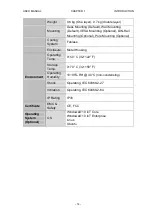
Page 16: ...ole Mounting Optional Cooling System Fanless Enclosure Metal Housing Environment Operating Temp 0 50 C 32 122 F Storage Temp 0 70 C 32 158 F Operating Humidity 10 95 RH 40 C non condensing Shock Operating IEC 60068 2 27 Vibration Operating IEC 60068 2 64 IP Rating IP30 Certificate EMC Safety CE FCC Operating System Optional OS Windows 10 IoT Core Windows 10 IoT Enterprise Linux Ubuntu ...

Page 17: ...ed below are inside your package If any of these items are missing or damaged contact us immediately Standard factory shipment list EAC Mini IoT Gateway Quick Start Guide Hardcopy Driver CD Terminal Block 2 pin to 2 5Ø Female Adapter Cable Varies by product specifications 915211101025 91711110100O 94J602G020K2 Your package may include optional accessories based on your order WLAN External Antenna ...

Page 18: ...USER MANUAL CHAPTER 1 INTRODUCTION 16 1 5 Appearance This section includes front and rear side I O ports location of the EAC Mini IL20EAC N IoT Gateway Front Side Rear Side ...

Page 19: ...SER MANUAL CHAPTER 1 INTRODUCTION 17 1 6 Dimensions All dimensions shown in mm millimeters Unit without mounting bracket Standard With Expansion Module With 2 Expansion Modules Unit with mounting bracket ...

Page 20: ...ER 1 INTRODUCTION 18 1 7 LED Indicators The EAC Mini IoT Gateway provides one HDD and one Power LED indicators located on the front for status monitoring LED Type Status Description Power On Power is on Off Power is off ...

Page 21: ...USER MANUAL CHAPTER 2 HARDWARE INSTALLATION 19 HARDWARE INSTALLATION This chapter provides information on how to use external I O and the installation of EAC Mini IL20EAC N IoT Gateway hardware ...

Page 22: ...L20EAC N and plug the other end to the monitor Pin Assignment and signal names for HDMI connector 2 1 2 Ethernet Connector The EAC Mini IL20EAC N has two Ethernet connectors located on the front Ethernet ports provide a standard RJ45 10 100 1000 Mbps jack connector with LED indicators on the front side to show its Active Link status and Speed status 10 100 Mbps Green 1G Mbps Orange Pin Signal Name...

Page 23: ...s Use USB 3 0 connector to connect external devices such as mouse or keyboard to the box computer 2 1 4 Power Connector DC power source input is a 2 pin terminal block connector Power Input is 9V to 30V DC in Pin Signal Name Pin Signal Name 1 5V 2 USB_D 3 USB_D 4 GND 5 STDA_SSRX 6 STDA_SSRX 7 GND 8 STDA_SSTX 9 STDA_SSTX ...

Page 24: ...n mSATA card with into the mPCIe slot 3 Screw the two screws on board to fix mSATA 4 Screw back the bottom cover 2 2 2 External Antenna Installation Notice that external antenna is an optional feature of the EAC Mini IL20EAC N To install external SMA antenna 1 Remove the rubber cap on the SMA connector before installing the antenna 2 Align the antenna with the SMA connector located on the rear sid...

Page 25: ... of the EAC Mini IL20EAC N To install expansion module 1 Unscrew the three screws on the bottom cover 2 Remove the I O module from the 2nd layer Attach module to the 1st layer and fasten five screws inside 3 Insert the I O module and fasten two screws inside 4 Screw back the bottom cover and fasten screws in front to secure I O module ...

Page 26: ...sure voltage and polarity is compliant with the DC input Improper input voltage or polarity can cause system damage 2 3 1 Connecting the Power Connect EAC Mini to 9 30V DC The power source can either be from a power adapter or an in house power source Front power LED indicator indicates the power status of the device 2 3 2 Chassis Grounding EAC Mini provides EMI protection and a stable grounding b...

Page 27: ...USER MANUAL CHAPTER 3 MOUNTING 25 MOUNTING This chapter provides step by step mounting guide for all available mounting options ...

Page 28: ...nting solutions You can purchase mounting kit from Winmate as an optional accessory 3 1 Wall Desk Mount L shape mounting brackets for wall desk mounting are supplied with the EAC Mini Mounting Instruction 1 Fasten screws to secure L shape mounting brackets to the EAC Mini 2 Place the EAC Mini on the fixture ex table and fasten screws to secure the unit to the fixture ...

Page 29: ...rchase DIN Rail mounting kit from Winmate as an optional accessory DIN Rail Mounting Kit Part Number 821118551400 Mounting Instruction 1 Fasten screws to secure DIN rail mounting bracket to the EAC Mini 2 Place the EAC Mini with the DIN Rail bracket on the DIN Rail ...

Page 30: ...onal accessory VESA Mounting Kit Part Number 821118561001 Mounting Instruction 1 Mark the location of the screw holes on the fixture ex wall 2 Align the VESA mounting bracket with the screw location 3 Place the EAC Mini on the VESA mounting bracket and fasten screws to secure and the EAC Mini to the fixture ...

Page 31: ...BIOS SETUP 29 INSYDE UEFI BIOS SETUP BIOS Setup Utility is a program for configuration basic Input Output system settings of the computer for optimum use This chapter provides information on how to use BIOS setup its functions and menu ...

Page 32: ...screen during start up The prompt screen shows only few seconds so need press Del key quickly IMPORTANT Updated BIOS version may be published after the manual released Check the latest version of BIOS on the website You may need to run BIOS setup utility for reasons listed below 1 Error message on screen indicates to check BIOS setup 2 Restoring the factory default settings 3 Modifying the specifi...

Page 33: ...e BIOS Setup Key Function F1 Help Esc Exit Cursor Select item Cursor Select item F5 F6 Change values Enter Select submenu F9 Setup defaults F10 Save and Exit NOTE You can press the F1 F2 F3 F4 and Esc keys by connecting a USB keyboard to your computer For items marked press Enter for more options ...

Page 34: ...on including BIOS version processor RC version system language time and date BIOS Setting Description Setting Option Effect Language Displays the system language English is set up by default Adjustment of the language Set the language in other language The language in this device is English System Time This is current time setting The time is maintained by the battery when the device is turned off...

Page 35: ...UTION Handle advanced BIOS settings page with caution Any changes can affect the operation of your computer BIOS Setting Description Setting Option Effect Boot Configuration Configures Boot parameters Enter Opens submenu Uncore Configuration Configures Uncore parameters Enter Opens submenu South Cluster Configuration Configures South Cluster parameters Enter Opens submenu Security Configuration Co...

Page 36: ...USER MANUAL CHAPTER 4 INSYDE UEFI BIOS SETUP 34 4 2 2 1 Boot Configuration BIOS Setting Description Setting Option Effect OS Selection Select the OS of your computer Windows Linux Select OS ...

Page 37: ...USER MANUAL CHAPTER 4 INSYDE UEFI BIOS SETUP 35 4 2 2 2 GOP and IGD Configuration ...

Page 38: ...e Render Standby support PC6 should be enabled if SOix is enabled GTT Size Use this item to select GTT Size 2MB 4MB 8MB Select the GTT Size Aperture Size Use this item to select Aperture Size 128MB 256MB 512MB Select the Aperture Size DVMT Pre Allocated Use this item to select DVMT Pre Allocated 64M 512M Select DVMT 5 0 Pre Allocated Fixed Graphics memory size used by Internal Graphics Device DVMT...

Page 39: ...t PCI Express paramerters Enter Opens submenu SATA Drives Use this item to change SATA Drives paramerters Enter Opens submenu SCC Configuration Use this item to change SCC Configuration Enter Opens submenu USB Configuration Use this item to change USB Configuration Enter Opens submenu Miscellaneous Configuration Use this item to change USB Configuration Enter Opens submenu ...

Page 40: ...ed Enadble Disable PCI Express Port 8xh Decode Peer Memory Write Enable Use this item to select Peer Memory Write parameters Enadbled Disabled Enadble Disable Peer Memory Write Compliance Mode Use this item to select Compliance Mode parameters Enadbled Disabled Enadble Disable Compliance Mode PCI Express Root Port 3 LANE0 Control the PCI Express Root Port 3 Lane 0 Enter Opens submenu PCI Express R...

Page 41: ...USER MANUAL CHAPTER 4 INSYDE UEFI BIOS SETUP 39 PCI Express Root Port ...

Page 42: ...isabled Enabled Enable Disable SENFE SECE Configure Root PCI Express System Error on Correctable Error Disabled Enabled Enable Disable SECE PMI SCI Configure PCI Express PMI SCI Disabled Enabled Enable Disable PMI SCI Hot Plug Configure PCI Express Hot Plug settings Disabled Enabled Enable Disable Hot Plug PCI Speed Configure PCI Speed Auto Gen 1 Gen2 Set PCI Speed parameters Transmitter Half Swin...

Page 43: ...USER MANUAL CHAPTER 4 INSYDE UEFI BIOS SETUP 41 4 2 2 4 SATA Drives ...

Page 44: ... Hot Plug Capability Enadble or Disable SATA Port 0 Hot Plug Capability Enadbled Disabled If enabled SATA port will be reported as Hot Plug capable Spin Up Device Configure Spin Up Device settings Enadbled Disabled If enabled for any of ports Staggerred Spin Up will be performed and only the drives which have this option enabled will spin up at boot Otherwise all drives spen up at boot SATA Device...

Page 45: ...d Support SCC eMMC Support D28 F0 Configure SCC eMMC Support settings Enadbled Disabled Enadble Disable SCC eMMC Support eMMC Max Speed Select the eMMC speed allowed HS400 HS200 DDR50 Select the eMMC speed SCC UFC Support D29 F0 Configure SCC UFC Support settings Enadbled Disabled Enadble Disable SCC UFC Support SCC SDIO Support D30 F0 Configure SCC SDIO Support Support settings Enadbled Disabled ...

Page 46: ...adbled Disabled Once disabled XHCI would be function disabled none of the USB devices are detectable and usable during boot and in OS Do not disable it unless for debug purpose USB Per Port Control Configure USB Per Port Control settings Enadbled Disabled Control each of the USB ports 0 3 enable disble XDCI Support Configure XDCI Support settings Enadbled Disabled Enadble Disable XDCI Support XDCI...

Page 47: ...4 Clock Gating Configure 8254 Clock Gating settings Enadbled Disabled Enadble Disable 8254 Clock Gating State After G3 Specify which state to go to when power is re applied after a power failure G3 State S0 State System will boot directly as soon as power applied S5 State System keeps in power off state until power buttom is pressed Clock Spread Spectrum Configure Clock Spread Spectrum settings En...

Page 48: ...ANUAL CHAPTER 4 INSYDE UEFI BIOS SETUP 46 4 2 2 8 TXE and TPM Configuration BIOS Setting Description Setting Option Effect Target TPM device Configure Target TPM device settings fTPM dTPM Select fTPM or dTPM ...

Page 49: ...int This value controls the temperature of the ACPI Critical Trip Point the point in which the OS will shut the system off Disabled 15C 103C Select the value NOTE 100C is the Plan of Record POR for all Intel Mobile Processors Passive Trip Point This value controls the temperature of the ACPI Passive Trip Point the point in which the OS will begin throttling the processor Disabled 15C 103C Select t...

Page 50: ...Effect WDT Configure WDT settings Enabled Disabled Enable Disable WDT Hardware Monitor Check Hardware Monitor settings Press Enter Open sub menu GPIO Group 0 Configuration Check GPIO Group 0 Configuration Press Enter Open sub menu GPIO Group 9 Configuration Check GPIO Group 9 Configuration Press Enter Open sub menu ...

Page 51: ...Configuration BIOS Setting Description Setting Option Effect Internal Resistance User can pull internal resistance push pull open drain Push Pull Open Drain Set Push Pull or Open Drain Input Output Mode Set the GPIO is input or output Input Output Set the GPIO is input or output ...

Page 52: ...AL CHAPTER 4 INSYDE UEFI BIOS SETUP 50 4 2 2 11 H2oUve Setup BIOS Setting Description Setting Option Effect H2oUve Support Enable Disable Interface for H2oUve tool Enabled Disabled Enable Disable H2oUve Support ...

Page 53: ... Description Setting Option Effect TrEE Protocol Version Select TrEE Protocol Version 1 0 or 1 1 1 0 1 1 Select TrEE Protocol Version TPM Availability Configure TPM Availability settings Available Available Hidden When hidden do not expose TPM to 0 TPM Operation Configure TPM Operation settings No Operation Enabled Disabled Change EPS Select one of the supported operation to change TPM2 state ...

Page 54: ...ER MANUAL CHAPTER 4 INSYDE UEFI BIOS SETUP 52 4 2 5 Power Menu 4 2 5 1 CPU Configuration BIOS Setting Description Setting Option Effect CPU Configuration Check CPU Configuration Press Enter Opens sub menu ...

Page 55: ...ant to enable VT d feature TM1 Configure TM1 settings Enabled Disabled Enable or disable TM1 AES N1 Configure AES N1settings Enabled Disabled Enable or disable AES N1 DIS Configure DIS settings Enabled Disabled Enable or disable Digital Thermal Sensor Active Processor Cores Configure Active Processor Cores settings Enabled Disabled Enable this to disable core in each processor package Monitor Mwai...

Page 56: ...lly allow processor cores to run faster than the base operating frequency if it is operating below power current and temperature specification limits Power Limit 1 Enable Configure Power Limit settings Enabled Disabled Enable Disable Power Limit Power Limit 1 Clamp Mode Configure Power Limit Clamp Mode settings Enabled Disabled Enable Disable Power Limit Clamp Mode Power Limit 1 Power Power Limit ...

Page 57: ...USER MANUAL CHAPTER 4 INSYDE UEFI BIOS SETUP 55 4 2 3 Boot Menu ...

Page 58: ...current at power up and to allow the host to sequence the spin up of devices Add Boot Options Position in Boot order for Shell Network and Removable First Last Select Add Boot Options first or last ACPI Selection ACPI Selection Acpi1 0B Acpi3 0 Acpi4 0 Acpi5 0 Acpi6 0 Acpi6 1 Select booting to USB Boot Configure USB Boot settings Enabled Disabled Disable or enable booting to USB boot devices UEFI ...

Page 59: ...USER MANUAL CHAPTER 4 INSYDE UEFI BIOS SETUP 57 4 2 3 1 Boot Type Order 4 2 3 Exit Menu ...

Page 60: ... the computer and when the boot screen shows up press Tab F6 to initiate the Recovery Wizard 3 The following screen shows the Recovery Wizard Click Recovery button to continue 4 A warning message about data loss will show up Make sure the data is backed up before recovery and click Yes to continue 5 Wait the recovery process to complete During the recovery process a command prompt will show up to ...

Page 61: ...more information on Watchdog in Watchdog Guide that you can download from Winmate Download Center or File Share Refer to the User Manual for more details To enable watchdog in Watchdog AP follow the instructions below 1 On the right bottom side of the desktop screen click triangle button to show hidden icons 2 Click icon to open Watchdog utility ...

Page 62: ...or occurs the system will restart automatically when the countdown time reaches 0 Every 9 min watchdog timer will be reset to 10 min Setting Description Watchdog Countdown Time The system automaticity restarts when this countdown time reaches zero Default 10 min Periodically Feed Time To set a cycle time to automatically reset watchdog timer Default 9 min Enable Disable Enable or disable watchdog ...

Page 63: ...USER MANUAL CHAPTER 5 DRIVER INSTALLATION 61 DRIVER INSTALLATION This chapter provides instructions on how to install drivers on the EAC Mini IL20EAC N IoT Gateway ...

Page 64: ...ctions on how to install drivers on the EAC Mini IL20EAC N IoT Gateway Notice that pictures in this example are for Windows 10 OS 5 1 Chipset Driver Installation To install chipset driver 1 Open the driver CD and double click on Chipset driver 2 The system opens installation window click Next to continue ...

Page 65: ...R MANUAL CHAPTER 5 DRIVER INSTALLATION 63 3 Click Accept to agree to the license terms 4 Check installation details and click Install 5 The installation is complete click Finish to exit installation window ...

Page 66: ...AL CHAPTER 5 DRIVER INSTALLATION 64 5 2 Graphic Driver Installation To install graphic driver 1 Open the driver CD and double click on Graphic driver 2 The system opens installation window click Next to continue ...

Page 67: ...USER MANUAL CHAPTER 5 DRIVER INSTALLATION 65 3 Click Accept to agree to the license terms 4 Check installation details and click Install 5 Wait for the system to install the driver ...

Page 68: ...USER MANUAL CHAPTER 5 DRIVER INSTALLATION 66 6 The installation is complete click Next to continue 7 Select Accept and exit installation window ...

Page 69: ... INSTALLATION 67 5 3 TXE Trusted Execution Engine Driver Installation To install TXE Trusted Execution Engine driver 1 Open the driver CD and double click on TXE driver 2 The system opens installation window click Next to continue ...

Page 70: ...USER MANUAL CHAPTER 5 DRIVER INSTALLATION 68 3 Click Next to agree to the license terms 4 Check installation details and click Next 5 Wait for the system to install the driver ...

Page 71: ...USER MANUAL CHAPTER 5 DRIVER INSTALLATION 69 6 The installation is complete click Finish to exit installation window ...

Page 72: ...CHAPTER 5 DRIVER INSTALLATION 70 5 4 Serial IO Driver Installation To install Serial IO driver 1 Open the driver CD and double click on Serial IO driver 2 The system opens installation window click Next to continue ...

Page 73: ...USER MANUAL CHAPTER 5 DRIVER INSTALLATION 71 3 Click Accept to agree to the license terms 4 Check installation details and click Install 5 Click Next to continue ...

Page 74: ...USER MANUAL CHAPTER 5 DRIVER INSTALLATION 72 6 Wait for the system to install the driver 7 The installation is complete click Finish to exit installation window ...

Page 75: ...USER MANUAL CHAPTER 5 DRIVER INSTALLATION 73 5 5 LAN Driver Installation To install LAN driver 1 Open the driver CD and double click on LAN driver 2 The system opens installation window ...

Page 76: ...USER MANUAL CHAPTER 5 DRIVER INSTALLATION 74 3 Click Next to continue 4 Press Next to continue 5 Press Next to continue ...

Page 77: ...USER MANUAL CHAPTER 5 DRIVER INSTALLATION 75 6 Press Install 7 Wait for the system to install driver 8 The installation is complete click Finish to exit installation window ...

Page 78: ...USER MANUAL CHAPTER 6 TECHNICAL SUPPORT 76 TECHNICAL SUPPORT This chapter includes pathway for technical support and Software Development Kit SDK ...

Page 79: ..._____ Problem Description Please describe the problem as clearly as possible Detailed description of the occurred problem will allow us to find the best solution to solve the problem as soon as possible _________________________________________________________________ _________________________________________________________________ _________________________________________________________________...

Page 80: ...USER MANUAL APPENDIX A ORDERING INFORMATION 78 ORDERING INFORMATION This section includes EAC Mini IL20EAC N IoT Gateway ordering information Appendix ...

Page 81: ...ons Expansion Module WD 01 Wi Fi Client Bluetooth WD 02 4G Optional GPS WD 03 3G Optional GPS WD 04 Wi Fi Access Point WD 05 2 Port RS232 422 485 DB9 WD 06 3 Port RS232 422 485 DB9 WD 07 3 Port USB 2 0 WD 08 2 Port 10 100 Ethernet RJ45 WD 09 24 Channel Isolated Digital I O WD 10 2 Port CANBus with Isolation WD11 3 Port Audio Jack with Stereo WD12 2 Port EtherCAT RJ45 WD 13 2 Port EtherNet IP RJ45 ...

Page 82: ...Winmate Inc 9F No 111 6 Shing De Rd San Chung District New Taipei City 24158 Taiwan R O C Tel 886 2 8511 0288 Fax 886 2 8511 0211 Email sales winmate com tw Official website www winmate com ...

Reviews: