Wolf DF364C, Use & Care Manual
The Wolf DF364C user manual provides comprehensive specifications and detailed instructions for operating this exceptional product. You can easily download this manual for free from our website, ensuring access to all the information you need to fully enjoy the features and benefits of the Wolf DF364C.
Share
Download


Reviews:
No comments
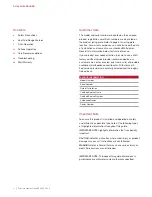
Related manuals for DF364C

MG-2
Brand: Keating Of Chicago Pages: 15

CI 282 601
Brand: Gaggenau Pages: 60

JED8130
Brand: Jenn-Air Pages: 36

36" (91.4 CM) ELECTRIC DOWNDRAFT COOKTOP
Brand: Jenn-Air Pages: 24

U22062 CSIG 509
Brand: Parkinson Cowan Pages: 24

85DP
Brand: wallas Pages: 40

ICS500WB0
Brand: IKEA Pages: 20

VGRT24
Brand: Viking Pages: 13

OC90TZ
Brand: Omega Pages: 21

CSM 559
Brand: Parkinson Cowan Pages: 36

90 Induction Cooker U109976 - 02
Brand: Rangemaster Pages: 32

SK-20G16M-1
Brand: Ocina Pages: 41

OGHF 64 I PRO SV
Brand: Ocean Pages: 46

I6ESH2E/KZ
Brand: Indesit Pages: 76

EW27EW55G S
Brand: Electrolux Pages: 10

EW30CC55G S
Brand: Electrolux Pages: 2

EW30IC60SS
Brand: Electrolux Pages: 20

EW30IC60LB
Brand: Electrolux Pages: 3


