background image


Conventional Flue Gas Stoves 

Phoenix 3 

Serial No: ……………………… 


INSTALLATION, SERVICING 

AND USER INSTRUCTIONS 

For use in GB & IE (United Kingdom and Ireland) 

This appliance has been tested and certified for other counties (see technical data). However to install appliance in other 

countries, modification of the appliance and its method of installation may be necessary in order to use the appliance safely and 

correctly. The manual for the local language must be obtained. Contact Woodwarm for further information. 


Document No. : User_Phoenix3_CF_10th Apr 2018 

File: Office_Printers_GasStovesLit 


Summary of Contents for Phoenix 3

Page 1: ...for other counties see technical data However to install appliance in other countries modification of the appliance and its method of installation may be necessary in order to use the appliance safely...

Page 2: ...has been tested and certified for use on Biopropane Gas Biopropane Gas can be used as a fuel with no adjustment necessary if the product is installed as an LPG version This Manual covers the followin...

Page 3: ...n instructions 12 3 1 Gas Connection 12 3 2 Ventilation 12 3 3 Appliance Fireplace Installation 12 3 4 Flue Connection 13 3 5 Door Lock Opening the Stove Door 14 3 6 Fuel Bed Arrangements 15 3 7 Commi...

Page 4: ...umerous installation situations as listed in these installation instructions However only flue approved by Woodwarm for this appliance may be used This appliance is rated below 6 9kW and as such needs...

Page 5: ...e appliance ensure that all packaging safety stickers and any protective wrapping have been removed and that the glass has been cleaned including all fingerprints from the glass Ensure that the room i...

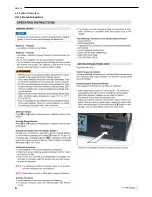
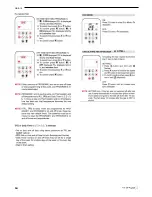
Page 6: ...GB IE 6 2 3 Control Overview 2 3 1 Remote Control...

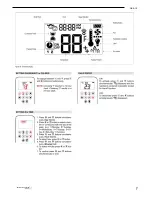
Page 7: ...GB IE 7...

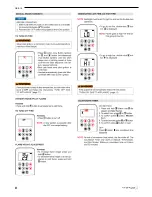
Page 8: ...GB IE 8...

Page 9: ...GB IE 9...

Page 10: ...GB IE 10 IF FITTED...

Page 11: ...This is done by turning OFF the gas at the Isolation Tap 2 5 Cleaning and Maintenance This appliance should be inspected and serviced once a year by a qualified competent and registered person The in...

Page 12: ...rom combustibles must not be less than 75mm This dimension can be reduced to 25mm as the distance from the underside and the sides of Horizontal Flue runs The stove must stand on a fireproof hearth wh...

Page 13: ...appliance The chimney or flue must be free from any obstruction Any damper plates must be removed or secured in the fully open position and no restrictor plates fitted The chimney must be swept prior...

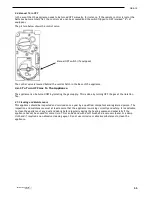
Page 14: ...Before gaining access to the burner tray first make sure that the stove is switched off and is cold Firstly remove the outer door lift the door upwards then pull away from the stove Remove the 4no gl...

Page 15: ...Media enters the Pilot shield The Pilot area includes the the pilot shield and the top of the burner to the first slot When comissioning or servicing the Appliance Cross Lighting must be checked to en...

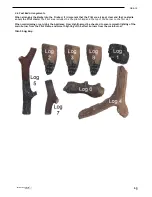
Page 16: ...ar Position the 8 logs as shown If desired lay the glow strands amongst the logs in the flames to create an enhanced Glow Log 1 Log 2 Position Log 1 Centrally on the Burner behind the central ports on...

Page 17: ...Log 3 on top of the Left Hand side of the Front Burner Position Logs 4 so that it sits on top of Logs 1 2 and 3 Position Logs 5 so that it sits on top of Log 4 in the centre with the bottom in the Le...

Page 18: ...the centre sitting on the Grate behind the Log Bar with the Top on Log 4 Position Log 8 in the Left Hand Rear Corner resting on Log 5 Position Log 6 so that the Top of the Log sits on Log 4 with the...

Page 19: ...GB IE 19 3 6 2 Coal Lay Pack containing 30 Coals...

Page 20: ...GB IE 20 Position the 30 Coals as shown Coals 1 8 Coals 9 13 Coals 14 17...

Page 21: ...GB IE 21 Coals 18 22 Coals 23 26 Coals 27 30...

Page 22: ...the Inlet Pressure test point on the gas valve and connect a manometer 3 Check that the measured pressure is as the prescribed supply pressure 4 Perform the test when the appliance is burning on full...

Page 23: ...pressures O Check the safe operation of the appliance 4 1 Cleaning the Ceramics Remove the ceramics as detailed in A D above Gently clean the ceramics in the open air using a soft brush and a vacuum...

Page 24: ...lot Assembly Natural CG06178 Pilot Assembly LPG CG20078 Electrode Lead G60 ZKIS1 1500 Injector Natural 280 CG22077 Injector LPG 120 EG02177 Complete Burner Assembly Natural 4A031N0 Complete Burner Ass...

Page 25: ...H G20 at 20 mbar I3 G31 G31 at 28 37 mbar I3P 37 G31 at 37 mbar I3B P 30 G30 G31 at 30 mbar HU Hungary I3B P 30 G30 G31 at 30 mbar HR Croatia I2H G20 at 20 mbar I3P 37 G31 at 37 mbar I3B P 30 G30 G31...

Page 26: ...Marking 320 Pilot OP904 3 Efficiency Class 1 Nox Class 5 Type B11 Gas type G30 G31 I3B P 30 G30 G31 I3 G31 I3P 50 G31 I3P 37 G31 I3P 30 Supply Pressure mbar 29 30 37 50 37 30 Nominal Heat Input Gross...

Page 27: ...GB IE 27 5 3 Dimensions 5 3 1 Phoenix3 Top Flue...

Page 28: ...GB IE 28 5 3 2 Phoenix3 Rear Flue...

Page 29: ...kW single stage heat output no room temperature control NO At minimum heat output el min N A kW two or more manual stages no room temperature control NO In standby mode el SB N A kW with mechanic ther...

Page 30: ...ngle stage heat output no room temperature control NO At minimum heat output el min N A kW two or more manual stages no room temperature control NO In standby mode el SB N A kW with mechanic thermosta...

Page 31: ...GB IE 31...

Page 32: ...GB IE 32 WOODWARM STOVES Metal Developments Ltd The Workshop Wheatcroft Farm Cullompton Exeter EX15 1RA Tel 44 0 1884 35806 Web www woodwarmstoves co uk Email info woodwarmstoves co uk...

Page 33: ...GB IE 33 Appendix 1 Mertik Maxitrol Symax Control System...

Reviews: