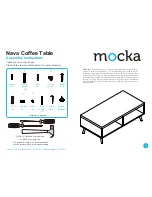

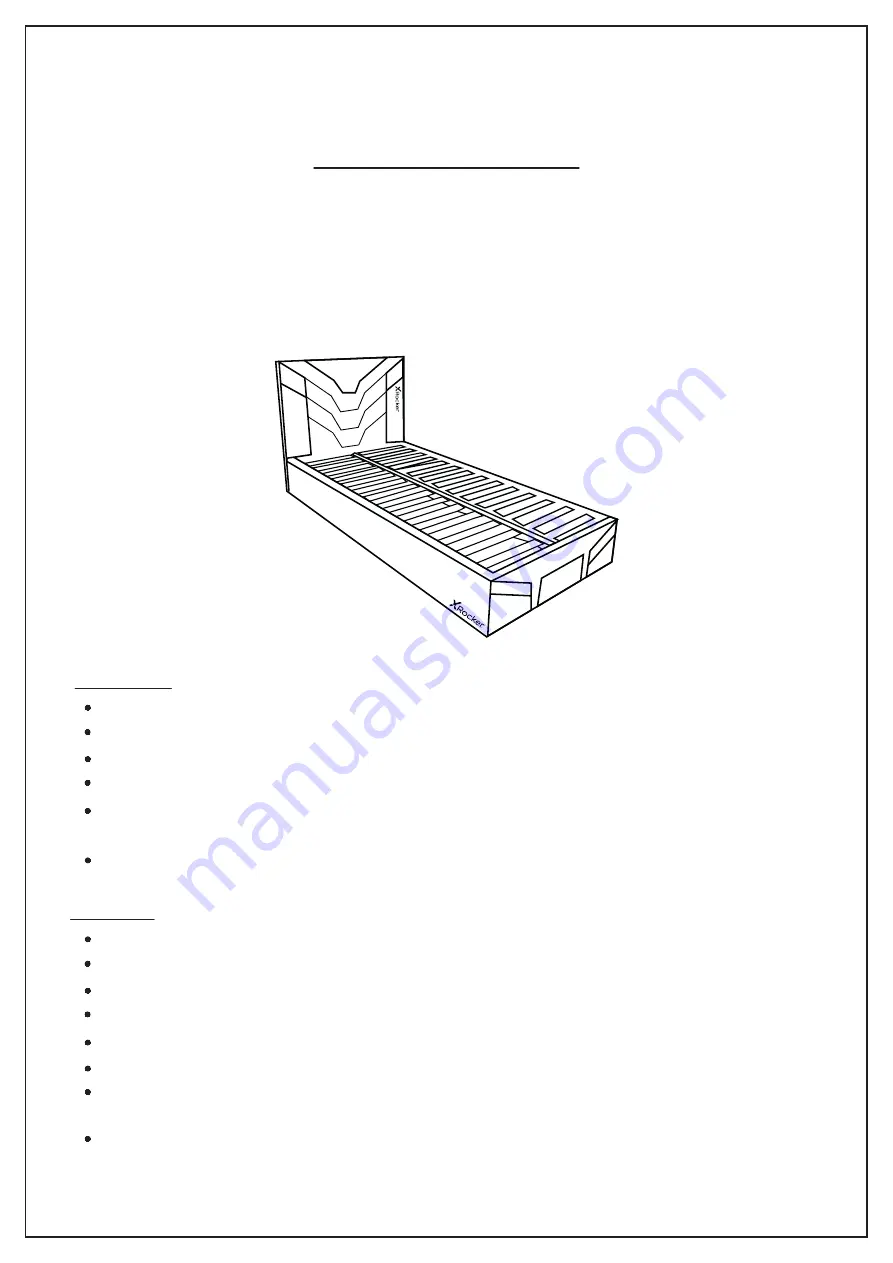
CERBERUS GAMING BED IN A BOX
PLEASE
read this leaflet prior to assembly to familiarise yourself with the various stages of construction.
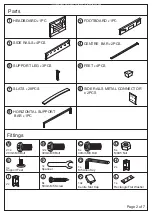
Carefully open the pack supplied and check the contents against the parts and fitting check list. Do not destroy
any of the packing until you are certain that you have all the necessary part for assembly.
CAUTION:
There are small components used in the construction of this unit. These loose items should be kept
away from young children while assembling your unit to avoid danger of choking hazards.
COLOUR: RED/BLACK, BLUE/BLACK
SIZE : SINGLE 3
'
,SMALL DOUBLE 4
'
,DOUBLE 4
'
6
''
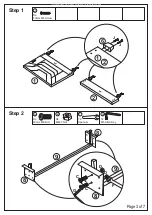
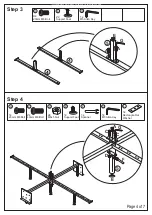
ASSEMBLY INSTRUCTION
IMPORTANT :
Please reading through this leaflet and then follow the simple step-by-step instruction
Please keep fittings out of children reach.
Please ensure products place on flat & soft surface.
Please ensure you have the right tools, Do Not use power tools to assembly this products.
Please ensure a clean, dry and spacious area for assembly, due to the size of this product we
recommend that it is assembled in the room intended for use.
Please retain these instruction for future reference.
WARNINGS
Ensure products is fully assembled and secured as illustrated before use.
Ensure the legs remain in contact with the ground at all time.
Ensure all screws or bolts are tightened and inspect regularly.
Do Not stand or jump on the product.
Do Not use this product if parts are missing, damage or worn.
Do Not expose this product to dripping or splashing, rain or areas with heavy moisture.
Do Not place the product under direct sunlight, open flames such as candles,heat or radiators.
Keep away from temperatures over 35
℃
.
Do Not use scourer, abrasivers or chemical cleaners, only clean with sponge wipe and warm soapy
water.
Page 1 of 7
All manuals and user guides at all-guides.com
all-guides.com