background image

Xena Networks ApS 


2009-11 


Page


1


XenaBay Chassis  

Installation Guide 

Version 1.0 


ABOUT


THE


XENABAY


C4

12


CHASSIS


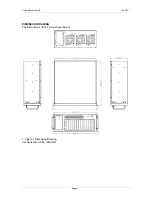
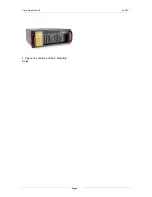
The 4U, heavy-duty steel C4-12 rack mount 
chassis is designed to operate reliably in 
industrial environments 

SPECIFICATIONS


Form Factor: Standard 4U, 19” wide 
Construction: Metal 
Slots Number: 12-slot 
Cooling: 3 x 8cm Papst 8412NH / NGLE 
Drive Bay: 1 x 2.5” internal HDD 
Dimensions (DxWxH): 454.7 mm x 431mm x 
176mm 
Operating Temperature: 0~40°C 
Relative Humidity: 5~95% 
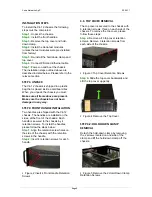


PACKING


LIST


When you unpack the chassis, make sure 
the following items have been shipped. 
1 x Quick Installation Guide 
1 x Power cord 
2 x Handles and handle plates

Summary of Contents for XenaBay C4-12

Page 1: ...nments SPECIFICATIONS Form Factor Standard 4U 19 wide Construction Metal Slots Number 12 slot Cooling 3 x 8cm Papst 8412NH NGLE Drive Bay 1 x 2 5 internal HDD Dimensions DxWxH 454 7 mm x 431mm x 176mm Operating Temperature 0 40 C Relative Humidity 5 95 PACKING LIST When you unpack the chassis make sure the following items have been shipped 1 x Quick Installation Guide 1 x Power cord 2 x Handles an...

Page 2: ...Xena Networks ApS 2009 11 Page 2 DIMENSION DRAWING The dimensions of C4 12 are shown below Figure 1 Dimension Drawing measurement units millimeter ...

Page 3: ...d with the C4 12 chassis The handles are installed on the sides at the front of the chassis Each handle is secured to the chassis by 4 retention screws To install the handles please follow the steps below Step 1 Align the retention screw holes on the side of the chassis with the retention screws in the handle Step 2 Insert 4 retention screws for each handle Figure 2 Insert 4 Front Handle Retention...

Page 4: ... hooks into the hold down clamp securing hook on the right side of the chassis Step b Align the retention screw holes in the other end of the hold down clamp with two retention screw holes in the clip stretches out from the internal side HDD bracket Step c Reinsert the 2 hold down clamp retention screws Figure 9 Hold Down Clamp Retention Screw Holes in the Clip of the Side HDD bracket Step d Re in...

Page 5: ...12NH NGLE fan to the fan bracket with the 4 previously removed retention screws Step 5 Reinstall the fan bracket into the chassis and secure it to the chassis with the 2 previously loosened thumbscrews FAN FILTER REPLACEMENT To replace the fan filter please follow the steps below Step 1 Loosen the 2 fan filter bracket retention screws at the top of the fan filter bracket and open the bracket Figur...

Page 6: ...Xena Networks ApS 2009 11 Page 6 Figure 14 Locations of the 4 Mounting Holes ...

Reviews: