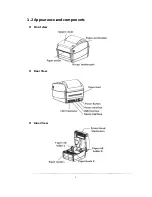
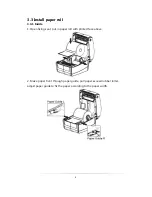
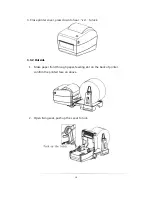
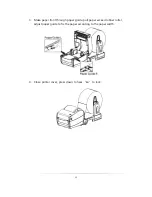
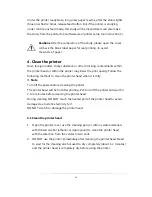
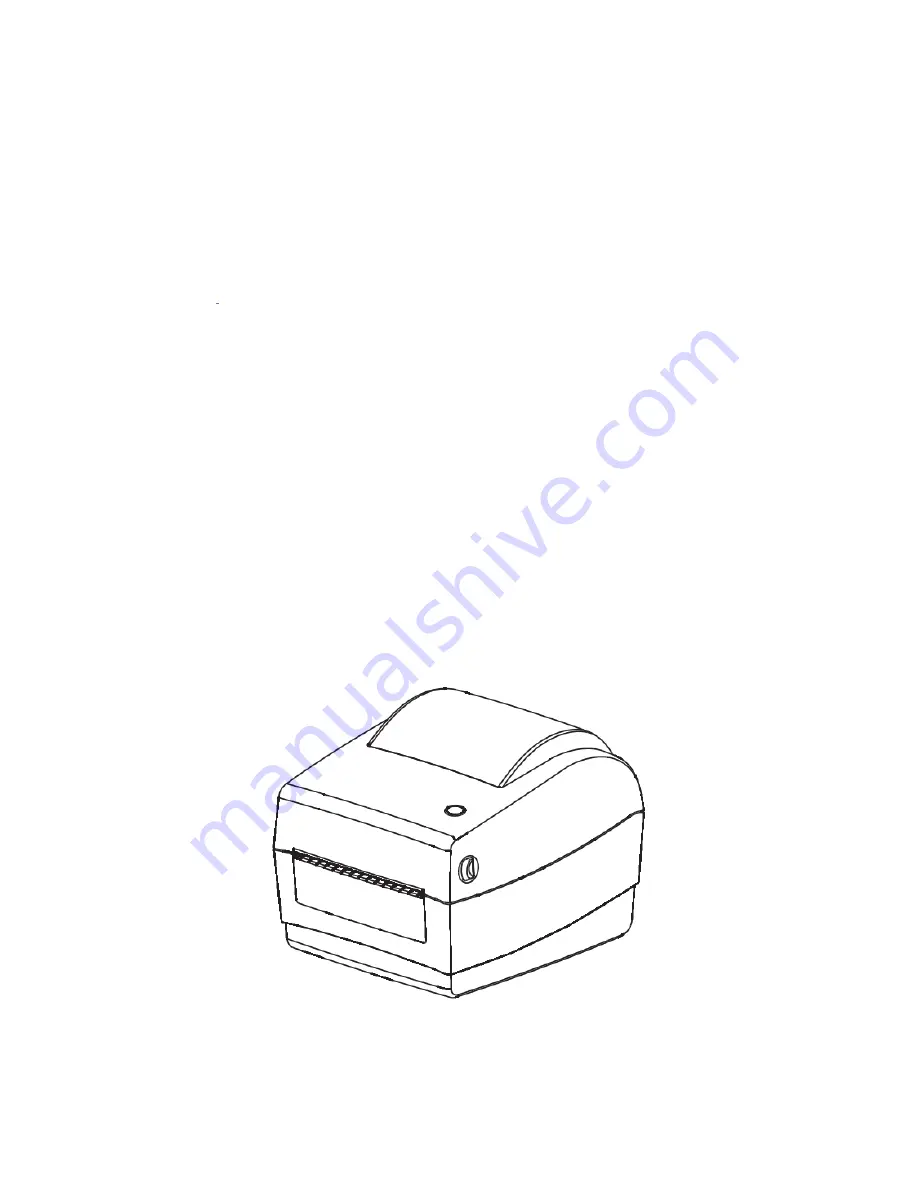
background image


XIAMEN RONGTA TECHNOLOGY CO., LTD. 

USER MANUAL


RP410


Summary of Contents for RP410

Page 1: ...XIAMEN RONGTA TECHNOLOGY CO LTD USER MANUAL RP410...

Page 2: ...er and PC 8 3 3 Install paper roll 9 3 3 1 Inside 9 3 3 2 Outside 10 3 4 The operator panel 12 3 4 1 The operational method of FEED 12 3 42 Led indication of printer status 12 3 5 Printing Test 13 3 5...

Page 3: ...ory 1 Manual for driver and program This manual includes information such as windows instruction for driver and program and main function 2 Printer practical tools manual This manual includes usage me...

Page 4: ...d adapter 3 Do not pull the plug by pulling the cable way 4 Do not plug or unplug the power cord when your hands wet 5 Do not bend the cable or place it under heavy objects 6 Install the printer on a...

Page 5: ...ity of printing and long life of the product suggest to use recommended by the same quality of paper 16 Plug or disconnect each interface must turn off the power Otherwise it may cause the printer con...

Page 6: ...l the product Standard accessories Optional accessories 4 Product introduction open the printer packaging keep the packaging materials to facilitate the future of packaging and transportation if there...

Page 7: ...1 2 Appearance and components Front view Rear View Inner View 5 Appearance and components...

Page 8: ...subsetsA B C Codabar EAN 8 EAN 13 UPC A UPC E EAN and UPC 2 5 digits add on MSI MSIC PLESSEY CPOST ITF 14 EAN 14 2D QR code Detecting Function Sensor Gap sensor Paper End Sensor uncover sensor black m...

Page 9: ...tware Operation System XP Win7 Win8 Win10 3 Installation 3 1 Power connection 1 PLS take attention to make confirmation if the printer power button on off position 2 Connect adaptor plug with printer...

Page 10: ...ng the printer If do not using printer for an extended period PLS disconnect it from power 3 2 How to connect printer and PC PLS follow up below step for connecting 1 PLS make sure the printer is off...

Page 11: ...er roll 3 3 1 Inside 1 Open fixing seat put in paper roll with printed face above 2 Make paper front through paper guide pull paper exceed rubber roller adjust paper guide to fix the paper according t...

Page 12: ...e printer cover press down to hear ka to lock 3 3 2 Outside 1 Make paper front through paper feeding slot on the back of printer confirm the printed face on above 2 Open fixing seat push up the L seat...

Page 13: ...11 3 Make paper front through paper guide pull paper exceed rubber roller adjust paper guide to fix the paper according to the paper width 4 Close printer cover press down to hear ka to lock...

Page 14: ...tory Reset Continuous printing press Print pause Print pause press Resume Printing 3 42 Led indication of printer status Led status The representative of the printer status Green light shine Normal st...

Page 15: ...2 Make sure is power off and the cover is closed properly 3 Hold the paper feed button then press the power button when printer is power on please loosen the feed button 3 5 2 Use Windows Driver Progr...

Page 16: ...ollowing methods to clean the printer head when it is dirty Note Turn off the power before cleaning the printer The printer head will be hot after printing PLS turn off the printer and wait for 2 to 3...

Page 17: ...tents of the table below are common problems and problem solving methods for general operators If you are already in accordance with our easy way to troubleshooting but the printer still not work norm...

Page 18: ...e standby state green light normally on Incorrect positioning a No label locating learning b Seam mark detection sensor components position offset c Selection mode error a Do label locating learning t...

Page 19: ...r printing density and speed Setting tool adjusting concentration for coarse adjustment drive to adjust concentration for fine tuning c Cleaning printer head rubber roller take reference of Point 4 1...

Reviews: