Misgav Industrial Park, POB 60, D.N. Misgav 20174, Israel
Tel:+972-4-9951999; Fax:+972-4-9990287
PM0661.04 – Spark CXS1000 CompletePBX Getting Started Guide
Page 1 of 4
Spark CXS1000 CompletePBX
Getting Started Guide
Package Contents
CXS1000 (1U 9'' width unit)
Power cord
Desktop power supply
Optional cable(s) for additional telephony modules (allows
upgrade to a total of two telephony modules – see
CompletePBX software preinstalled on the hardware
Prerequisites
You will need a computer equipped with an Internet browser. Firefox or Chrome is recommended. By
default, the Spark CXS1000 is configured for static IP address 10.10.10.10 with the network mask
255.255.255.0. Configure Ethernet interface of your computer for an IP address from the same sub-
network range. For example, 10.10.10.11/255.255.255.0
Step 1: Submit Warranty Activation Request
Activate the product warranty (a pre-requisite for submitting any request for technical support). Go to
https://xorcom.com/xorcom-product-warranty/
, complete and submit the form found there.
Step 2: Powering Up the Unit
1.
For safety reasons, if the line wiring exits the building, it is essential to ground the unit.
Note: Not properly grounding this device will void your warranty!
a. Connect a grounding tab to the grounding screw on the rear panel.
b. Using 12-16 gauge wire, connect the grounding tab to a reliable ground.
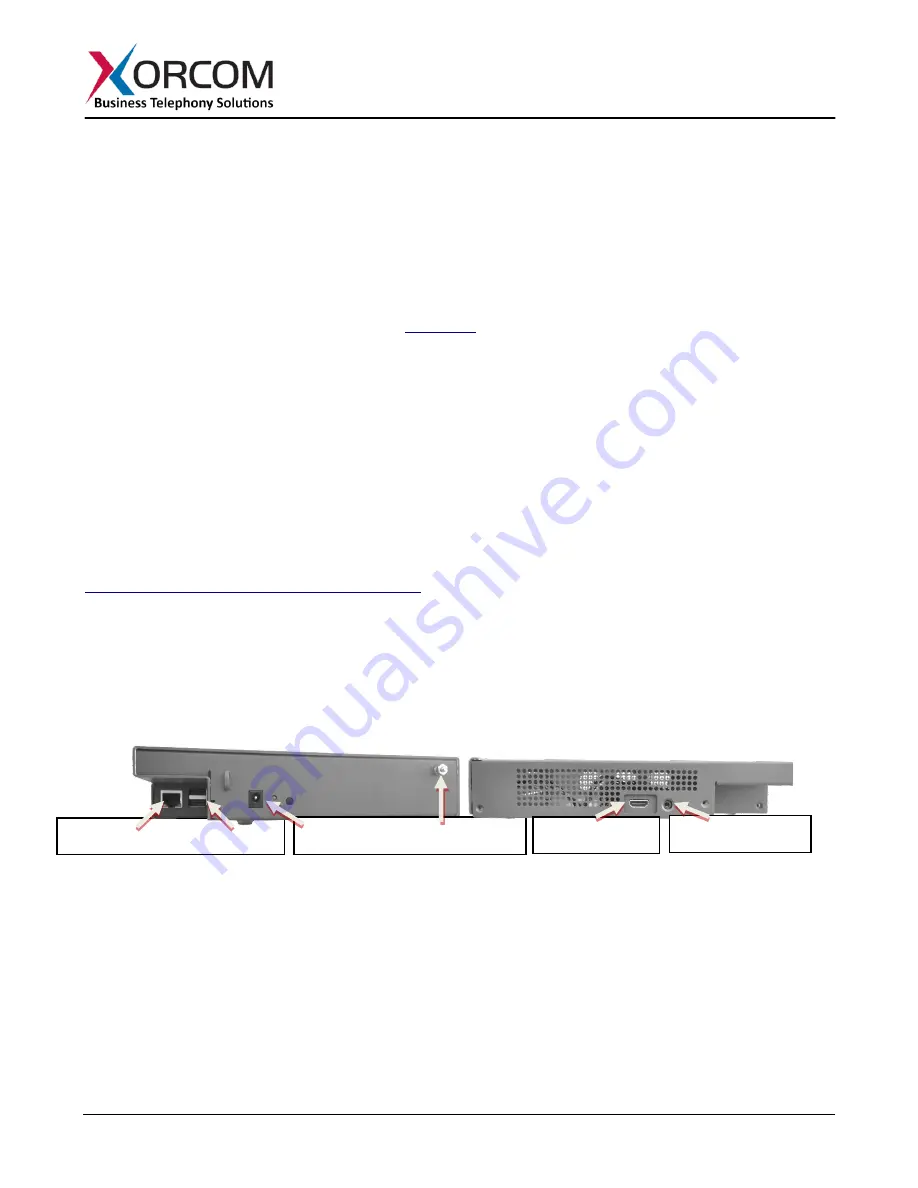
Figure 1: Ethernet & USB2 ports, power supply and grounding screw on Spark CXS1000 rear panel;
HDMI and audio ports on Spark CXS1000 side panel.
2.
Using a straight Ethernet cable, connect the Spark to your computer.
3.
Connect the power cord to the Spark and turn on the power by pressing the blue button on the front
panel. The device startup process takes about 30 seconds.
Step 3: Configure the Spark CXS1000
If the unit is equipped with FXS ports they are configured as CompletePBX extensions starting from
number 3001.
Ethernet Port USB2 Port
Ethernet Port
USB2 Port
Power Supply Grounding
HDMI Port
Audio Output


