background image

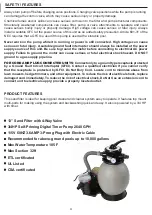
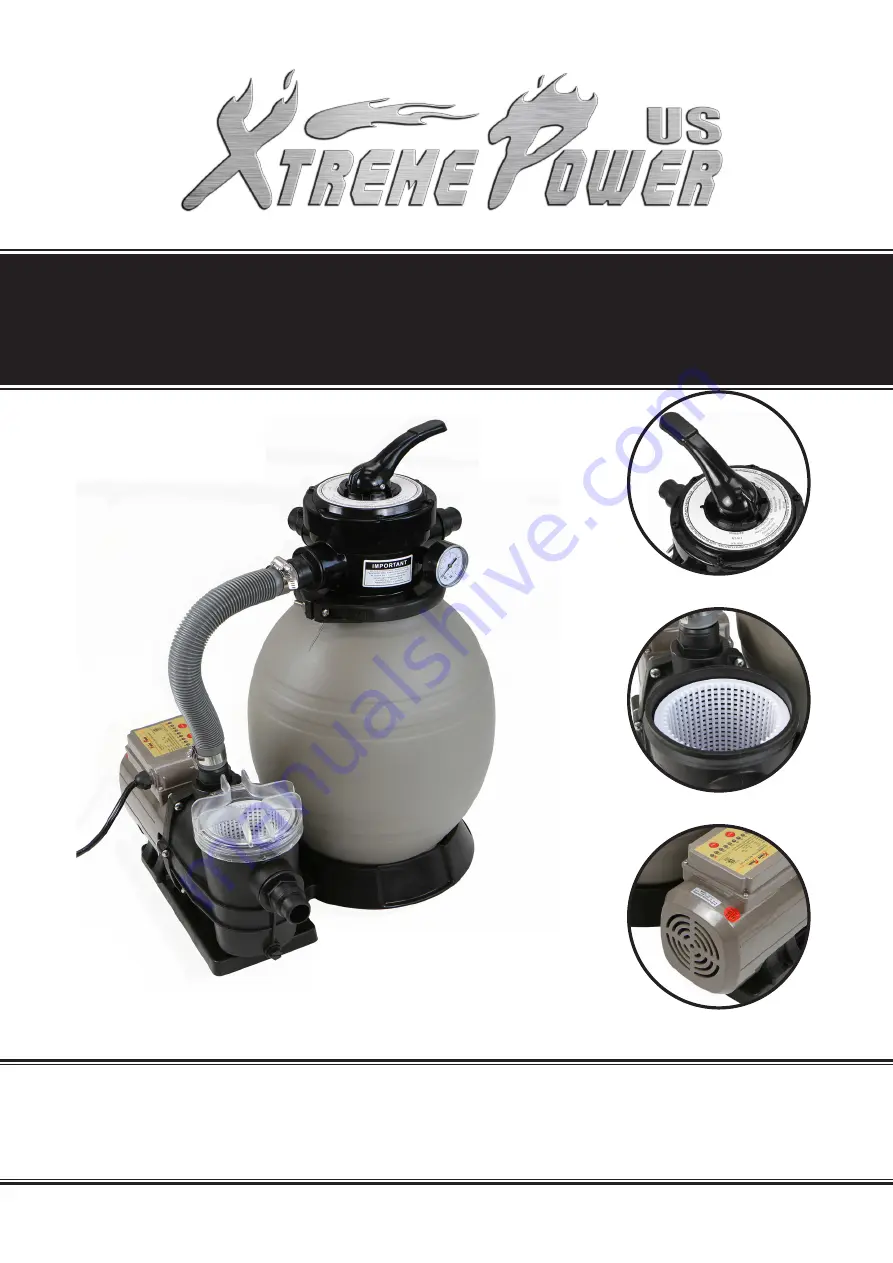
13” TIMER SAND FILTER PLUS 3/4HP ABOVEGROUND SELF 

PRIMING POOL PUMP

SAVE THIS MANUAL: KEEP THIS MANUAL FOR  SAFETY WARNINGS, PRECAUTIONS, ASSEMBLY, 

OPERATING, INSPECTION, MAINTENANCE AND CLEANING PROCEDURES. WRITE THE PRODUCT’S 

SERIAL NUMBER ON THE BACK OF THE MANUAL NEAR THE ASSEMBLY DIAGRAM (OR MONTH 

AND YEAR OF PURCHASE IF PRODUCT HAS NO NUMBER).

OWNER’S MANUAL AND SAFETY INSTRUCTIONS

ITEM: 75159

FOR QUESTIONS PLEASE CALL OUR CUSTOMER SUPPORT:  (909) 628 0880 MON-FRI 9AM TO 3PM PST

Summary of Contents for 75159

Page 1: ...SEMBLY OPERATING INSPECTION MAINTENANCE AND CLEANING PROCEDURES WRITE THE PRODUCT S SERIAL NUMBER ON THE BACK OF THE MANUAL NEAR THE ASSEMBLY DIAGRAM OR MONTH AND YEAR OF PURCHASE IF PRODUCT HAS NO NUMBER OWNER S MANUAL AND SAFETY INSTRUCTIONS ITEM 75159 FOR QUESTIONS PLEASE CALL OUR CUSTOMER SUPPORT 909 628 0880 MON FRI 9AM TO 3PM PST ...

Page 2: ...s Improper installation may create an electrical hazard which could result in death or serious injury to pool users installers or others due to electrical shock and may also cause damage to property To reduce the risk of injury do not permit children to use or operate this pump and sand filter Do not bury the electrical cord Locate the cord where it will not be damaged by lawn mowers hedge trimmer...

Page 3: ...bled for storage and reassembled to its original integrity A permanently installed pool is constructed in or on the ground or in a building such that it cannot be readily disassembled for storage The suction and relief valve must be opened before starting the circulating system of the pump Doing so may result in injury or property damage WARNING Electric Shock Hazard MAKE SURE to shut off the powe...

Page 4: ... F Suction outlets shall be reconfigured into return inlets This filter operates under high pressure When any part of the circulating system e g clamp pump filter valves etc is serviced air can enter the system and become pressurized Pressurized air can cause the lid or control valve to separate which may result in serious injury death or property damage To avoid this potential hazard follow these...

Page 5: ...re to ground the motor can cause serious or fatal electrical shock hazard DO NOT ground to a gas supply pipe line FOR CORD AND PLUG CONNECTED UNITS Connect only to a ground type receptacle protected by a Ground Fault Circuit Interrupter GFCI Contact a qualified electrician if you cannot verify that the receptacle is protected by GFCI Do Not Bury Cord Locate cord to minimize abuse from lawn mowers ...

Page 6: ... PRE FILTER HOUSING WITH THE WATER INLET ON THE MOTOR This pump utilizes advanced technology with the feature of an automatic timing controller In accordance with the following simple yet effective preventative measures when installing the Sand Filter Pump 1 Make sure to tighten the anchor bolts in order to avoid the influence of vibrational movements 2 The suction hose of the pump should be large...

Page 7: ...e the tank as above picture shows then place the funnel on the tank s mouth and out the quartz sand into the tank A 12 sand filter requires about 19kg of sand to fill the tank a 14 sand filler needs about 27kg of sand to fill the tank 4 Remove the funnel and make sure the tank s neck is clean Put the O ring on the valve and use clamp to fix the valve with the tank Pump port valve direction needs t...

Page 8: ... Do not over tighten fittings or adapters HOW TO USE 1 Inspect all connections have been made and are secure 2 Depress the top mount valve handle and rotate to BACKWASH position 3 Prime and start pump according to the pump instructions NOTE All suction and discharge valves must be opened when starting the system Failure to do so can cause severe personal injury Make sure the filter vessel are full...

Page 9: ... configured to avoid electric shock when deterioration of the insulation occurs due to product age CONTROL PANEL INSTRUCTION TIMER INITIATION NOTE Make sure the power supply is off 1 Unscrew the four screws on the lid of the terminal box and remove the lid 2 Remove the battery 3 Remove the rubber film on the surface of the battery 4 Replace the battery 5 Replace the lid on the terminal box and re ...

Page 10: ...6h 24h Then press the ON OFF button the pump should start running The running time is what the indicator light shows TIMES ON OFF 2h 4h 6h 8h 10h 12h 16h 24h TIMES ON OFF 2h 4h 6h 8h 10h 12h 16h 24h SINGLE CYCLE MODE Depressing the TIMER button more than 10 seconds the Single Cycle Indicator light will flash and switch to Single Cycle mode In the Single Cycle Mode press ON the pump will work and S...

Page 11: ...n good condition If any parts are worn cracked or in bad condition replace them prior to starting the pump The pump should be stopped immediately if the temperature is too high Inspect and if need be have a technician repair it If loud noises are coming from the pump turn the power off immediately and have a service technician service and repair it TROUBLESHOOTING ...

Page 12: ...PRESSLY STATES THAT ALL REPAIRS AND PARTS REPLACEMENTS SHOULD BE UNDERTAKEN BY CERTIFIEDAND LICENSED TECHNICIANS AND NOT BY THE BUYER THE BUYER ASSUMES ALL RISK AND LIABILITY ARISING OUT OF HIS OR HER REPAIRS TO THE ORIGINAL PRODUCT OR REPLACEMENT PARTS THERETO OR ARISING OUT OF HIS OR HER INSTALLATION OF REPLACEMENT PARTS THERETO Record Product s Serial Number Here Note If product has no serial n...

Reviews: