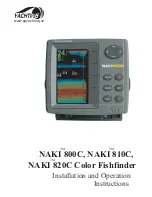
background image

         NAKI 800C, NAKI 810C, 
    NAKI 820C Color Fishfinder

Installation and Operation 
                      Instructions

www.goyachting.cn

TM

TM

TM

Summary of Contents for Naki 800C

Page 1: ...NAKI 800C NAKI 810C NAKI 820C Color Fishfinder Installation and Operation Instructions www goyachting cn TM TM TM...

Page 2: ......

Page 3: ...t necessary to change or end our policies regulations and special offers at any time We reserve the right to change or improve its products and to make changes in the content without obligation to not...

Page 4: ...warranty are handled with reasonable charges based on concrete situations For details regarding maintenance service please refer to thewarranty explanations of this User s Guide To familiarize yoursel...

Page 5: ...tallation 5 Transom installation 5 Shoot thru hull transducer installation 9 Sonar unit installation 12 Operation 15 Understanding the Fishfinder screen 15 Real time sonar window 16 Keyboard instructi...

Page 6: ...el Offset 34 3 System 35 Beeper 35 Simulator 35 Language 36 System Info 37 Load Default 38 4 Units 39 Temperature 39 Depth 40 5 Alarm 41 Fish ID 41 Shallow 42 Battery 43 Trouble Shooting 44 Maintenanc...

Page 7: ...to the water in a cone shape At the source the wave is narrow however as it penetrates deeper the sound wave spreads forming a cone think flashlight The sound wave bounce back to the t ransducer when...

Page 8: ...o at same interval for your fish finder it is 0 06mS And the continuous signals form different sampling point The shorter the distance between 2 sampling points is the higher precision your fishfinder...

Page 9: ...get the best bottom information By the Dual beam sonar setting you can use the narrow 20 12 beam to penetrate the deep bottom while you are still being able to use the wide 60 35 beam for a wide detec...

Page 10: ...nd for any problems you meet during the installation please contact your local dealer for help Packing list Before you install the transducer and sonar unit please check the Packing List below and mak...

Page 11: ...e areas can create turbulence when the boat moves in a high speed 2 Mark the location and drill the mounting holes a Make sure the boat is level and no obvious incline of the shipboard b Hold the temp...

Page 12: ...nut into the slot of pivot then insert the pivot bolt hand tighten the pivot bolt figure 3 Note Do not over tighten the pivot bolt with Allen wrench otherwise you will not being able to adjust the an...

Page 13: ...ucer by ratchets and the increment is12degree so in some situations you may find it impossible to adjust the transducer completely parallel with the water surface In this situation a slight incline 1...

Page 14: ...ng to the test outcome Before the test please make certain you have finished the installation of the sonar unit and properly connect the transducer cable to the sonar unit Also make sure the distance...

Page 15: ...the pivot from thn mark the third hold with a pencil figure 8 c Using a 5 32 bit drill a hole appreciated 1 25mm deep at the marked position d Apply some marine sealant in three holes and hold the te...

Page 16: ...hull then removing the inner layer of fiberglass and flotation materials thus the surface of outer hull exposed Epoxy the transducer to the outer layer of fiberglass press the transducer with a sligh...

Page 17: ...y clean and flat b Wipe off the sand debris on mounting surface with a piece of cloth and then clean the mounting surface of hull and transducer with rubbing alcohol c Get a quantity of epoxy and hard...

Page 18: ...imension please refer to the figure 9 c There should be enough room behind the sonar unit to route the cable when the installation is finished d To get a stable installation the mounting surface shoul...

Page 19: ...13 bracket control head figure 10 2 Assemble the locking knob 3 Fix the fish finder on the installation surface which you choose before locking knob figure 11...

Page 20: ...tric system however for your Fishfinder only 12 volt electric system could be adopted Any damage from the surplus power will void your warranty Note for the purpose of minimizing the potential of inte...

Page 21: ...etc is formed by the sonar history The black line at the top of the screen represents the water surface and the water depth and Temp will appear at the upper left corner as soon as you turn on the so...

Page 22: ...ine dividing the screen into many parallel bands at vertical direction Each band represents the signals received by the sonar unit at a particular time The closer the position of brand to the right si...

Page 23: ...used to enter into a menu setting 2 ENT Key The ENT key is used to confirm option setting 3 ZOOM Key The MENU key is used to enter into zoom setting 4 BACKLIGHT Key The BACKLIGHT key is used to incre...

Page 24: ...nar is working if the EXIT key is pressed down a HOLD will display on the lower left screen and the scrolling will stop until the EXIT is pressed down again 7 Up Arrow Down Arrow Key The Up Arrow Down...

Page 25: ...or 1 For software updating please download the latest software version from www goyachting cn 2 For GPS connector simply connect a standard GPS reveiver to the unit then the tracking point data can be...

Page 26: ...m With the low speed you feel easeful to have enough time to interpret the fish details and bottom However the compressed information may cause a little problem for you to interpret them To achieve be...

Page 27: ...layed If the Noise Filter is increased too hige most sonar returns which maybe fish will not be displayed In situation while water is clear try decreasing the Noise Filter however in situation while w...

Page 28: ...r returns such as hard bottom or other relatively hard target will be display with brightly colored line Weak sonar returns such as soft muddy or weedy bottom will be displayed as lightly colored line...

Page 29: ...see more details on the screen In deep water increasing the sensitivity whereas in shallow decreasing the sensitivity In most situation just set sensitivity to Auto will work well To set the Sensitive...

Page 30: ...setting will prevent weak sonar returns being displayed as fish which will be very helpful when you are seeking large species of fish To set the Fish ID Sens 1 Press MENU to enter into menu setting 2...

Page 31: ...ing of your Fishfinder is in line with the water condition To set the Water Type 1 Press MENU to enter into menu setting 2 Use the Up Down Arrow to select Sonar option 3 Press Right Arrow to enter int...

Page 32: ...and Real Sonar Window will only display the 83 50 kHz narrow beam sonar returns c In 50 200 or 83 200 setting the screen will display both the 200 kHz and 83 50 kHz sonar returns The 200 kHz narrow b...

Page 33: ...to confirm the setting 8 Press EXIT to exit the menu setting Note a for the fish target detected under 200kHz the depth redout on the fish ID is displayed in Green color b for the fish target detecte...

Page 34: ...you wish to see the underwater condition in the shallower layer near 0 5m please set the TCG Control as On Note In air the signal consumption is much bigger than in water So if you try to test the so...

Page 35: ...29...

Page 36: ...lt setting is Auto which will keep the bottom always display in a proper position on the screen However in some certain situation you could also manually select a depth range To set the Depth Range 1...

Page 37: ...the sonar image of the 20 30m depth segment with a 4x scale To set the Zoom Range 1 Press MENU to enter into menu setting 2 Use the Up Down Arrow to select Display option 3 Press Right Arrow to enter...

Page 38: ...acklight To set the Backlight 1 Press MENU to enter into menu setting 2 Use the Up Down Arrow to select Display option 3 Press Right Arrow to enter into Display setting 4 Use the Up Down Arrow to sele...

Page 39: ...Echo Style 1 Press MENU to enter into menu setting 2 Use the Up Down Arrow to select Display option 3 Press Right Arrow to enter into Display setting 4 Use the Up Down Arrow to select the Echo Style o...

Page 40: ...n the actual water depth is 42feet By Keel Offset you can calibrate the depth displayed on the screen First measure the distance from the transducer surface to water surface then set a value for examp...

Page 41: ...o the setting 6 Press Up Down Arrow to change the option 7 Press ENT to confirm the setting 8 Press EXIT to exit the menu setting Simulator Simulator is used to let you practicing using the Fishfinder...

Page 42: ...e For your sonar unit there are 10 languages for operation choosing English Deutsch French Spanish Nederlands Italiano Polish Portuguese Russian Suomi To set the Language 1 Press MENU to enter into me...

Page 43: ...ting the software of the sonar operating system which will make the unit working beter or with new features or function The new upgraded software can be downloaded in free in our website www goyachtin...

Page 44: ...and want to return to the original operation setting then you can use the Reset Settings to reset all the current options and settings to the original factory defaults To set the Load Default 1 Press...

Page 45: ...into menu setting 2 Use the Up Down Arrow to select Units option 3 Press Right Arrow to enter into Units setting 4 Use the Up Down Arrow to select the Temperature option 5 Press Right Arrow to enter...

Page 46: ...ting 2 Use the Up Down Arrow to select Units option 3 Press Right Arrow to enter into Units setting 4 Use the Up Down Arrow to select the Depth option 5 Press Right Arrow to enter into the setting 6 P...

Page 47: ...ill not sound when the option is off To set the Fish ID 1 Press MENU to enter into menu setting 2 Use the Up Down Arrow to select Alarm option 3 Press Right Arrow to enter into Units setting 4 Use the...

Page 48: ...wn Arrow to increase or decrease the value 7 Press ENT to confirm the setting 8 Press EXIT to exit the menu setting Note once triggered an alarm message will appear on the screen You can press any key...

Page 49: ...p Down Arrow to increase or decrease the value 7 Press ENT to confirm the setting 8 Press EXIT to exit the menu setting Note once triggered an alarm message will appear on the screen You can press any...

Page 50: ...motor can interferes with the sonar which will cause some weaker signals being eliminated e Please check the battery voltage The unit s transmitter power will decrease due to the voltage drop And thi...

Page 51: ...n to make certain it is properly installed An improper installation may cause sonar signal lost b Oil dirt and fuel might cause a film to form on the transducer and reduce its effe ctiveness Cleaning...

Page 52: ...piece of soft cloth or pelt to clean the screen fresh water or eyeglass cleaner can be used if needed Stubborn dirt or oil stains remaining on the screen shall not be wiped with force otherwise it ma...

Page 53: ...ng the warranty coverage the maintenance department will charge customers some fees according to the real situation b This warranty is void if damage or malfunction is due to abuse misuse accident fai...

Page 54: ...requency 200 kHz for NAKI800C 200 83kHz for NAKI810C 200 50KHz for NAKI 820C Sonar coverage NAKI800C 20 degree Cone Angle NAKI810C 20 60 degree Cone Angles NAKI820C 12 35 degree Cone Angle Power Requi...

Page 55: ...ransducer for actuate water surface temp 6 pin data port for software updating and GPS connetion Color Line separates fish and structure from the bottom and defines bottom hardness Display target dept...

Page 56: ......

Page 57: ...Yachting Electronic Co Ltd Building107 No 508 Heyan Road Nanjing 210038 China Tel 86 25 84680809 Fax 0086 25 85359123 Email info goyachting cn...

Reviews: