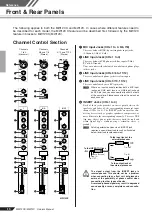
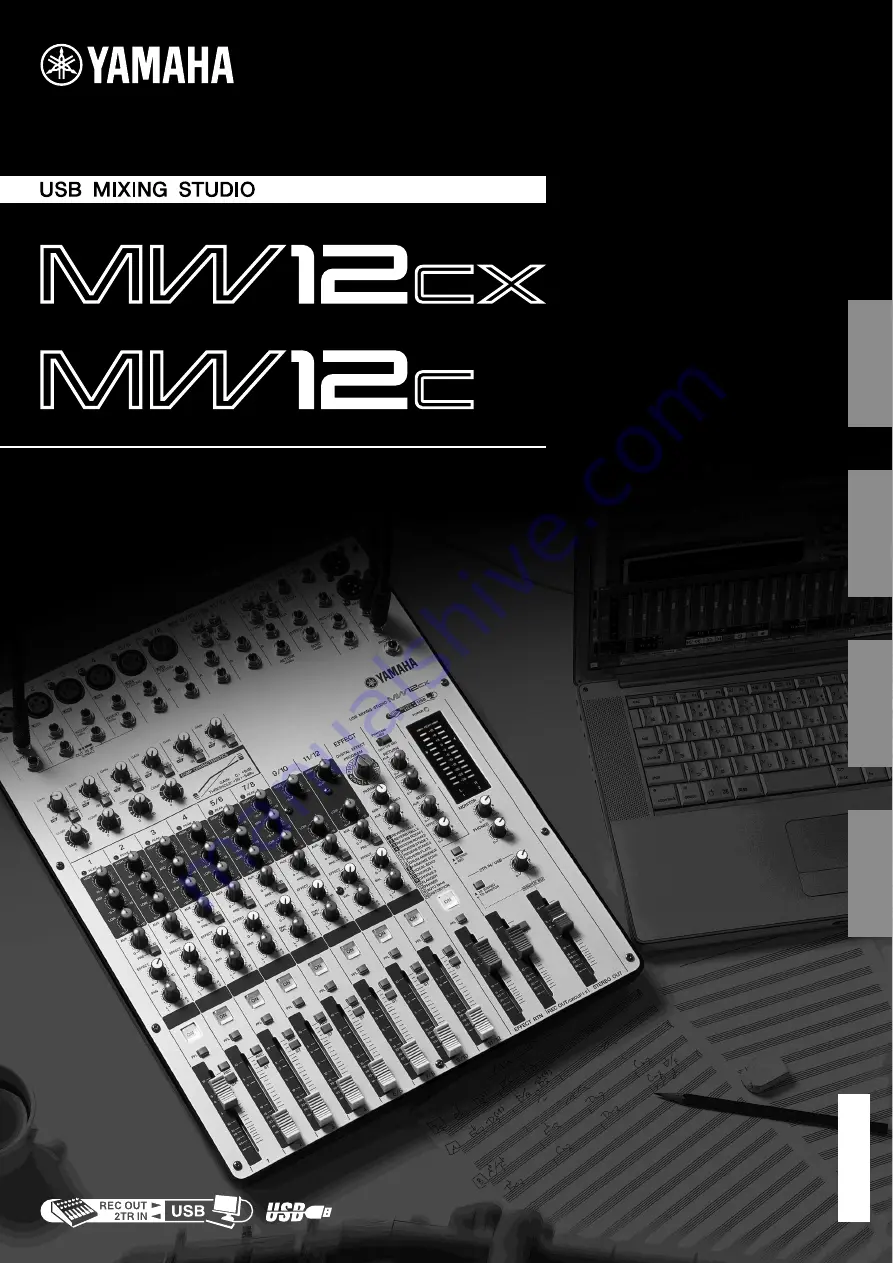
background image

English

Deutsch

Français

Español

Owner’s Manual
Bedienungsanleitung
Mode d’emploi
Manual de instrucciones

ES

FR

DE

EN

Summary of Contents for MW12C

Page 1: ...English Deutsch Français Español Owner s Manual Bedienungsanleitung Mode d emploi Manual de instrucciones ES FR DE EN ...

Page 2: ...or another product use only high quality shielded cables Cable s supplied with this product MUST be used Follow all installation instructions Failure to follow instructions could void your FCC authorization to use this product in the USA 3 NOTE This product has been tested and found to comply with the requirements listed in FCC Regulations Part 15 for Class B digital devices Compliance with these ...

Page 3: ...oid generating unwanted noise make sure there is adequate distance 50 cm or more between the AC power adaptor and the device Do not cover or wrap the AC power adaptor with a cloth or blanket Before moving the device remove all connected cables When setting up the device make sure that the AC outlet you are using is easily accessible If some trouble or malfunction occurs immediately turn off the po...

Page 4: ...D player Visit the web address below for the latest information on supplied software and operating system requirements http www yamahasynth com The illustrations and LCD screens as shown in this owner s manual are for instructional purposes only and may appear somewhat different from those on your instrument This product incorporates and bundles computer programs and contents in which Yamaha owns ...

Page 5: ...njoy trouble free operation for years to come After reading the manual please store it in a safe place Connect To Your Computer via a Single USB Cable page 7 The MW mixer connects to your computer via the supplied USB cable Stereo audio data is transferred in both direc tions from the mixer to the computer and vice versa via the USB connection 44 1 kHz or 48 kHz sampling fre quency No Driver Insta...

Page 6: ...e is 50 cm or more between the power adaptor and the mixer Press the mixer s power switch to the ON position When you are ready to turn the power off press the power switch to the STANDBY position Note that trace current continues to flow while the switch is in the STANDBY position If you do not plan to use the mixer again for a long while please be sure to unplug the adaptor from the wall outlet ...

Page 7: ...ears in the actual icon name Visit the web address below for the latest information on http www yamahasynth com 1 Turn the power to the MW mixer and all gear that is to be connected to the MW mixer off standby except the computer and set the channel faders STEREO OUT Master fader and REC OUT fader to their minimum settings 2 Connect the MW mixer to your computer using the supplied USB cable When c...

Page 8: ...ing phantom powered con denser microphones Although electric guitars and basses can be con nected directly to the mixer s inputs the sound is likely to be thin and possi bly noisy For best results with these types of instru ments use a DI box direct box or amp simulator between the instrument and the mixer Step 3 Powering Up the System CAUTION NOTE Balanced Cables and Unbalanced Cables Two types o...

Page 9: ...r for Microphone Input As the name implies a high pass filter allows only signals above a certain frequency to pass Conversely signals below that cutoff frequency are attenuated When an MW high pass filter is turned on signals below 80 Hz are attenuated This can be useful for minimizing low frequency breath noise from a vocalist as well as handling noise or rumble transmit ted via the microphone s...

Page 10: ...stalling the Cubase AI software launch the application from that location Create a Cubase AI shortcut or alias on your desktop so you can easily launch the program when required 2 When the Project Assistant window appears select the More menu Empty and click Create A new project is created Recorded Cubase AI data is stored as a Project 3 Select Device Setup from the Devices menu to open the Device...

Page 11: ...the Visible column in the Device Setup window Click OK to close the window If the Port System Name field does not change close and restart the Cubase AI then open the Device Setup window 6 Select VST Connections from the Devices menu Windows If Not Connected is selected in the Audio Device field click on the Not Connected indication and then switch to ASIO DirectX Full Duplex Driver Also set the O...

Page 12: ...ding via the ruler at the top of the win dow for the project Click the black area of the ruler to move the project cur sor the vertical black line to that position Recording and Playback 1 Click the Transport panel Record button to begin recording When recording is started the project cursor will begin moving to the right and a box that displays the recording results will be created 2 Play the par...

Page 13: ... USB on page 19 for details In this section we ll try mixing down multiple recorded audio tracks to stereo and creating an audio file Mixes can be stored as WAV or AIFF files which can then be recorded to audio CDs 1 Launch Cubase AI and open a project file 2 Click the Start button on the Transport Panel 3 While listening to playback drag the chan nel strip level faders up and down to create the d...

Page 14: ...file type If you intend to use the file to create an audio CD select the WAV file type AIFF on Mac OS X 16 bit and 44 1 kHz 9 Click Export Progress of the mixdown operation will be shown in a progress window When the progress window closes the mixdown is complete Audio files created by mixdown can be directly played back using the Windows Media Player or iTunes on a Mac computer Pan Effectively Pa...

Page 15: ...5 Setup DI Foot Switch YAMAHA FC5 Recorder Synthesizer CD Player Microphone Powered Speakers Powered Monitor Speakers Bass Headphones Guitar Effect Processor Effect Processor exciter Powered Monitor Speaker MW12CX Personal Computer Reference ...

Page 16: ... of these jacks provides an insert point between the equalizer and fader of the corresponding monaural input channel CHs 1 to 4 The INSERT jacks are ideal for con necting devices such as graphic equalizers compressors or noise filters into the corresponding channels These are TRS tip ring sleeve phone jacks that carry both the send and return signal tip send out ring return in sleeve ground Patchi...

Page 17: ... B AUX PRE Switch Selects whether the pre fader or the post fader signal is fed to the AUX AUX1 bus If the switch is on the mixer sends the pre fader signal the signal immediately prior to the Channel fader I to the AUX AUX1 bus so that AUX AUX1 output is not affected by the fader If the switch is off the mixer sends the post fader signal to the AUX AUX1 bus C EFFECT AUX2 Controls Adjusts the leve...

Page 18: ... the L MONO jack only the mixer will recognize the signal as monaural and will send the identical signal to both the L and R jacks 5 SEND Jacks AUX AUX1 This is an impedance balanced TRS phone jack that outputs the signals from AUX AUX1 bus You can use this jack for example to connect to an effect unit cue box or other mon itoring system EFFECT AUX2 This is an impedance balanced TRS phone jack tha...

Page 19: ...el Meter This LED meter displays the level of the signal selected by the MONITOR switch D 2TR IN USB switch E and PFL switch The 0 segment corresponds to the nominal output level The PEAK segment lights red when the output reaches the clipping level D MONITOR PHONES MONITOR Switch If this switch is set to REC the REC L R bus signals are sent to the MONITOR OUT jacks the PHONES jack and the level m...

Page 20: ...witches the internal effect on or off The internal effect is applied only if this switch is turned on The switch lights orange when on An optional Yamaha FC5 foot switch sold separately can be used to toggle the digital effects ON and OFF The ON switch lights and the internal effect unit is active by default when the power is initially turned on 6 PFL Switch Turn this switch on to send the effect ...

Page 21: ... VOCAL ECHO DELAY TIME Echo suitable for vocals 11 CHORUS 1 LFO Frequency Creates a thick sound by modulating the delay time The PARAMETER control adjusts the frequency of the LFO that modulates the delay time 12 CHORUS 2 LFO Frequency 13 FLANGER LFO Frequency A sweeping pitched effect The PARAMETER control adjusts the frequency of the LFO that modulates the delay time 14 PHASER LFO Frequency Phas...

Page 22: ...rces audio devices applications software computer operating system etc set at appropriate levels Is the output of your computer operating system muted Do you have several applications running at the same time Be sure to quit all applications you are not using Is the sound output of your computer operating system assigned properly Windows 7 Vista 1 From the START menu click Control Panel then doubl...

Page 23: ... menu click Control Panel then double click the Sounds and Audio Devices icon to open the Sounds and Audio Devices Properties dialog window 2 Click the Volume tab 3 Set Device volume to High 4 Click the Sound tab 5 Select No sound in the Sound scheme Mac 1 Select System Preferences from the Apple menu and then select Sound to open the Sound dialog window 2 Click the Output tab and set the volume s...

Page 24: ...ck Control Panel from the START menu and double click the Sounds and Audio Devices icon to open the Sounds and Audio Devices Properties dialog window 2 Click the Volume tab and click Advanced in Speaker settings The Advanced Audio Properties dialog window will open 3 Click the Performance tab Set Hardware acceleration to Full and Sample rate conversion quality to Good Don t change these settings i...

Page 25: ...n measured PAN BAL panned hard left or hard right Rs 150 Ω INPUT GAIN maximum MIC to CH INSERT OUT 60 dB MIC to STEREO OUT 84 MIC to REC OUT2 MIC to REC to ST 94 MIC to REC OUT1 72 2 MIC to MONITOR OUT ST TO MONITOR 84 MIC to PHONES OUT 83 MIC to AUX AUX1 SEND PRE 76 MIC to AUX AUX1 SEND POST EFFECT AUX2 SEND 86 CH 5 6 7 8 LINE to STEREO OUT 58 CH 5 6 7 8 LINE to REC OUT2 CH 5 6 7 8 AUX AUX1 SEND ...

Page 26: ...Bu 15 5 mV 14 dBu 155 mV Phone jack unbalanced 10 dB 10 dBu 245 mV 10 dBu 2 45 V 30 dBu 24 5 V ST CH INPUT CHs 9 10 11 12 10kΩ 600Ω Lines 30 dBu 24 5 mV 10 dBu 245 mV 10 dBu 2 45 V Phone jack unbalanced RCA pin jack CH INSERT IN CHs 1 4 10kΩ 600Ω Lines 20 dBu 77 5 mV 0 dBu 0 775 V 20 dBu 7 75 V TRS phone Jack unbalanced Tip Out Ring In Sleeve GND RETURN L R 10kΩ 600Ω Lines 12 dBu 195 mV 4 dBu 1 23...

Page 27: ...owner s manual are for information purposes only Yamaha Corp reserves the right to change or modify products or specifications at any time without prior notice Since specifications equipment or options may not be the same in every locale please check with your Yamaha dealer 346 2 433 9 86 1 436 6 79 6 2 Unit mm MW12CX ...

Page 28: ...C R GROUP 2 PFL L PFL R PFL CTRL 0dBu SUM SUM SUM SUM SUM INV INV 0dBu 10dBu REC GROUP Fader BA BA TO STEREO 0dBu BA 10dBu BA STEREO Fader STEREO REC GROUP 0dBu SUM 0dBu SUM 6dBu SUM SUM 0dBu 0dBu AUX SEND 1 6dBu 6dBu EFFECT SEND 1 SUM 0dBu SUM DR LED METER DR LED METER MONITOR 6dBu 16dBu PHONES BA BA INV INV INV INV 0dBu L 1 R 2 4dBu REC OUT2 GROUP OUT 4dBu STEREO OUT L L R 10dBV 7 8dBu REC OUT1 ...

Page 29: ...nder the Adminis trator account In order to have continuous use of the DAW software in the accessory disk including support and other bene fits you will need to register the software and activate your software license by starting the software while the computer is connected to the Internet Click the Regis ter Now button shown when the software is started then fill in all required fields for regist...

Page 30: ...are auf der Zubehör Disk einschließlich Support und anderer Vorteile zu gewährleisten müssen Sie die Software registrieren und Ihre Software Lizenz aktivieren indem Sie die Software auf dem Computer starten während dieser mit dem Internet verbunden ist Klicken Sie auf die Schaltfläche Jetzt registrieren die beim Starten der Software angezeigt wird und füllen Sie dann alle für die Registrierung erf...

Page 31: ...ininterrompu des logiciels DAW contenus sur le disque accessoire ainsi que du support et d autres avantages vous devez obligatoire ment enregistrer le logiciel et activer votre licence de logiciel en démarrant l application sur un ordinateur con necté à Internet Cliquez sur la touche Enregistrer maintenant qui apparaît au démarrage du logiciel puis renseignez tous les autres champs requis pour l e...

Page 32: ...la el software DAW con la cuenta de administrador Para usar de forma continua el software DAW del disco complementario incluida asistencia técnica y otras ven tajas deberá registrarlo y activar su licencia iniciándolo con el ordenador conectado a Internet Haga clic en el botón Register Now registrar ahora que aparece cuando se inicia el software luego rellene todos los campos requeridos para el re...

Page 33: ...Skiathou Street 112 55 Athens Greece Tel 01 228 2160 SWEDEN Yamaha Scandinavia AB J A Wettergrens Gata 1 Box 30053 S 400 43 Göteborg Sweden Tel 031 89 34 00 DENMARK YS Copenhagen Liaison Office Generatorvej 6A DK 2730 Herlev Denmark Tel 44 92 49 00 FINLAND F Musiikki Oy Kluuvikatu 6 P O Box 260 SF 00101 Helsinki Finland Tel 09 618511 NORWAY Norsk filial av Yamaha Scandinavia AB Grini Næringspark 1...

Page 34: ...Yamaha Web Site English only http www yamahasynth com Yamaha Manual Library http www yamaha co jp manual C S G Pro Audio Division 2007 2011 Yamaha Corporation 111POGR 01D0 ZA68630 ...

Reviews: