background image

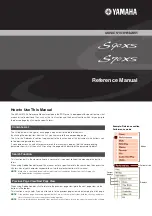
How to Use This Manual

The S90 XS/S70 XS Reference Manual created via the PDF format is equipped with special features that 
are exclusive to electronic files, such as the Link function and the Search function which let you jump to 
the desired page by clicking the specific term.

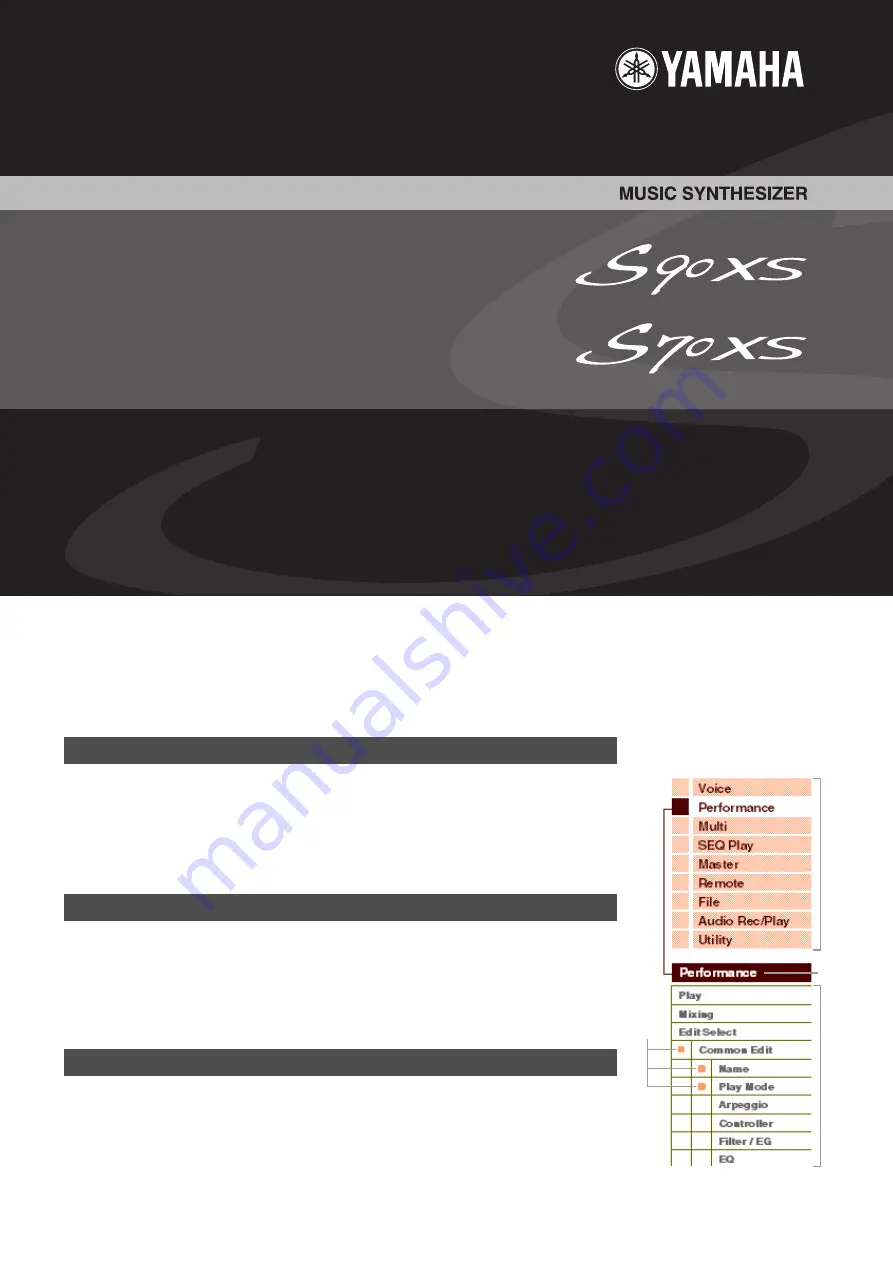
The list indicated at the right of each page is equivalent to the table of contents.
By clicking the desired item from this list, you can jump to the corresponding page. 
The list in the “Reference” section is equivalent to the function tree of this instrument, which allows you 
to find desired parameters easily.
If you come across an unfamiliar parameter on the instrument’s display, find the corresponding 
parameter from this list then click it to call up the page which describes the parameter in detail.

This function built in the viewer software is very useful if you want to know the meaning of unfamiliar 
terms.
When using Adobe Reader to read this manual, enter a specific word in the search box, then press the 
<Enter> key of your computer keyboard to call up the relevant section in this manual.

NOTE

Make sure to check and download the latest version of the Adobe Reader from the following site.
http://www.adobe.com/products/reader/

When using Adobe Reader, click to return to the previous page view/go to the next page view via the 
buttons in the toolbar.
This function is very useful if you want to return to the previous page view when jumping to a link page.

NOTE

If the previous page view/next page view buttons are not shown in the toolbar, hold the <Alt> key and press 
<

>/<

> keys to move to the previous/next page view.

NOTE

For more information on these and other functions in the software, refer to the owner’s manual of the software.
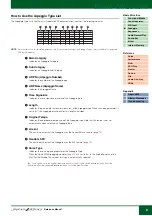
Contents List

Search Function

Previous Page View/Next Page View

Reference Manual

Example: Reference section, 
Performance mode

Modes

Current mode

Current 
displays

Displays

Summary of Contents for S70 XS

Page 1: ... if you want to know the meaning of unfamiliar terms When using Adobe Reader to read this manual enter a specific word in the search box then press the Enter key of your computer keyboard to call up the relevant section in this manual NOTE Make sure to check and download the latest version of the Adobe Reader from the following site http www adobe com products reader When using Adobe Reader click ...

Page 2: ...is system based on sampled waves sound material and is used in many Yamaha synthesizers For extra realism each AWM2 Voice uses multiple samples of a real instrument s waveform Furthermore a wide variety of parameters envelope generator filter modulation and others can be applied S90 XS S70 XS Controller block page 13 Keyboard Controllers Tone Generator block page 3 AWM2 Tone Generator 16 Parts Voi...

Page 3: ... to eight Elements Normal Voice or up to 73 keys Drum Voice An Element or Drum Key is the basic and the smallest unit for a Voice This means that only one Element or key can produce the musical instrument sound In addition a Normal Voice can produce the realistic sound or various types of sound by combining multiple Elements Each Voice is created by editing parameters unique to each element key El...

Page 4: ... of the acoustic instrument is released The S90 XS S70 XS realizes the sound produced when the note of the acoustic instrument is released by setting the XA Control parameter of a certain Element to key off sound Subtle sound variations for each note played Conventional synthesizers attempt to reproduce this by randomly changing the pitch and or filter However this produces an electronic effect an...

Page 5: ...o the set s of the keyboard and velocity For information on the Oscillator parameters refer to pages 46 and 60 Pitch This unit controls the pitch of the sound wave output from the Oscillator In the case of a Normal Voice you can detune separate Elements apply Pitch Scaling and so on Also by setting the PEG Pitch Envelope Generator you can control how the pitch changes over time Pitch related param...

Page 6: ... will not play back properly in this mode If you are using an external MIDI sequencer or computer to play the instrument make sure to use the Multi mode A program in which multiple Voices Parts are combined in a layer or in other configurations is referred to as a Performance Each Performance can contain up to four different Parts Voices Each Performance can be created by editing parameters unique...

Page 7: ...ed into 18 categories as listed below The categories are based on the musical instrument Category List NOTE Categories named GtMG and BaMG include Arpeggio types appropriate for using with a Mega Voice Multi Memory structure of Multi Maximum Polyphony Maximum polyphony refers to the highest number of notes that can be sounded simultaneously from the internal tone generator of the instrument The ma...

Page 8: ...11 Arpeggio type with _XS at the end of the type name example Rock1_XS These Arpeggios use a newly developed chord recognition technology to determine what notes should be played back by the Arpeggio This XS type of arpeggio has the following benefits The arpeggios respond only to any area on the keyboard where an XS type of arpeggio is assigned Other areas of the keyboard do not effect the chord ...

Page 9: ...When the Loop parameter is set to off the Arpeggio plays back for this length and stops 7 Original Tempo Indicates the appropriate tempo value of the Arpeggio type Note that this tempo is not set automatically when selecting an Arpeggio type 8 Accent The circle indicates that the Arpeggio uses the Accent Phrase feature page 10 9 Random SFX The circle indicates that the Arpeggio uses the SFX featur...

Page 10: ...Velocity Threshold parameter to a lower value NOTE The Accnt Vel Th Accent Velocity Threshold can be set in the Arp Edit display page 36 of the Voice Edit Arp Edit display page 84 of the Performance Part Edit and Arp Edit display page 104 of the Multi Part Edit NOTE For information on Arpeggio types that use this function refer to the Arpeggio Type List in the Data List separate PDF documentation ...

Page 11: ... is played back no matter what order you play the notes When the Key Mode parameter is set to thru or thru direct a different sequence is played back depending on the order you play the notes NOTE Since these types are programmed for Normal Voices using them with Drum Voices may not give musically appropriate results These arpeggio types are programmed specifically for use with Drum Voices giving ...

Page 12: ...lay mode The MIDI messages played in the Sequencer block will be transmitted to the tone generator block Audio Recording Playback Block This block lets you record your keyboard performance as audio data to the USB storage device or internal flash memory and play back the recorded audio data Audio Recording The sound output from the tone generator block of this instrument and the sound input via th...

Page 13: ...mode From this display you can also reverse the Pitch Bend function so that moving the wheel up lowers the pitch and moving it down raises the pitch Functions other than Pitch Bend can be assigned to the Pitch Bend wheel in the Controller display page 39 of the Voice Edit mode Modulation Wheel Even though the Modulation wheel is conventionally used to apply vibrato to the sound many of the preset ...

Page 14: ...lied individually to each Part Insertion Effects are mainly used to directly process a single Part Voice Each Voice features one set of Insertion effects A and B units The different Effects can be assigned to the A and B respectively on the Effect Parameter display page 45 of the Voice Edit This instrument features eight sets of Insertion Effects each set has two units A and B They can be applied ...

Page 15: ... from the MIC INPUT jack in the Voice mode when the Output Select parameter page 141 is set to something other than L R the signal can be applied at only 3 4 settings as shown above and output 1 Part EQ applied to each Part Can be set in the 3 Band EQ display page 88 of Performance Part Edit 2 Selection to which Parts the Insertion Effect is applied Can be set in the Fx Send display page 89 of Per...

Page 16: ...ivided into convenient Effect categories This section explains the Effect categories and their types The Effect Type list described below for each category contains the columns Rev Reverb Cho Chorus Ins Insertion and Mas Master Effect The checkmarks indicated in these columns means the Effect Type is available for each block These Effect types with the checkmarks indicated in each list can be sele...

Page 17: ... sounds L R and C center DELAY LR Stereo Produces two delayed sounds in stereo L and R Effect Type Cho Ins Description G CHORUS A Chorus Effect that produces a richer and more complex modulation than normal chorus 2 MODULATOR A Chorus Effect consisting of the pitch modulation and the amplitude modulation SPX CHORUS An effect which uses a 3 phase LFO to add modulation and spaciousness to the sound ...

Page 18: ...ia the pedal control For best results assign the Pedal Control parameter of this Effect type to the Foot Controller in the Controller Set display then use the Foot Controller to control this effect in real time Effect Type Ins Mas Description LO FI Degrades the audio quality of the input signal to get a lo fi sound NOISY Adds the noise to the current sound DIGITAL TURNTABLE Simulates the noise of ...

Page 19: ...reo These effects emulate the characteristics of analog phasers used in the 1970s recreating a warm high quality phaser effect VCM Auto Wah VCM Touch Wah VCM Pedal Wah These effects emulate the characteristics of analog Wah used in the 1970s recreating a warm high quality wah wah effect REV X is a reverb algorithm developed by Yamaha It provides high density richly reverberant sound quality with s...

Page 20: ...e sound When set to Scratch the delay effect is not applied if both the Delay Time and Delay Time Offset are set to 0 Damper Control When the half damper compatible FC3 footswitch is connected to the SUSTAIN jack the Damper Control parameter is controlled by the FC3 over a range of 0 127 allowing for partial damper effects such as is available on an actual grand piano Decay Controls how the reverb...

Page 21: ...ay When one of the delay chorus flanger comp distortion delay and TEC effects is selected this parameter determines the feedback level output from the delay and returned to the input When Tempo Phaser or Dynamic Phaser is selected this parameter determines the feedback level output from the phaser and returned to the input Feedback Level 1 2 Determines the feedback level of the delayed sound in ea...

Page 22: ... status of the mid frequencies Mid Ratio Determines the ratio of the compressor for the mid frequencies Mid Threshold Determines the minimum input level at which the effect is applied for the mid frequencies Mix Determines the volume of the effect sound Mix Level Determines the level of the effect sound mixed to the dry sound Mod Depth Determines the depth of the modulation Mod Depth Ofst R Determ...

Page 23: ...arly reflections until the reverberations Reverb Time Determines the reverb time Room Size Determines the size of the room in which the instrument sounds Rotor Speed Fast Determines the speed of the rotor when the slow fast switch is set to fast Rotor Speed Slow Determines the speed of the rotor when the slow fast switch is set to slow Rotor Horn Balance Determines the volume balance of the horn a...

Page 24: ...strument is equipped with only DRAM Because data contained in DRAM is lost when the power is turned off you should always save any data residing in DRAM to a USB storage device or internal flash memory in the File mode before turning off the power Audio Record Audio Play Sequencer Play File extensions X2V File extensions MID File extensions wav File extensions X2G File extensions aif File extensio...

Page 25: ... Recall Buffer If you ve selected another Voice Performance Multi without storing the one you were editing you can recall your original edits since the edit buffer s contents are stored in backup memory NOTE Keep in mind that the recall buffer is not available in the Master Edit mode Internal Flash Memory In addition to the above memory types this instrument also features the internal flash memory...

Page 26: ...s provides a smooth seamless interface and makes it very easy to create and edit your data For details about how to synchronize data between the two refer to the owner s manual of the S90 XS S70 XS Editor About EDITOR marks In the Reference section the parameters that are available only on the S90 XS S70 XS Editor are marked with EDITOR marks How to use the Edit display 1 These marks mean that up ...

Page 27: ...e Bank consists of eight Groups A to H each of which contains 16 Voices To select the desired Voice select the Bank Group then Number 1 Press the VOICE button This calls up the Voice Play display The VOICE button lamp lights 2 Select a Voice Bank with the BANK DEC INC buttons In this condition playing the keyboard sounds the Voice indicated in the display 3 Select a Group Press one of the A to H b...

Page 28: ...tton to actually call up the Voice This closes the Category Search dialog Grouping your most used Voices together Favorite Category Category Search also has a convenient Favorite Category that lets you bring together your most often used and favorite Voices for easy selection This is one more useful way you can quickly select the Voices you need from the huge number available on the instrument 1 P...

Page 29: ...ob 1 ATTACK Increases or decreases the EG Attack Time of the current Voice The smaller the value the faster the attack Knob DECAY Decay Time Increases or decreases the AEG Decay Time of the current Voice controlling how fast the volume falls from maximum attack level to the sustain level The smaller the value the faster the decay Knob 3 SUSTAIN Increases or decreases the EG Sustain Level at which ...

Page 30: ... but not yet stored To store the current edited status press the STORE button to store the edited Voice Storing the created Voice 1 Press the STORE button to call up the Voice Store display 2 Set the destination for storing the Voice Select a Voice Bank and Number as destination by using the Data Dial DEC and INC buttons You can use the A H buttons and 1 16 buttons to select a Voice number NOTE Wh...

Page 31: ...CTAVE buttons and TRANSPOSE buttons The OCTAVE button lets you shift the pitch of the keyboard in octave and by up to three octaves For example you may want to shift the pitch down lower to get extra bass notes or shift up to get higher notes for leads and solos The OCTAVE controls let you do this quickly and easily The range is from 3 to 3 with 0 being standard pitch Pressing the and the buttons ...

Page 32: ...Arpeggio playback on or off press the ARP ON OFF button on the panel 1 Press the EDIT button in the Voice mode 2 Select Arpeggio by using the Cursor button then press the ENTER button 3 Select Arp Select and select the desired Arp 1 5 by using the Data Dial When selecting the ARP SELECT via the Arpeggio Effect Function button you can select the Arp 1 to 5 via the Function buttons 4 Select Arp 1 5 ...

Page 33: ...TILITY button to enter the Utility mode 2 Select the Voice in the Utility Select display then press ENTER button 3 Select A D FX then press the ENTER button 4 Select InsA then press the ENTER button 5 Move the cursor to the Effect category then select the desired category by using the Data Dial DEC and INC buttons 6 Move the cursor to the Type then select the desired effect type by using the Data ...

Page 34: ...tions on inputting a character refer to the S90 XS S70 XS Owner s Manual Main Ctgry Main Category Sub Ctgry Sub Category Determines the Main Category and Sub Category of the Voice Category can be used as a keyword representing the characteristic of the Voice The appropriate setting makes it easy to find the desired Voice from a variety of Voices There are 17 Main Categories which indicate types of...

Page 35: ... longer pitch change time or a slow speed Settings 0 127 Porta Mode Portamento Mode Determines how Portamento is applied to your keyboard performance Settings fingered fulltime Porta Time Mode Portamento Time Mode Determines how the pitch changes in time Settings rate1 time1 rate2 time2 Porta Lgt Slope Portamento Legato Slope When the Mono Poly is set to mono legato playing may produce an unnatura...

Page 36: ...te icon shown in the settings indicates that one of the Arpeggio Types other than off is selected for the Arpeggio When the Arpeggio Effect Function button is set to ARP SELECT you can select one of Arp 1 Arp 5 via the Function buttons Settings Arp 1 Arp 5 Determines the item being edited will commonly affect all five Arpeggios assigned to each Voice Arp Sw Arpeggio Switch Determines whether Arpeg...

Page 37: ... note data in the Song will be aligned or determines to what beats in the Song the swing is applied The number shown at right of each value indicates the resolution of the quarter notes in clocks Settings 60 32nd note 80 16th note triplet 120 16th note 160 8th note triplet 240 8th note 320 1 4 note triplet 480 1 4 note Quantize Strngth Quantize Strength Sets the strength by which note events are p...

Page 38: ...e even if notes are held Settings off on Trigger Mode When this is set to gate pressing the note starts Arpeggio playback and releasing the note stops it When this is set to toggle pressing the note starts stops Arpeggio playback and releasing the note does not affect Arpeggio playback Normally this parameter should be set to gate Settings gate toggle NOTE The Trigger Mode toggle setting overcomes...

Page 39: ...io type Settings Refer to the Arpeggio Category List on page 7 Type Arpeggio Type Determines the desired Arpeggio Type number from the specified Category The number and name of the selected Arpeggio Type is shown at the second line on the display Refer to the Arpeggio Type List in Data List separate PDF documentation Settings off pre0001 6779 usr0001 0256 NOTE For details about how to use the Arpe...

Page 40: ... If insA B Prm 1 16 is shown instead of a clear name no function is assigned to that parameter NOTE When at least one of the Controller Set 1 6 Element Sw parameters is set to off and the Element related parameters are assigned to any of the Ctrl Set 1 6 Dest parameters an exclamation mark is shown at the beginning of the value for Ctrl Set 1 6 Src Ctrl Set 1 6 Dest and Ctrl Set 1 6 Depth This ind...

Page 41: ...t point each on The LFO resets with each note you play and starts a wave at the phase specified by the Phase parameter above 1st on The LFO resets with each note you play and starts a waveform at the phase specified by the Phase parameter above If you play a second note while the first is being played Note Off has not been received the LFO does not reset to the specified phase no synchronization w...

Page 42: ...on mark is shown at the beginning of the value for Ctrl Set 1 3 Dest and Ctrl Set 1 3 Depth This indicates that the function specified as destination is not applied to all the Elements LFO Set 1 3 Depth Determines the LFO Wave Depth Settings 0 127 LFO Set 1 3 Element Sw LFO Set 1 3 Element Switch Determines whether or not each Element is to be affected by the LFO on the S90 XS S70 XS Editor When s...

Page 43: ...ce Width for all Elements page 50 This parameter can be changed via the Knob directly Settings 64 0 63 FEG Attack Decay Release Depth FEG Attack Time Decay Time Release Time Depth Determines the FEG Filter Envelope Generator parameters for the Voice Using the Filter EG you can control the transition in tonal color Cutoff Frequency from the moment the sound starts to the moment the sound stops The ...

Page 44: ...ows you to control how wide or narrow the bandwidth is On the other hand the EQ shape of the High and Low band is the Shelving type which lets you attenuate boost the signal at frequencies above or below the specified Frequency setting Ins Connect Type Insertion Connection Type Determines the effect routing for Insertion Effects A and B The setting changes are shown on the diagram in the display g...

Page 45: ...for the specified element Settings thru through ins A Insertion A ins B Insertion B Ins A Insertion Effect A Ins B Insertion Effect B Vocoder Chorus Reverb When the cursor is located here pressing the ENTER button calls up the Effect Parameter display Switch Determines whether or not the Master Effect can be used This parameter cannot be selected from this display Category Type From the Category c...

Page 46: ...n the Data List separate PDF documentation XA Control Expanded Articulation Control Expanded Articulation XA is a special feature of the S90 XS S70 XS that provides greater performance flexibility and realism This parameter determines how the XA feature of the Element works Try setting this parameter referring to the five types of the XA Mode described below You can realize the desired sound depen...

Page 47: ...you have one Element sound when you play softly and have a different one sound when you play strongly If you specify the maximum value first and the minimum value second for example 93 to 34 then the velocity range covered will be 1 to 34 and 93 to 127 Settings 1 127 Note Limit Determines the lowest and highest notes of the keyboard range for each Element The selected Element will sound only when ...

Page 48: ...unds that do not need to be spaced in semitones such as pitched drum sounds in a Normal Voice Time Determines the Pitch EG transition time The Time parameters let you set the time between the adjoining points of the Level parameters below A higher value results in a longer time until reaching the next level Settings 0 127 Level Determines the level settings for the Pitch EG The Level parameters le...

Page 49: ...his is set to a negative value high velocities cause the pitch range to contract and low velocities cause it to expand When this is set to 0 the pitch envelope does not change no matter what the velocity Settings 64 0 63 EG Depth Curve EG Depth Velocity Sensitivity Curve The five curves determine how the pitch range will be generated according to the velocity strength with which you play notes on ...

Page 50: ...ettings will cause the Cutoff Frequency to rise the more softly you play the keyboard Settings 64 0 63 Distance Determines the distance between the two Cutoff frequencies for the Dual Filter types which feature two identical filters combined in parallel and the LPF12 BPF6 type When any of other filter types is selected this parameter is not available Settings 128 0 127 Resonance Width This paramet...

Page 51: ...ext the corresponding Time indicates the length of time for which the Level is held at the current setting A higher value results in a longer time until reaching the next level Settings 0 127 Level Determines the Filter EG transition time The Level parameters let you set the amount of the filter change at each point based on the cutoff frequency specified in the Filter Type display page 50 Setting...

Page 52: ...nsitivity Determines how the range of the cutoff frequency responds to velocity When this is set to a positive value high velocities cause the Filter EG range to expand and low velocities cause it to contract as shown below When this is set to a negative value high velocities cause the Filter EG range to contract and low velocities cause it to expand When this is set to 0 the Filter EG range does ...

Page 53: ...lay the keyboard A setting of 0 will cause the output level not to change Negative settings will cause the output level to rise the more softly you play the keyboard Settings 64 0 63 Level Velocity Curve Level Velocity Sensitivity Curve The five curves determine how the actual velocity will be generated according to the velocity strength with which you play notes on the keyboard The horizontal axi...

Page 54: ...aching the next level Settings 0 127 Level Determines the Level settings for the Amplitude EG The Level parameters let you set the amount of the transition at each point based on the level specified in the Level Pan display page 53 Settings 0 127 Time Vel Sens EG Time Velocity Sensitivity Determines how the Amplitude EG transition time speed responds to velocity or the strength with which the note...

Page 55: ...ilable only when the Half Damper parameter is set to on and you use the optional FC3 connected to the rear panel Settings 0 127 Time Key Follow Center Key EG Time Key Follow Sensitivity Center Key Determines the central note for the Time Key Follow When the Center Key note is played the Amplitude EG behaves according to its actual settings Settings C 2 G8 Time Key Follow EG Time Key Follow Sensiti...

Page 56: ...her value results in a longer delay time Settings 0 127 Fade in Time Determines the amount of time for the LFO effect to fade in after the Delay time has elapsed A higher value results in a slower fade in When set to 0 the LFO effect will not fade in and reach the maximum level immediately after the Delay time has elapsed Settings 0 127 P Mod Pitch Modulation Determines the amount depth by which t...

Page 57: ...nd Determines the center frequency of the higher EQ band Settings 503 8Hz 10 1kHz Low Gain This parameter is available only when the Type EQ Type parameter is set to 2 Band or P EQ When setting to 2 Band this determines the amount by which signals below the Low Freq will be boosted attenuated When setting to P EQ this determines the amount by which signals in the area of the center frequency will ...

Page 58: ... to all keys of the selected Drum Voice Same as the Name display in Normal Voice Common Edit page 34 Same as the Play Mode display in Normal Voice Common Edit page 34 The following settings are not available for Drum Voice Note Shift settings Mono Poly settings Key Assign mode settings Portamento settings Micro tuning settings Same as the General display in Normal Voice Common Edit See page 36 Sam...

Page 59: ...n the Key parameter Settings thru through Ins A Insertion A Ins B Insertion B Key Determines the Drum Key to be edited You can select the key by clicking the keyboard on the S90 XS S70 XS Editor The parameters Key Out Reverb Send Key Reverb Send and Chorus Send Key Chorus Send can be set for each Drum Key Settings C0 C6 Chorus Send Key Chorus Send Determines the level of the Drum Key sound the byp...

Page 60: ... note off message To allow playback of each instance of the same note set this to multi To allow playback of each instance of the same note set this to multi In general you should probably set this to multi especially for tambourine and cymbal sounds that you would want to ring out to their full decay when playing them multiple times in succession Please keep in mind that the multi setting consume...

Page 61: ...sh to apply a connected external effect to a specific drum instrument The setting here is available only when the Ins Effect Output parameter is set to thru Settings For details refer to the Output Select List page 68 of the Supplementary information Coarse Coarse Tuning Determines the pitch of each Drum Key in semitones Settings 48semi 0semi 48semi Fine Fine Tuning Determines the pitch of each Dr...

Page 62: ...d Settings L63 far left C center R63 far right Alternate Pan Determines the amount by which the sound is panned alternately left and right for each note you press assuming the pan position parameter above is set to center Higher values increase the width of the Pan range Settings L64 C R63 Random Pan Determines the amount by which the sound of the selected Drum Key is panned randomly left and righ...

Page 63: ...ing tools If you are editing a Voice but you have not stored it before switching to another Voice the edits you have made will be cleared If this happens you can use the Recall function to restore the Voice with your latest edits intact Press the ENTER button to execute the Recall This function lets you send your edited parameter settings for the currently selected Voice to a computer or another M...

Page 64: ...h Lead Analg Analog Digtl Digital H Hop Hip Hop Dance Arp Pads Synth Pad Choir Analg Analog Warm Brite Bright Choir Arp SyCmp Synth Comp Analg Analog Digtl Digital Fade Hook Arp CPerc Chromatic Percussion Malet Mallet Percussion Bell SynBl Synth Bell PDrum Pitched Drum Arp Dr Pc Drum Percussion Drums Perc Percussion Synth Arp Arpeggio S EFX Sound Effect Move Moving Ambie Ambient Natur Nature SciFi...

Page 65: ...ed in the Filter Type display page 50 of the Voice Element Edit LPF Low Pass Filter This is a Filter type that only passes signals below the Cutoff Frequency The sound can be brightened by raising the cutoff frequency of the filter On the other hand the sound can be darkened by lowering the cutoff frequency of the filter You can then use Resonance to add further character to the sound This filter ...

Page 66: ...ncy around which the audio signal is muted or eliminated The Band Elimination Filter has an opposite effect on the sound compared to the Band Pass Filter BEF12 BEF6 Dual Type Filter This type is a combination of two same filter types You can edit the distance between the two Cutoff Frequencies You can edit the distance between the two Cutoff Frequencies Dual LPF Two 12 dB oct low pass filters conn...

Page 67: ...toff Frequencies Setting example of Filter Scaling Here we ll show you the setting example of Filter Scaling in Filter Scale page 53 of the Voice Element Edit parameters For the settings shown in the example below the basic Cutoff frequency value is 127 and the various Cutoff Offset values at the selected Break Point settings change that basic value accordingly The Cutoff frequency changes in a li...

Page 68: ...ments for the signals Output Select is specified in several different places OSC Oscillator of the Drum Key Edit parameters on the S90 XS S70 XS Editor the Voice A D Out and A D FX display of the Utility parameters and Click Output Sel of the Utility General parameter The drum setting can be selected in the Multi Part Edit display of the Parts assigned to the Drum Voice To the edited Part the soun...

Page 69: ...ains 128 Performances in each of the User Banks 1 4 Selecting Performances is done in basically the same way as selecting Voices Refer to page 27 As in the Voice Play mode you can use the Category Search page 28 and Favorite Category page 28 functions in the Performance Play mode Switching a Part on off The Performance Play mode lets you turn the four Parts of the current Performance on or off as ...

Page 70: ... Using Knobs One of the more powerful performance features of the S90 XS S70 XS is its extensive set of real time controls especially the Knobs These let you adjust a variety of parameters for the current Performance such as effect depth attack release characteristics tonal color and others These real time controls can be used to change the sound as you play or to quickly edit and customize the Pe...

Page 71: ...ded Each Performance within a Bank is assigned to a Performance Number of 001 to 128 This format corresponds to the A H buttons and the Number 1 16 buttons The Performance Numbers and the corresponding Group Numbers are listed below 3 Category Main Category Sub Category Indicates the Category of the selected Performance Category consisting of Main Category and Sub Category is a keyword that indica...

Page 72: ... returns to the Performance Play display CAUTION When you execute the Store operation the settings for the destination memory will be overwritten Important data should always be saved to the internal flash memory or a USB storage device connected to the USB TO DEVICE terminal For details on operation refer to the Owner s Manual Mixing The Mixing display shows the information about each Part of the...

Page 73: ...top line of the dialog to the desired location Repeat this operation until the desired name is complete After completing the name press the ENTER button to actually enter the name or press the EXIT button to cancel naming and return to the original display Main Ctgry Main Category Sub Ctgry Sub Category Determines the Main Category and Sub Category of the Performance Category can be used as a keyw...

Page 74: ...essing the desired key Porta Sw Portamento Common Switch Porta Part 1 Sw Part 2 Sw Part 3 Sw Part 4 Sw Determines whether Portamento is applied to the current Performance or not You can determine the Portamento on off setting for each Part when the Portamento Common Switch is set to on The Portamento Switch of each Part is not available when the Portamento Common Switch is set to off is displayed ...

Page 75: ...essing the button alternates the lamp status between on and off When set to momentary pressing holding the button turns the lamp on and releasing the button turns the lamp off Settings momentary latch Cutoff Raises or lowers the cutoff frequency of the low pass filter to adjust the tone brilliance The sound can be brightened by raising the cutoff frequency and darkened or muffled by lowering it Th...

Page 76: ...e Q setting is available only for the Mid band which is a Peaking type EQ Peaking referring to the peak shape lets you attenuate boost a specific frequency and allows you to control how wide or narrow the bandwidth is On the other hand the EQ shape of the High and Low band is the Shelving type which lets you attenuate boost the signal at frequencies above or below the specified Frequency setting M...

Page 77: ...tings 0 127 4 Reverb Return Determines the Return level of the Reverb Effect This parameter can be changed via the Knob directly Settings 0 127 5 Reverb Pan Determines the pan position of the Reverb effect sound Settings L63 far left C center R63 far right 6 Chorus 7 Reverb 8 Master When the cursor is located here pressing the ENTER button calls up the Effect Parameter display Switch Determines wh...

Page 78: ...ameter can be changed via the Knob directly Settings L63 far left C center R63 far right Output Select Determines the output jack assignment for the A D Input part Settings See below Chorus Send Determines the Send level of the Audio Input Part signal sent to the Chorus effect The higher the value the more pronounced the Chorus This parameter can be changed via the Knob directly Settings 0 127 Rev...

Page 79: ...n be changed via the Knob directly Settings 0 127 Reverb Send Adjusts the Reverb send level for the A D Input Part The higher the value the more pronounced the Reverb This parameter can be changed via the Knob directly Settings 0 127 Dry Level Determines the level of each Part which has not been processed with the System Effects Reverb Chorus Settings 0 127 Output Select Sets the monitor output de...

Page 80: ...ect one of the Effect Types listed in the selected Category Settings Details about the Effect categories and the Effect types are described on page 16 NOTE The Category is not edited in the Reverb effect parameter display because there is only one Reverb category Preset This lets you call up pre programmed settings for each Effect type designed to be used for specific applications and situations Y...

Page 81: ...d off You can select the Voice corresponding to the current Part by pressing the CATEGORY SEARCH button Param with Voice Parameter with Voice Determines whether or not the following parameter settings of the selected Voice are copied from the Voice to the current Part when you change a Voice for the current Part individually Arpeggio settings Filter Cutoff Frequency Filter Resonance Amplitude EG F...

Page 82: ...semitones Settings 24 0 24 Detune Adjusts the tuning of the Part in 0 1 Hz increments Settings 12 8Hz 0Hz 12 7Hz PB Range Upper Pitch Bend Range Upper PB Range Lower Pitch Bend Range Lower Determines the maximum Pitch Bend range in semitones Setting the Upper parameter to 12 would result in a maximum pitch rise of one octave when the Pitch Bend wheel is moved upwards On the other hand a Lower sett...

Page 83: ...s applied to each Part or not Settings off on NOTE For Parts to which the Drum Voice is assigned this parameter is not available Porta Time Portamento Time Determines the pitch transition time Higher values result in a longer pitch change time or a slow speed Settings 0 127 NOTE For Parts to which the Drum Voice is assigned this parameter is not available Porta Mode Portamento Mode Determines how ...

Page 84: ...e Arpeggios assigned to each Voice Arp Sw Arpeggio Switch Determines whether Arpeggio is on or off This parameter is same as the Arp Select on the Arp Select display in the Voice Edit Settings off on Arp Hold Arpeggio Hold When this is set to on the Arpeggio cycles automatically even if you release your fingers from the keys and it continues to cycle until the next key is pressed Settings sync off...

Page 85: ...e For example if you set a value of 200 the playback time will be doubled tempo is halved On the other hand if you set a value of 50 the playback time will be halved and the tempo doubled Normal playback time is 100 Settings 50 66 75 100 133 150 200 Quantize Value Determines to what beats the note data in the Arpeggio will be aligned or determines to what beats in the Arpeggio the swing is applied...

Page 86: ...10 10 Loop When this is set to on the Arpeggio cycles while notes are held When this is set to off the Arpeggio plays only once even if notes are held Settings off on Trigger Mode When this is set to gate pressing the note starts Arpeggio playback and releasing the note stops it When this is set to toggle pressing the note starts stops Arpeggio playback and releasing the note does not affect Arpeg...

Page 87: ...will be set to 127 Settings 64 0 63 SFX Key on Ctrl Random SFX Key On Control When this is set to off the Random SFX special sound is played with the pre programmed velocity When this is set to on the Random SFX special sound is played with the velocity generated when the note is pressed Settings off on Determines the settings of the Arpeggio selected on the Arp Select Main Ctgry Main Category Sub...

Page 88: ...y page 50 of Voice Common Edit This parameter can be changed via the Knob directly Settings 64 0 63 FEG Attack Decay Release Depth FEG Attack Time Decay Time Release Time Depth AEG Attack Decay Sustain Release AEG Attack Time Decay Time Sustain Level Release Time Determines the basic EG settings both volume and filter for the selected Part The parameter values offset the same parameters of the ass...

Page 89: ...not available in the Performance mode NOTE If Control Change here is set to off Control Change related parameters are not available Settings off on Chorus Send Determines the Send level of the selected Part signal sent to the Chorus effect The higher the value the more pronounced the Chorus This parameter can be changed via the Slider directly Settings 0 127 Reverb Send Determines the Send level o...

Page 90: ...ber setting refer to page 137 Part This convenient operation lets you copy Common Edit and Part Edit settings of a certain Performance to the currently edited Performance This is useful if you are creating a Performance and wish to use some parameter settings of another Performance NOTE When this display is shown you can hear the original sound at copy source by pressing the EDIT button to call up...

Page 91: ...s to be copied from Reverb Chorus Master Effect and Master EQ NOTE Even when each of the Reverb and Chorus is set to on executing the Job does not copy the Send Level from the Voice to the Performance If you want to apply the same depth of the Reverb and Chorus as in the Voice mode to the copied Voice set the Reverb Send and Chorus Send in the Voice Output display of the Performance Part Edit mode...

Page 92: ... their Sub Categories to which the respective Performances of the S90 XS S70 XS belong Main Category Sub Category Rock Rock Pops Top40 Clsic Classic Rock Hard Hard Rock Cntry Country Blues Folk Balad Ballad Film R B R B Hip Hop HipHp Hip Hop Modrn Modern R B Clsic Classic R B Funk Elect Electronic Tekno Techno Trnce Trance House Dance Pop House D B Breakbeats D B Chill Chillout Ambient Jazz Swing ...

Page 93: ...ulti will be lost When you store the edited Multi be careful not to overwrite any important User Multis Multi Play In the Multi Play mode you can select and play any of the Multis Selecting a Program The S90 XS S70 XS features 128 specially programmed Multis stored to internal User Memory The Bank consists of eight Groups A to H each of which contains 16 Multi programs Selecting Multis is done in ...

Page 94: ...en stored a Completed message appears and operation returns to the Multi Play display CAUTION When you execute the Store operation the settings for the destination memory will be overwritten Important data should always be saved to the internal flash memory or a USB storage device connected to the USB TO DEVICE terminal For details on operation refer to the Owner s Manual Mixing The settings of th...

Page 95: ...ing you to enter the desired name The name can contain up to 20 characters Use the data dial and cursor buttons to select the desired character in the lower section of the dialog then use the INC or DEC button to move the cursor in the top line of the dialog to the desired location Repeat this operation until the desired name is complete After completing the name press the ENTER button to actually...

Page 96: ... note 160 8th note triplet 240 8th note 320 1 4 note triplet 480 1 4 note off A Func 1 Mode Assignable Function 1 Mode A Func 2 Mode Assignable Function 2 Mode Determines whether the ASSIGNABLE FUNCTION 1 and 2 buttons functions as a latch type or momentary type When set to latch pressing the button alternates the lamp status between on and off When set to momentary pressing holding the button tur...

Page 97: ...mentation Effect Parameter 1 16 The effect parameter differs depending on the currently selected effect type For details about the Effect parameters refer to page 19 For a complete list of the available Effect parameters for each Effect type refer to the Effect Type List in the Data List separate PDF documentation From this display you can apply five band equalization to all parts of the selected ...

Page 98: ...via the Knob directly Settings L63 far left C center R63 far right Output Select Determines the output jack assignment for the A D Input part Settings See below Chorus Send Determines the Send level of the Audio Input Part signal sent to the Chorus effect The higher the value the more pronounced the Chorus This parameter can be changed via the Knob directly Settings 0 127 Reverb Send Determines th...

Page 99: ...e Knob directly Settings 0 127 Dry Level Determines the level which has not been processed with the System Effects Reverb Chorus Settings 0 127 Output Select Determines the output destination Settings See below NOTE The Reverb Send and Chorus Send values are set to 0 and Dry Level is set to 127 when Output Select is not set to L R Ins A Insertion A Ins B Insertion B When the cursor is located here...

Page 100: ...you call up pre programmed settings for each Effect type designed to be used for specific applications and situations You can change how the sound is affected by the selected pre programmed settings NOTE For a list of the preset of each effect type see the Data List separate PDF documentation Effect Parameter 1 16 The effect parameter differs depending on the currently selected effect type For det...

Page 101: ...rned off You can select the Voice corresponding to the current Part by pressing the CATEGORY SEARCH button Param with Voice Parameter with Voice Determines whether or not the following parameter settings of the selected Voice are copied from the Voice to the current Part when you change a Voice for the current Part individually Arpeggio settings Filter Cutoff Frequency Filter Resonance Amplitude E...

Page 102: ...ft Adjusts the pitch of the Part in semitones Settings 24 0 24 Detune Adjusts the tuning of the Part in 0 1 Hz increments Settings 12 8Hz 0Hz 12 7Hz PB Range Upper Pitch Bend Range Upper PB Range Lower Pitch Bend Range Lower Determines the maximum Pitch Bend range in semitones Setting the Upper parameter to 12 would result in a maximum pitch rise of one octave when the Pitch Bend wheel is moved up...

Page 103: ...are output jack on the rear panel Settings L R asL R asL asR drum only Drum Voice Vel Sens Depth Velocity Sensitivity Depth Determines the degree to which the resulting volume of the tone generator responds to your playing strength The higher the value the more the volume changes in response to your playing strength as shown at the right When this is set to 0 the volume remains the same no matter ...

Page 104: ...a the HOLD 1 4 buttons on the panel Settings sync off see below off on NOTE You can obtain the same result by receiving the Control Change SUSTAIN Control 64 when Arp Sw is set to on Arp MIDI Out Sw Arpeggio MIDI Output Switch When this is set to on Arpeggio playback data is output from the MIDI terminal Settings off not output on output Arp Transmit Ch Arpeggio Transmit Channel Determines the MID...

Page 105: ...20 1 4 note triplet 480 1 4 note Quantize Strngth Quantize Strength Sets the strength by which note events are pulled toward the nearest quantize beats A setting of 100 produces exact timing set via the Quantize Value parameter above A setting of 0 results in no quantization A setting of 50 result that the note events are pulled to the half point between the 0 and 100 Settings 0 100 Swing Delays n...

Page 106: ...nce even if notes are held Settings off on Trigger Mode When this is set to gate pressing the note starts Arpeggio playback and releasing the note stops it When this is set to toggle pressing the note starts stops Arpeggio playback and releasing the note does not affect Arpeggio playback Normally this parameter should be set to gate Settings gate toggle NOTE The Trigger Mode toggle setting overcom...

Page 107: ...ndom SFX special sound is played with the velocity generated when the note is pressed Settings off on Determines the settings of the Arpeggio selected on the Arp Select Main Ctgry Main Category Sub Ctgry Sub Category Determines the Arpeggio Main Category and Sub Category including the desired Arpeggio type Settings See Category List in the Basic Structure page 7 Type Arpeggio Type Determines the d...

Page 108: ...t This parameter can be changed via the Knob directly Settings 64 0 63 FEG Attack Decay Release Depth FEG Attack Time Decay Time Release Time Depth AEG Attack Decay Sustain Release AEG Attack Time Decay Time Sustain Level Release Time Determines the basic EG settings both volume and filter for the selected Part The parameter values offset the same parameters of the assigned Element set in Voice El...

Page 109: ...t to the Chorus effect The higher the value the more pronounced the Chorus This parameter can be changed via the Slider directly Settings 0 127 Reverb Send Determines the Send level of the selected Part signal sent to the Reverb effect The higher the value the more pronounced the Reverb This parameter can be changed via the Slider directly Settings 0 127 Dry Level Determines the level of the selec...

Page 110: ...ct display Part This convenient operation lets you copy Common Edit and Part Edit settings of a certain Multi to the currently edited Multi This is useful if you are creating a Multi and wish to use some parameter settings of another Multi NOTE When this display is shown you can hear the original sound at copy source by pressing the EDIT button to call up the Compare mode Pressing the EDIT button ...

Page 111: ...Multi This would come in handy when a certain Performance has effect settings that you want to use in your Multi NOTE When this display is shown you can hear the original sound at copy source by pressing the EDIT button to call up the Compare mode Pressing the EDIT button again will exit from the Compare mode 1 Source Performance Determines the Bank and the Performance number to be copied Settings...

Page 112: ...Select the Chain Step number with the Cursor U D buttons then select a Multi using the Data Dial or the DEC INC buttons 2 Selecting a MIDI audio file Select a Chain Step number and press the ENTER button to call up the File Load display You can select a MIDI audio file stored to internal flash memory or the external USB storage device After selecting the file press the EXIT button to return to the...

Page 113: ...y CH 9 16 display INT Internal Switch Determines whether musical performance data of each track is sent to the internal tone generator block or not If you use the internal tone generator move the cursor to the desired channel then enter the checkmark with the INC button When removing the checkmark with the DEC button data over the specified MIDI channel will not affect the internal tone generator ...

Page 114: ...urrent Chain Step and increases the numbers of all the already programmed steps after the cursor location by 1 NOTE When a value other than skip is assigned to the Chain Step number 100 last step you cannot insert a new Chain Step DELETE Deletes the currently selected Chain Step and decreases the numbers of all the already programmed steps after the cursor location by 1 When deleting the last Chai...

Page 115: ...ps A to H each of which contains 16 Master programs Selecting a Master is done in basically the same way as selecting Voices To call up the desired Master program select the appropriate Group and Number 1 Master Program Number Group Number 2 Master Program Name 3 Mode 4 Program Number Group Number 5 Category Sub Category 6 Arpeggio Tempo 7 On off status of the Insertion Effect Chorus Reverb Master...

Page 116: ...al different channels in addition to the internal Voices of this synthesizer itself letting you use the S90 XS S70 XS to effectively do the work of several keyboards There are two types of Master Edit displays those for editing parameters common to all eight Zones and those for editing individual Zones Common Edit Lets you edit the parameters common to all Zones Specify the name for the Master The...

Page 117: ...When the Zone Switch is set to on the Knobs and Sliders work as the Zone controllers when set to off they work as the controller selected by the Knob Slider Functions When set to on the Knob Function lamps and the Slider Function lamps go out then the Knobs and Sliders work as the Zone controller When the Knobs and Sliders work as the Zone controller you can determine which functions will be assig...

Page 118: ...tted off Int Bank Sel Internal Bank Select Ext Bank Sel External Bank Select Int PC Internal Program Change Ext PC External Program Change From this display you can determine whether or not MIDI messages controlling Voice selection for each Zone are transmitted to the internal external tone generator Settings on off NOTE When the Ins Sw Ext Sw is set to off none of these parameters is available Vo...

Page 119: ... set the Note directly from the Keyboard by holding down the SHIFT button and pressing the desired key From this display you can make the Voice related settings for each Zone which will be transmitted as MIDI messages automatically when the Master is selected Bank MSB Bank Select MSB Bank LSB Bank Select LSB PC Program Change Number Determines the Voice related settings for each Zone in the select...

Page 120: ...ransmitted to an external internal tone generator when you use the Knobs and Sliders for each Zone NOTE This setting will be in effect only when the Knob Slider parameter in Zone Switch is set to on In other words the Knobs and Sliders work as Zone controllers when the Knob Function lamps and the Slider Function lamps go out Knob Slider Determines which Control Change numbers are transmitted when ...

Page 121: ...s for the selected Master are initialized When set to on other parameters in this display cannot be set Settings on transmitted off 2 Common Determines whether or not all Common parameter settings for the selected Master are initialized When set to on executing the Job initializes all the parameter settings of Common Edit Settings on transmitted off 3 Zone Determines whether or not all Zone parame...

Page 122: ...transmit channels of Zone 1 and Zone 2 respectively when the Initialize Type is set to layer or split Settings 1 16 7 Split Point Determines the Split Point that divides the keyboard into the Zone 1 and Zone 2 when the Initialize Type is set to split By setting this parameter the Note Limit High of Zone 1 is automatically set to the note one semitone lower than the Split Point set here and the Not...

Page 123: ...er software their normal functions are disabled Press this button again to exit from the Remote mode 1 The DAW software name Shows the DAW software name which is set in the Utility mode page 143 2 Control Template Number Template Name Up to fifty Control Templates can be saved in the S90 XS S70 XS Use the S90 XS S70 XS Remote Editor for editing the Control Template For details refer to the S90 XS ...

Page 124: ... function can be assigned to each Slider The assigned function will be shown on the display when pressing the Slider Function button When pressing the Slider Function button the VOLUME lamp will flash NOTE Note that you need to use the S90 XS S70 XS Remote Editor to assign functions to the Knobs and Sliders For details on operation refer to the S90 XS S70 XS Remote Editor Owner s Manual NOTE When ...

Page 125: ...hange messages via the Knobs when the Knob Out Select is set to CC in the Control Template Program Change message when the PC Change Mode is set to PC or PC Remote in the Remote display of the Utility mode Port 2 Messages only for Remote Control via operation of the panel of the instrument Remote messages via the Knobs when the Knob Out Select is set to Remote in the Control Template Program Chang...

Page 126: ... particular data File size This refers to the memory amount of the file The file size is determined by the amount of data saved to the file Generally the size of an audio file including the Waveforms is much larger than the size of a MIDI file File sizes are indicated in conventional computer terms by B byte KB kilobyte MB megabyte and GB gigabyte 1KB is equivalent to 1024 bytes 1MB is equivalent ...

Page 127: ... file and use the EXIT button to go back to the parent directory If the ENTER button or the Cursor R button is pressed when cursor is at the NEW FILE in the top of each directory the file type selection dialog will be displayed Select a file type and press the ENTER button to call up the Naming display After naming the file press the ENTER button to display the confirmation display Press the ENTER...

Page 128: ...hen Voice data and Performance data are loaded you can select the Load source and Load destination of the Bank On the Load source display select whether all the Voices of the Bank are loaded or just a specific program Move the cursor to the desired Bank to be loaded then press the ENTER button to call up the Load destination display Press the Cursor R button on the Load source display to call up t...

Page 129: ...the User Voice data from S90 XS S70 XS Editor files The procedure and parameters for loading are the same as the loading All Voice of the All data You can load All Arp files saved on the MOTIF XS Only loading all of the User Arpeggio data is available This is the same function as selecting All Arp when loading the All data You can load audio files wav aif and Standard MIDI Files to add to the requ...

Page 130: ...ed Creates a new directory in the current directory Enter the directory name in the Naming dialog The name can contain up to 20 characters When selecting a storage device this parameter is not shown Formats the current USB storage device or the internal flash memory NOTE You cannot change the name for the volume label of the internal flash memory internal NOTE The file system is FAT32 when formatt...

Page 131: ...r Level Determines the signal level at which recording will begin For best results set this as low as possible to capture the entire signal but not so low as to record unwanted noise Press the ENTER button to call up the Record Standby display When manual is selected pressing the ENTER button starts recording immediately Settings manual 1 127 Recordable Time Indication only Indicates the available...

Page 132: ...isplay NOTE If you try to play an unavailable audio file an error message appears The display is shown during playback of the audio file At the top of this display the file name is shown At the bottom of this display the total time and the time of the current playback position of the audio file are shown as both numeric values and status bars At the right section of this display the playback level...

Page 133: ...e S90 XS S70 XS s overall sound You can adjust the tuning in cent increments Settings 102 4 cents 414 7Hz 0 cents 440 0Hz 102 3 cents 466 8Hz L R Gain Determines the output gain of the OUTPUT L MONO and R jacks Settings 0dB 6dB Asgn L R Gain Assign L R Gain Determines the output gain of the ASSIGNABLE OUT L and R jacks Settings 0dB 6dB Kbd Octave Keyboard Octave Determines the amount in octaves by...

Page 134: ...nb Sldr Disp Time Knob Slider Display Time Determines whether or not operating one of the Knobs or Sliders will cause the Knob popup or Slider popup to appear Settings off 1 sec 1 5 sec 2 sec 3 sec 4 sec 5 sec keep Knb Sldr Func Disp Sw Knob Slider Function Display Switch Determines whether or not pressing the Knob Function button or Slider Function button will cause the Knob Function popup page 2...

Page 135: ...by pressing the STORE button before turning the power off Please keep in mind that the Utility settings will be lost if you turn off the power without executing the Store operation LCD Mode Switches the backlight of the LCD Settings normal reverse Click Sw Click Switch Switches the click metronome sound on off This parameter can be set also by holding the SHIFT button and pressing the START STOP b...

Page 136: ...tput Sel Click Output Select Determines the output destination of the click metronome sound Settings L R asL R asL asR Determines the parameters for the Performance Creator LAYER SPLIT DRUM ASSIGN buttons Type Determines which Voice is assigned first when using the Performance Creator When manual is selected the Voice specified as Bank Number below is assigned When random is selected a Voice is as...

Page 137: ...n be set in the Voice display page 101 of Multi Part Edit MIDI In Out Determines which physical output input terminal s will be used for transmitting receiving MIDI data Settings MIDI USB NOTE When a USB cable is not connected to the S90 XS S70 XS the MIDI terminal will be automatically used for transmitting receiving MIDI data even if this parameter is set to USB MIDI Sync Determines whether Arpe...

Page 138: ... this is set to reset the controllers are reset to the default states below Settings hold reset If you select reset the controllers will be reset to the following states positions Receive Bulk Determines whether or not Bulk Dump data from the DAW software or the external MIDI devices can be received Settings protect not received on received Bulk Interval Determines the interval time of the Bulk Du...

Page 139: ...ontroller Settings off 1 95 FC 1 Ctrl No Foot Controller 1 Control Number FC 2 Ctrl No Foot Controller 2 Control Number Determines the Control Change number which this instrument recognizes as operation of the Foot Controller 1 2 Settings off 1 95 FS Ctrl No Footswitch Control Number Determines the Control Change number which this instrument recognizes as operation of the Footswitch Settings off 1...

Page 140: ...ers applied to the entire Voice mode From this display you can make the MIDI settings for the Arpeggio in the Voice mode Arp MIDI Out Sw Arpeggio MIDI Output Switch Determines whether Arpeggio playback data in the Voice mode is output to the external devices as MIDI messages When this is set to on the data is output Settings off on Arp Transmit Ch Arpeggio Transmit Channel Determines the MIDI tran...

Page 141: ...ertion Connection Type Determines the effect routing for Insertion Effects A and B when the cursor is located around the Ins A B The setting changes are shown on the diagram in the display giving you a clear picture of how the signal is routed The parameter name and value are shown at the top of the display Settings ins A B ins B A Chorus Send Determines the level sent to the Chorus Effect The hig...

Page 142: ...pending on the currently selected effect type For details about the Effect parameters refer to page 19 For a complete list of the available Effect parameters for each Effect type refer to the Effect Type List in the Data List separate PDF documentation Determines Master Effect parameters in the Voice mode The settings here affect all Voices Switch Determines whether the Master Effect is applied to...

Page 143: ...y Slider Mode Determines how the parameter value is affected when you operate the Slider Settings catch jump Prog Change Mode Program Change Mode Determines what messages will be transmitted to the computer when you operate the DEC INC buttons or data dial When PC is selected Program Change messages will be transmitted via MIDI Port 1 When remote is selected Remote Control messages will be transmi...

Page 144: ... Sync Setup 1 3 Clock Out Setup 1 3 Arp MIDI Out Sw Adjusts each value of the Quick Setup 1 3 Settings See below Quick Setup dialog This dialog allows you to execute the Quick Setup by selecting the Quick Setup Number and pressing the ENTER button 1 Quick Setup Number This parameter lets you select three types of settings registered to Quick Setup Three types of the Initial Settings are shown belo...

Page 145: ...s User memory page 24 to the factory default settings Factory Set Please note that the setting of the Power On Auto Factory Set on this display will be stored automatically by executing Factory Set CAUTION When you restore the factory default settings the internal flash memory as well as the internal User memory data all the User Voices Multis and system settings in the Utility you created will be...

Page 146: ...ion transmits its broadcasts over a specific channel Your home TV set receives many different programs simultaneously from several TV stations and you select the appropriate channel to watch the desired program MIDI operates on the same basic principle The transmitting instrument sends MIDI data on a specific MIDI channel MIDI Transmit Channel via a single MIDI cable to the receiving instrument If...

Page 147: ...he various types of MIDI messages which this synthesizer can recognize transmit The messages transmitted recognized by this synthesizer are shown in the MIDI Data Format and MIDI Implementation Chart of the Data List separate PDF document Channel messages contain data related to the performance on the keyboard for the specific channel Note ON OFF Messages which are generated when the keyboard is p...

Page 148: ...rt during performance Setting the value to 127 produces maximum volume and 0 results in volume off This parameter produces volume variations during playback Hold1 Control 64 Messages which control sustain on off Notes playing when the pedal is pressed will be sustained Values between 64 127 turn the sustain on while values between 0 63 turn the sustain off Portamento Control 65 Messages which cont...

Page 149: ... the send level for the Chorus effect Data Increment Control 96 Data Decrement Control 97 Messages which increase or decrease the MSB value of pitch bend sensitivity fine tune or coarse tune in steps of 1 You will need to assign one of those parameters using the RPN in the external device in advance RPN LSB Registered Parameter Number LSB Control 100 RPN MSB Registered Parameter Number MSB Control...

Page 150: ...hich voice to select for each Part With a combination of Bank Select you can select not only basic voice numbers but also variation voice bank numbers For a list of the Voices see the Data List separate PDF document NOTE When you specify a program change as a number in the range of 0 127 specify a number that is one less than the program number listed in the Voice List For example to specify progr...

Page 151: ... each receive channel of Parts 1 16 in a Multi will be assigned to 1 16 F0 7E 7F 09 01 F7 Hexadecimal NOTE Make sure that the interval between this message and the first note data of the song is at least a quarter note or greater in length MIDI Master Volume When received the Volume MSB will be effective for the System Parameter mm MSB appropriate volume value ll LSB ignored F0 7F 7F 04 01 ll mm F...

Page 152: ...nnot be transmitted received since the device number is off Device number mismatch Bulk data cannot be transmitted received since the device numbers don t match Directory is not empty You have attempted to delete a folder that contains data Disk or memory is full The external storage device is full and no more data can be saved Use a new external storage device or make space by erasing unwanted da...

Page 153: ...s when the Part switches of all Parts are set to on and the Split function used Part x for the Split Part in the Performance mode Please stop Audio Play Rec The operation you have attempted to execute cannot be done during Audio Rec Play recording or playback Please stop sequencer The operation you have attempted to execute cannot be done during SEQ PLAY playback Save Audio Rec file Confirming whe...

Page 154: ...ol set to OFF If this is set to off the internal tone generator will not sound UTILITY MIDI Local Control page 137 Are the MIDI volume or MIDI expression settings too low when using the external controller Are the effect and filter settings appropriate If you are using the filter try changing the cutoff frequency Some cutoff settings may filter out all of the sound VOICE EDIT Effect page 44 VOICE ...

Page 155: ...eive channel of each Part in the Multi set appropriately MULTI SEQ PLAY selecting Multi mode EDIT Part selection Voice Receive Ch page 101 When the Performance Multi produces no sound is the Arpeggio Play Only parameter of each Part turned on PERFORM EDIT Part selection Voice Arp Play Only page 81 MULTI SEQ PLAY selecting Multi mode EDIT Part selection Voice Arp Play Only page 101 No sound from th...

Page 156: ...g Multi mode EDIT Common Effect Master page 96 Are the filter settings appropriate Excessively high filter resonance settings can cause distortion VOICE EDIT Filter EG page 43 PERFORM EDIT Common Filter EG page 75 PERFORM EDIT Part selection Filter EG page 88 MULTI SEQ PLAY selecting Multi mode EDIT Part selection Filter EG page 108 Are any of the following volume parameters set so high that clipp...

Page 157: ...ORUS Knobs Sliders been turned fully to the minimum Have any or all of the effect types been set to thru or off Is the EFFECT ON OFF parameter of each Effect set to OFF When this occurs in the Performance Multi mode check whether the Insertion Switch Ins Effect Sw parameters are set properly or not PERFORM EDIT Part selection FX Send Ins Effect Sw page 89 MULTI SEQ PLAY selecting Multi mode EDIT P...

Page 158: ...rp Edit Velocity Limit Lo Hi page 103 When this situation occurs in the Performance Multi mode check the Arpeggio Switch parameter PERFORM EDIT Part selection Arpeggio Arp Edit Arp Sw page 84 MULTI SEQ PLAY selecting Multi mode EDIT Part selection Arpeggio Arp Edit Arp Sw page 104 Cannot stop the Arpeggio When Arpeggio playback does not stop even when you release the key set the Arpeggio Hold para...

Page 159: ... the data was saved with the Bulk Dump function of the S90 XS S70 XS you need to set the Device Number to the same number before Bulk Dump transmission UTILITY MIDI Device No page 138 When transmission does not work properly is the device number of the MIDI instrument connected to the S90 XS S70 XS set to match the Device Number Parameter in the Utility mode UTILITY MIDI Device No page 138 Cannot ...

Page 160: ... G Pro Audio Digital Musical Instrument Division Yamaha Corporation 2009 Yamaha Corporation 906MW B0 Yamaha Web Site English only http www yamahasynth com Yamaha Manual Library http www yamaha co jp manual ...

Reviews: