q
Read this manual carefully before operating this vehicle.
OWNER’S MANUAL
WR25RK
WR25RKC
2CF-28199-16
LIT-11626-32-30
2CF-9-16_E0_Hyoshi.indd 1
2018/06/27 13:15:03
Downloaded from
ManualsNet.com
search engine
Page 1: ...ad this manual carefully before operating this vehicle OWNER S MANUAL WR25RK WR25RKC 2CF 28199 16 LIT 11626 32 30 2CF 9 16_E0_Hyoshi indd 1 2018 06 27 13 15 03 Downloaded from ManualsNet com search en...
Page 2: ...To minimize exposure avoid breathing exhaust do not idle the engine except as necessary service your vehicle in a well ventilated area and wear gloves or wash your hands frequently when servicing your...
Page 3: ...in these high standards it is important that you and your Yamaha dealer pay close attention to the recommended maintenance schedules and operating instructions contained within this manual Yamaha cont...
Page 4: ...ersonal injury hazards Obey all safety messages that follow this symbol to avoid possible injury or death A WARNING indicates a hazardous situation which if not avoided could result in death or seriou...
Page 5: ...r Corporation U S A 1st edition July 2018 All rights reserved Any reprinting or unauthorized use without the written permission of Yamaha Motor Corporation U S A is expressly prohibited Printed in Jap...
Page 6: ...and lubrication chart 7 5 Removing and installing panels 7 9 Checking the spark plug 7 12 Canister for California 7 13 Engine oil 7 13 Coolant 7 16 Cleaning the air filter element and check hose 7 17...
Page 7: ...Troubleshooting charts 7 43 Motorcycle care and storage 8 1 Matte color caution 8 1 Care 8 1 Storage 8 3 Specifications 9 1 Consumer information 10 1 Identification numbers 10 1 Reporting safety defe...
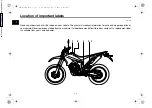
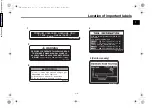
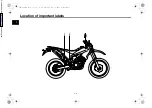
Page 8: ...r vehicle They contain important information for safe and proper operation of your vehicle Never remove any labels from your vehicle If a label becomes difficult to read or comes off a replacement lab...
Page 9: ...2C 21668 00 WARNING This unit contains high pressure nitrogen gas Mishandling can cause explosion Read owner s manual for instructions Do not incinerate puncture or open 4AA 22259 80 PREMIUM UNLEADED...
Page 10: ...Location of important labels 1 3 1 2 3 4 5 6 7 8 9 10 11 12 2 1 2CF 9 16_E0 book 3 Downloaded from ManualsNet com search engine...
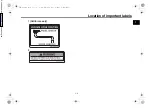
Page 11: ...Location of important labels 1 4 1 2 3 4 5 6 7 8 9 10 11 12 2 1 California only 2CF 9 16_E0 book 4 Downloaded from ManualsNet com search engine...
Page 12: ...eases the possibility of an accident or equipment damage See page 5 1 for a list of pre operation checks This motorcycle is designed to car ry the operator and a passenger The failure of motorists to...
Page 13: ...the preven tion or reduction of head injuries Always wear an approved helmet Wear a face shield or goggles Wind in your unprotected eyes could contribute to an impairment of vision that could delay s...
Page 14: ...e sure to distrib ute the weight as evenly as possi ble on both sides of the motorcycle to minimize imbalance or instabili ty Shifting weights can create a sud den imbalance Make sure that ac cessorie...
Page 15: ...rk area they must be as lightweight as possible and should be kept to a minimum Bulky or large accessories may seriously affect the stability of the motorcycle due to aerody namic effects Wind may at...
Page 16: ...ached to solid parts of the motorcycle such as the frame or upper front fork triple clamp and not for example to rubber mount ed handlebars or turn signals or parts that could break Choose the locatio...
Page 17: ...page 4 14 2 Coolant reservoir page 7 16 3 Compression damping force adjuster page 4 14 4 Battery page 7 34 5 Owner s tool kit page 7 2 6 Helmet holder page 4 14 7 Shift pedal page 4 10 8 Fuses page 7...
Page 18: ...ir page 7 27 3 Air filter element page 7 17 4 Rear brake light switch page 7 25 5 Fuel tank cap page 4 11 6 Bleed screw page 4 16 7 Engine oil filler cap page 7 13 8 Engine oil level check window page...
Page 19: ...r page 4 9 2 Left handlebar switches page 4 8 3 Main switch steering lock page 4 1 4 Multi function display page 4 3 5 Front brake fluid reservoir page 7 27 6 Right handlebar switches page 4 8 7 Brake...
Page 20: ...il the key is turned to OFF even if the engine stalls EAU10662 OFF All electrical systems are off The key can be removed WARNING EWA10062 Never turn the key to OFF or LOCK while the vehicle is moving...
Page 21: ...Imp gal When this occurs refuel as soon as possible The electrical circuit of the warning light can be checked by turning the key to ON The warning light should come on for a few seconds and then go...
Page 22: ...e electrical circuit monitoring the engine If this oc curs have a Yamaha dealer check the self diagnosis system See page 4 8 for an explanation of the self diagnosis device The electrical circuit of t...
Page 23: ...ometer and odometer tripmeter displays be tween kilometers and miles press the SELECT 2 button until the distance units change Speedometer The speedometer shows the vehicle s traveling speed Basic mod...
Page 24: ...on of the ve hicle If the fuel level warning light comes on while riding in the measurement mode change to the basic mode and push the SELECT 2 button to display the fuel reserve tripmeter TIP To chan...
Page 25: ...prior time Changing from the basic mode to the measurement mode With the odometer selected push the SELECT 1 button and SELECT 2 button together for at least two seconds to change to the measurement...
Page 26: ...ehicle is stopped To stop and or resume counting repeat steps 3 and 4 Measurement mode for calibrating the distance compensation tripme ter s reading The distance compensation tripmeter is a feature i...
Page 27: ...Reset the distance compensation tripmeter and the stopwatch to zero by pushing the RESET but ton for at least two seconds Self diagnosis device This model is equipped with a self diag nosis device fo...
Page 28: ...n the vehicle overturns or when the throttle cable is stuck EAU12713 Start switch Push this switch to crank the engine with the starter See page 6 1 for start ing instructions prior to starting the en...
Page 29: ...mesh transmission equipped on this motorcycle EAU12892 Brake lever The brake lever is located on the right side of the handlebar To apply the front brake pull the lever toward the throttle grip EAU12...
Page 30: ...zard EAU13222 Fuel Make sure there is sufficient gasoline in the tank WARNING EWA10882 Gasoline and gasoline vapors are extremely flammable To avoid fires and explosions and to reduce the risk of inju...
Page 31: ...ings as well as to the exhaust system Your Yamaha engine has been de signed to use premium unleaded gaso line with a pump octane number R M 2 of 91 or higher or a research octane number of 95 or highe...
Page 32: ...haust system Make sure that the exhaust sys tem has cooled down before do ing any maintenance work Do not allow the engine to idle more than a few minutes Long idling can cause a build up of heat NOTI...
Page 33: ...t fork WARNING EWA10181 Always adjust both fork legs equal ly otherwise poor handling and loss of stability may result This front fork is equipped with rebound damping force adjusting screws and compr...
Page 34: ...a damping force adjusting mechanism may not exactly match the above spec ifications due to small differences in production the actual number of clicks 1 Rebound damping force adjusting screw Rebound d...
Page 35: ...rough condi tions the air temperature and pressure in the front fork will rise This will in crease the spring preload and harden the front suspension If this occurs bleed the front fork as follows 1...
Page 36: ...bound damping force To increase the rebound damping force and thereby harden the rebound damp ing turn the adjusting knob in direction a To decrease the rebound damping force and thereby soften the re...
Page 37: ...ng performance Do not dispose of a damaged or worn out shock absorber as sembly yourself Take the shock absorber assembly to a Yamaha dealer for any service EAU41942 EXUP system This model is equipped...
Page 38: ...d distract the operator resulting in a possible loss of control Yamaha s ignition circuit cut off system has been designed to assist the operator in fulfilling the respon sibility of raising the sides...
Page 39: ...gine has stalled 10 Move the sidestand up 11 Pull the clutch lever 12 Push the start switch Does the engine start The system is OK The motorcycle can be ridden YES NO YES NO YES NO The neutral switch...
Page 40: ...using this vehicle check the following points ITEM CHECKS PAGE Fuel Check fuel level in fuel tank Refuel if necessary Check fuel line for leakage 4 11 Engine oil Check oil level in engine If necessar...
Page 41: ...icate cable and grip housing 7 20 7 30 Control cables Make sure that operation is smooth Lubricate if necessary 7 30 Drive chain Check chain slack Adjust if necessary Check chain condition Lubricate i...
Page 42: ...erly tightened Tighten if necessary Instruments lights signals and switches Check operation Correct if necessary Sidestand switch Check operation of ignition circuit cut off system If system is not wo...
Page 43: ...ne stops automatically if left idling for 20 minutes In this case the display will indicate error code 70 but this is not a malfunction Push the start switch to clear the error code and to restart the...
Page 44: ...ustration TIP To shift the transmission into the neu tral position press the shift pedal down repeatedly until it reaches the end of its travel and then slightly raise it NOTICE ECA10261 Even with the...
Page 45: ...The recommended shift points during acceleration and deceleration are shown in the table below EAU16842 Engine break in There is never a more important period in the life of your engine than the perio...
Page 46: ...g When parking stop the engine and then remove the key from the main switch WARNING EWA10312 Since the engine and exhaust system can become very hot park in a place where pedestri ans or children are...
Page 47: ...e when performing maintenance unless otherwise specified A running engine has moving parts that can catch on body parts or clothing and electrical parts that can cause shocks or fires Running the engi...
Page 48: ...the owner s tool kit are intended to assist you in the performance of preventive maintenance and minor repairs How ever additional tools such as a torque wrench may be necessary to perform certain mai...
Page 49: ...or 12 months 10000 mi 16000 km or 18 months 13000 mi 21000 km or 24 months 16000 mi 26000 km or 30 months 1 Fuel line Check fuel hoses for cracks or damage Replace if necessary 2 Spark plug Check cond...
Page 50: ...induction system Check the air cut off valve reed valve and hose for damage Replace any damaged parts No ITEM ROUTINE INITIAL ODOMETER READINGS 600 mi 1000 km or 1 month 4000 mi 6000 km or 6 months 70...
Page 51: ...ck operation fluid level and for fluid leakage Adjust brake lever free play and replace brake pads if necessary 4 Rear brake Check operation fluid level and for fluid leakage Replace brake pads if nec...
Page 52: ...s Check all chassis fitting and fasteners Correct if necessary 14 Brake lever pivot shaft Apply silicone grease lightly 15 Brake pedal pivot shaft Apply lithium soap based grease lightly 16 Clutch lev...
Page 53: ...nd rear brake switches Check operation 26 Control cables Apply Yamaha cable lubricant or other suitable cable lubricant thoroughly 27 Throttle grip Check operation Check throttle grip free play and ad...
Page 54: ...disassembling the brake master cylinders and calipers always change the fluid Regularly check the brake fluid levels and fill the reservoirs as required Every two years replace the internal component...
Page 55: ...of the maintenance jobs described in this chapter Refer to this section each time a panel needs to be removed and installed EAU45132 Panel A To remove the panel 1 Remove the seat See page 4 13 2 Remov...
Page 56: ...posi tion and then install the collars and bolts 2 Install the seat Panel B To remove the panel 1 Remove the seat See page 4 13 2 Remove the bolt and then remove the panel as shown To install the pan...
Page 57: ...nel in the original position and then install the bolts Panel D To remove the panel 1 Remove the seat See page 4 13 2 Remove the bolt and washer and then remove the panel as shown To install the panel...
Page 58: ...s it should be replaced Before installing a spark plug the spark plug gap should be measured with a wire thickness gauge and if necessary adjusted to specification Clean the surface of the spark plug...
Page 59: ...also lubricates the clutch do not mix any chemical additives Do not use oils with a diesel speci fication of CD or oils of a high er quality than specified In addition do not use oils labeled ENERGY C...
Page 60: ...engine 3 Remove the engine oil filler cap and then the engine oil drain bolt and gasket TIP Skip to step 8 if not replacing the oil fil ter element 4 Remove the oil filter element cover by removing th...
Page 61: ...not flow out after 1 minute stop the engine immediately Have your Yamaha dealer inspect the vehicle before further use ECA26130 13 Tighten the bleed bolt to the spec ified torque 14 For several minute...
Page 62: ...WARNING Remove only the coolant reservoir cap Never at tempt to remove the radiator cap when the engine is hot EWA15162 5 Add coolant to the maximum level mark NOTICE If coolant is not available use d...
Page 63: ...ly if you are riding in unusually wet or dusty areas In addition the air filter check hose must be frequently checked and cleaned if necessary To clean the air filter element 1 Remove panel B See page...
Page 64: ...air filter element into the air filter case NOTICE Make sure that the air filter element is prop erly seated in the air filter case The engine should never be op erated without the air filter ele men...
Page 65: ...then remove the gasket 3 Tap the tailpipe lightly and then use a wire brush to remove any carbon deposits from the spark ar rester portion of the tailpipe and in side of the tailpipe housing 4 Instal...
Page 66: ...g screw To increase the engine idling speed turn the screw in di rection a To decrease the en gine idling speed turn the screw in direction b TIP If the specified idling speed cannot be obtained as de...
Page 67: ...i fied tires Tire air pressure The tire air pressure should be checked and if necessary adjusted before each ride WARNING EWA10504 Operation of this vehicle with im proper tire pressure may cause se v...
Page 68: ...ire since the tire surface must first be broken in for it to develop its optimal characteristics Tire information This model is equipped with tube tires Tires age even if they have not been used or ha...
Page 69: ...the tire or tube has been re placed An unbalanced wheel can result in adverse handling charac teristics and shortened tire life WARNING EWA10611 The wheels on this model are not de signed for use wit...
Page 70: ...turn the adjusting nut in direction b 7 Tighten the locknut at the clutch cable and then slide the rubber cover to its original position 8 Tighten the locknut at the clutch le ver and then slide the r...
Page 71: ...the braking performance which may result in loss of con trol and an accident EAU44821 Checking the shift pedal The operation of the shift pedal should be checked before each ride If opera tion is not...
Page 72: ...e brake pad wear check the wear indicator grooves If a brake pad has worn to the point that the wear indicator grooves have almost disap peared have a Yamaha dealer replace the brake pads as a set EAU...
Page 73: ...vel goes down suddenly have a Yamaha dealer check the cause before further rid ing WARNING EWA15991 Improper maintenance can result in loss of braking ability Observe these precautions Insufficient br...
Page 74: ...ift the transmission into the neu tral position 3 Push up on the drive chain at the center point between the chain tensioner and the chain support mounting bolt 4 Measure distance A between the swinga...
Page 75: ...nd lubricated at the intervals specified in the periodic maintenance and lubrica tion chart otherwise it will quickly wear out especially when riding in dusty or wet areas Service the drive chain as f...
Page 76: ...prevent unsafe condi tions EWA10712 EAU23115 Checking and lubricating the throttle grip and cable The operation of the throttle grip should be checked before each ride In addi tion the cable should b...
Page 77: ...ould be lu bricated if necessary Brake lever Clutch lever EAU23185 Checking and lubricating the brake pedal The operation of the brake pedal should be checked before each ride and the pedal pivot shou...
Page 78: ...in the periodic maintenance and lubrication chart EAU23273 Checking the front fork The condition and operation of the front fork must be checked as follows at the intervals specified in the periodic m...
Page 79: ...the ground See page 7 39 WARNING To avoid injury se curely support the vehicle so there is no danger of it falling over EWA10752 2 Hold the lower ends of the front fork legs and try to move them for...
Page 80: ...ntilation when charging it in an enclosed space KEEP THIS AND ALL BATTER IES OUT OF THE REACH OF CHILDREN To charge the battery Have a Yamaha dealer charge the bat tery as soon as possible if it seems...
Page 81: ...ircuits is located be hind panel C See page 7 9 If a fuse is blown replace it as follows 1 Turn the key to OFF and turn off the electrical circuit in question 2 Remove the blown fuse and then install...
Page 82: ...e luminosity of the bulb and the bulb life will be adversely af fected Thoroughly clean off any dirt and fingerprints on the headlight bulb using a cloth moistened with al cohol or thinner 1 Remove th...
Page 83: ...original position and then installing the bolts 7 Have a Yamaha dealer adjust the headlight beam if necessary EAU24182 Tail brake light This model is equipped with an LED type tail brake light If the...
Page 84: ...icense plate light bulb 1 Remove the license plate light unit by removing the screws 2 Remove the license plate light bulb socket together with the bulb by pulling it out 3 Remove the burnt out bulb b...
Page 85: ...y support the vehicle so there is no danger of it falling over 1 Loosen the front wheel axle pinch bolts and axle nut 2 Lift the front wheel off the ground according to the procedure in the previous s...
Page 86: ...WARNING EWA10822 To avoid injury securely support the vehicle so there is no danger of it falling over 1 Loosen the axle nut 2 Lift the rear wheel off the ground according to the procedure on page 7 3...
Page 87: ...in slack See page 7 28 EAU25872 Troubleshooting Although Yamaha motorcycles receive a thorough inspection before shipment from the factory trouble may occur dur ing operation Any problem in the fuel c...
Page 88: ...nd adjustment 7 42 1 2 3 4 5 6 7 8 9 10 11 12 heaters or furnaces Gasoline or gasoline vapors can ignite or ex plode causing severe injury or property damage 2CF 9 16_E0 book 42 Downloaded from Manual...
Page 89: ...eck the vehicle Have a Yamaha dealer check the vehicle Remove the spark plug and check the electrodes 3 Ignition Wipe off with a dry cloth and correct the spark plug gap or replace the spark plug Have...
Page 90: ...n the hissing sound has stopped press down on the cap while turning it counterclockwise and then remove the cap TIP If coolant is not available tap water can be temporarily used instead provided that...
Page 91: ...fler outlet with a plastic bag after the engine has cooled down 2 Make sure that all caps and covers as well as all electrical couplers and connectors including the spark plug cap are tightly in stall...
Page 92: ...then rinse thoroughly with clean water Use a toothbrush or bottlebrush for hard to reach areas Stubborn dirt and insects will come off more easily if the area is covered with a wet cloth for a few min...
Page 93: ...t them with a suitable care product Avoid using abrasive polishing compounds as they will wear away the paint TIP Consult a Yamaha dealer for ad vice on what products to use Washing rainy weather or h...
Page 94: ...ing the engine over EWA10952 e Remove the spark plug cap from the spark plug and then install the spark plug and the spark plug cap 4 Lubricate all control cables and the pivoting points of all levers...
Page 95: ...e SG type or higher JASO stan dard MA Engine oil quantity Oil change 1 30 L 1 37 US qt 1 14 Imp qt With oil filter removal 1 40 L 1 48 US qt 1 23 Imp qt Coolant quantity Coolant reservoir up to the ma...
Page 96: ...ressure measured on cold tires Up to 90 kg 198 lb load Front 125 kPa 1 25 kgf cm2 18 psi Rear 175 kPa 1 75 kgf cm2 25 psi 90 kg 198 lb load maximum load Front 150 kPa 1 50 kgf cm2 22 psi Rear 200 kPa...
Page 97: ...light 21 0 W License plate light 5 0 W Meter lighting EL Electroluminescent Neutral indicator light LED High beam indicator light LED Turn signal indicator light LED Fuel level warning light LED Coola...
Page 98: ...ATION NUM BER ENGINE SERIAL NUMBER MODEL LABEL INFORMATION KEY IDENTIFICATION NUMBER EAU26401 Vehicle identification number The vehicle identification number is stamped into the steering head pipe Rec...
Page 99: ...ed into the key tag Record this number in the space provided and use it for reference when ordering a new key EAU48271 Vehicle Emission Control Informa tion label The Vehicle Emission Control Informa...
Page 100: ...if it finds that a safety defect exists in a group of vehicles it may order a recall and remedy campaign However NHTSA cannot become involved in individual problems between you your dealer or Yamaha M...
Page 101: ...ve hicle for the purpose of noise control prior to its sale or delivery to the ultimate purchaser or while it is in use or 2 the use of the vehicle after such device or element of design has been rem...
Page 102: ...a reminder that maintenance work is required It is not acceptable proof of maintenance work Maintenance interval Date of service Mileage Servicing dealer name and address Remarks 600 mi 1000 km or 1...
Page 103: ...5 6 7 8 9 10 11 12 28000 mi 46000 km or 54 months 31000 mi 51000 km or 60 months Maintenance interval Date of service Mileage Servicing dealer name and address Remarks 2CF 9 16_E0 book 6 Downloaded f...
Page 104: ...NTY TRANSFER To transfer the warranty from the original purchaser to any subsequent purchaser it is imperative that the machine be inspected and registered for warranty by an authorized Yamaha motorcy...
Page 105: ...any later date Each Yamaha motorcycle dealer is held responsible for his setup service and warranty repair work Is the warranty transferable to second owners Yes The remainder of the existing warranty...
Page 106: ...for covered repairs There s no deductible to pay and repairs aren t pro rated You don t have any out of pocket expenses for covered repairs In addition Travel and Recreation Interruption Protection TR...
Page 107: ...backed protection even after your Yamaha Limited Warranty expires A special note If visiting your dealer isn t convenient contact Yamaha with your VIN number and we ll be happy to help you get the Y E...
Page 108: ...ulb replacing 7 36 Helmet holder 4 14 High beam indicator light 4 2 Horn switch 4 9 I Identification numbers 10 1 Ignition circuit cut off system 4 19 Indicator lights and warning lights 4 2 K Key ide...
Page 109: ...t bulb replacing 7 37 Turn signal switch 4 9 V Valve clearance 7 21 Vehicle Emission Control Information label 10 2 Vehicle identification number 10 1 W Warranty extended 10 9 Warranty limited 10 7 Wh...
Page 110: ...2CF 9 16_E0 book 3 Downloaded from ManualsNet com search engine...
Page 111: ...the box Yamalube Take care of your Yamaha with legendary Yamalube oils lubricants and care products They re formulated and approved by the toughest judges we know the Yamaha engineering teams that kno...
Page 112: ...PRINTED ON RECYCLED PAPER PRINTED IN JAPAN 2018 07 0 3 1 E 2CF 9 16_E0_Hyoshi indd 4 2018 06 27 13 15 03 Downloaded from ManualsNet com search engine...