


BEFORE ASSEMBLY
This must be read before you start assembling this unit.
Great care has been taken in design and how to as-
semble this unit. All bags of nuts and bolts have been
packed with ease of assembly in mind. You must follow
the assembly instructions exactly as outlined.
You will need at least one person to help you assemble
this unit, two would be better. Assemble this unit
starting at the beginning and work to the end. The
assembly instructions are set out so that you are only
doing one section at a time, therefore you will finish one
section and move on to the next. Do not do what most
people do, when all else fails they read the assembly
instructions. If something is missing when assembling
this unit, you must notify us of the part number of the
exact nut, bolt or part that is missing and the colour of
the model you purchased.
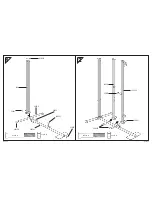
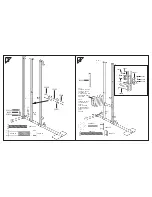
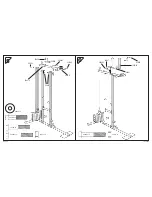
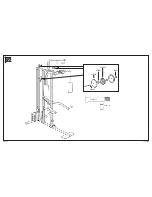
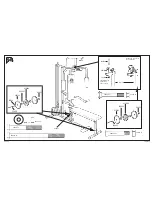
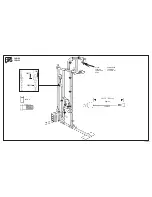
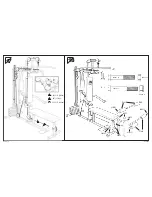
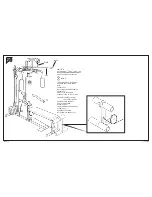
To help you assemble this unit we have used line
drawings. Check the line drawings for the exact posi-
tioning of the parts.
This unit will need to be checked at least once a week
for wearing wire ropes, nuts and bolts that can work
loose, upholstered pieces working loose and wear on
pivot assemblies.
WARNING: WIRE ROPES DO WEAR OUT!!
The way to check the wire ropes is to run your fingers
lightly along them and if you start to feel they are frayed,
please contact us for replacements. This is for your own
safety.
A S S E M B L Y I N S T R U C T I O N S
7/05/2003
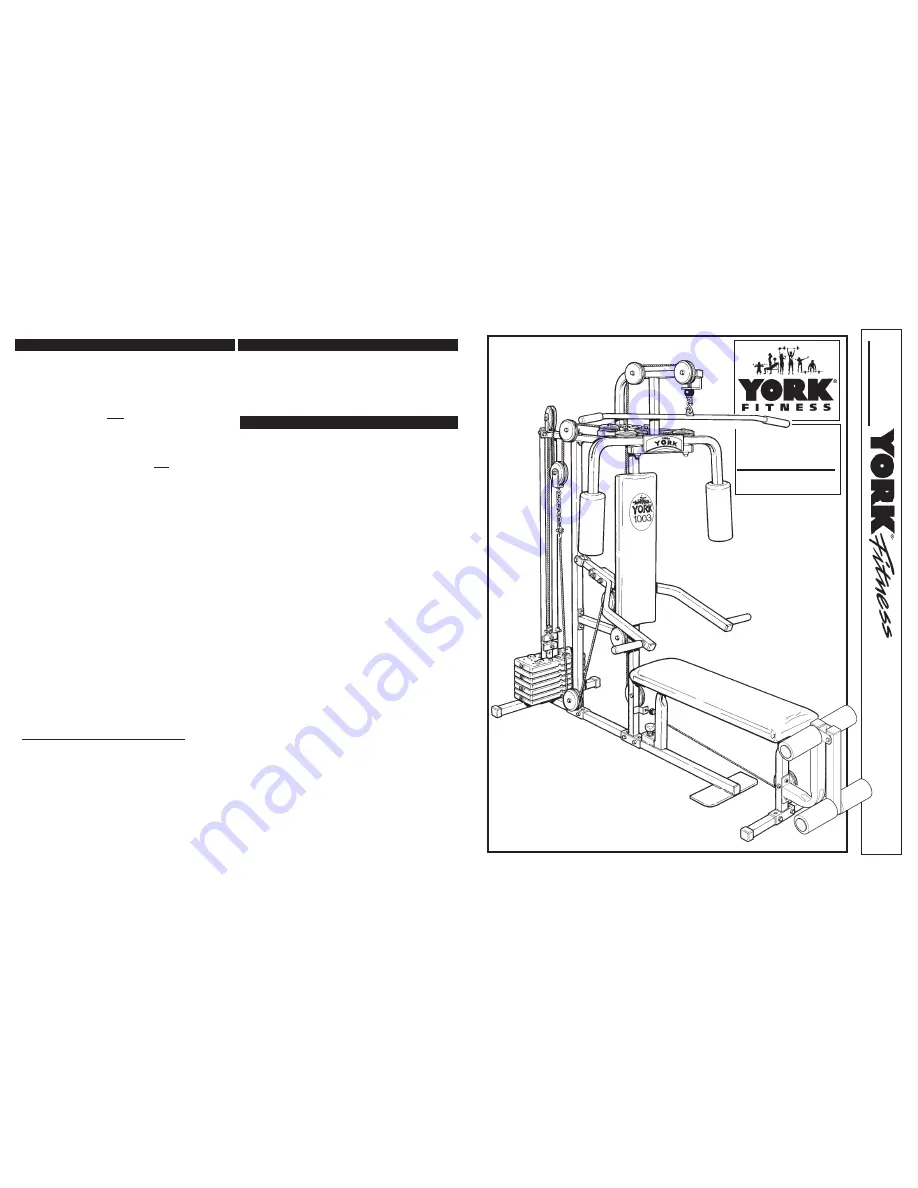
If the box containing the parts for the YORK 1003 GYM
was unopened when you purchased it and there is a
shortage, please notify us by mail and send a copy of
your receipt. If the box was opened and there is a
shortage, the dealer is responsible. Please indicate to
us the part number which is missing and we will return
the missing part by return mail.
10031003100310031003
WARNINGS:
WARNING:
It is important that you do not destroy these instructions,
they will need to be kept for further reference
WARNING: YOU ARE RESPONSIBLE FOR YOUR OWN
SAFETY!!
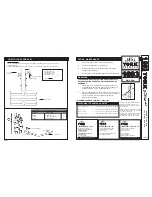
TOOLS NEEDED TO ASSEMBLE 1003 GYM
a) wrenches :-
2 x 9/16"
14 mm
2 x 3/4"
19mm
1 x 5/8"
16mm
1 x 1/2"
13mm
1 x 7/16"
11mm
b) large screwdriver
c) hammer
PLIERS SHOULD NOT BE USED!!
This machine should be assembled finger tight in the
beginning to allow for proper alignment.
1. Always consult your doctor before undertaking any
exercise program.
2. Ensure that all nuts and bolts are fully tight before
using any exercise equipment.
3. Always wear suitable clothing and footwear e.g.
tracksuit and training shoes.
4. Children should not be allowed on or around the
machinery or equipment, even when not in use.
5. After eating allow over 2 hours prior to exercising.
6. Always warm up and cool down before and after
exercising as this will help prevent straining muscle.
7. Always read and follow the manufacturers assembly
and user instructions.
8. Remove jewellery, rings, chains and pins before
exercising.
9. Check for full engagement of locking pins.
10. Check that any of the adjustment devices are not
projecting.
11. Give special attention to the cables, pulleys and
locking devices as they may wear. (Warning: wire ropes
wear out. Once a week slide your fingers along wire
ropes and check for roughness. If you need new ropes
contact the address shown).
12. Injuries to health may result from incorrect or exces-
sive training.
13. Always use your gym on a flat level surface.
14. Always use your gym in adequate space e.g. at least
2ft. (60cm) clearance on each side to avoid collision with
furniture, walls etc.
15. We recommend you never lift weights alone. There
should always be someone available to assist you.
Training with others can help motivate you.
16. Breathing is very important; you should not hold your
breath when exercising. General rule: Exhale as you exert
the muscles and inhale as you relax the muscles.
17. Keep yourself warm while exercising.
18. Start with a moderate weight so that you can perform
the exercise correctly.
N.B. this list should not be taken as exhaustive.
Multi - Gym
PAGE 1
ASSEMBLY INSTRUCTIONS #01A696
1003
1003
1003
1003
1003


