background image

User manual

ZWT 8121

Washing machine

Summary of Contents for ZWT 8121

Page 1: ...User manual ZWT 8121 Washing machine...

Page 2: ...We were thinking of you when we made this product...

Page 3: ...The Electrolux ambition is to offer a wide variety of quality products that make your life more comfortable You find some examples on the cover in this manual Please take a few minutes to study this...

Page 4: ...ion 15 Care and cleaning 16 Operating problems 17 Technical specifications 20 Installation 20 Environment 23 The following symbols have been used in this user guide Important information about con cer...

Page 5: ...g or maintenance Do not machine wash clothes with ribbing unfinished or torn material Installation Unpack or ask for the appliance to be unpacked immediately upon deli very Check the outside of the ap...

Page 6: ...ay avoiding any ice formation which would damage your appliance Before turning your appliance on again ensure that it is installed in an area whe re the temperature will not fall below freezing Use Yo...

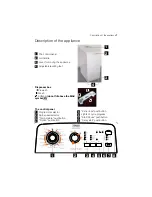
Page 7: ...le levelling feet Dispenser box Prewash Wash Softener do not fill above the MAX symbol The control panel Programme selector Spin speed selector Temperature pushbutton Option pushbutton Extra rinse pus...

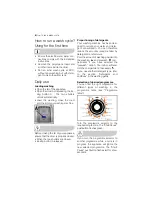
Page 8: ...oning of detergents Your washing machine has been desi gned to reduce your water and deter gent consumption You can therefore reduce the amounts recommended by detergent manufacturers Pour the amount...

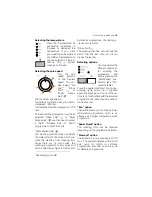
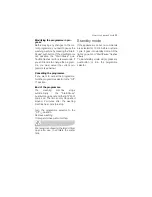
Page 9: ...pin cycles the washing programme is very quiet and can be selected at night In Cotton and Synthetics programmes the rinsing cy cle uses more water Rinse hold The washing machine will not drain the wat...

Page 10: ...or cancel the delayed start pro ceed as follows To cancel the delayed start and start the cycle immediately press Start Pau se and then Delay start Press Start Pause to start the cycle To change the...

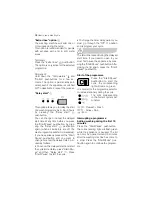
Page 11: ...to the Off position End of the programme The washing machine stops automatically the Start Pause pushbutton goes out and the light End comes on The lid can only be opened around 2 minutes after the w...

Page 12: ...pending on type of materials The amount of washing placed in the drum must not exceed the maximum capacity of the washing machine This capacity can vary depending on the type of materials Reduce the q...

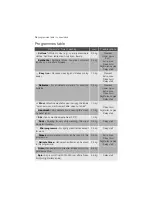
Page 13: ...re a wash cycle please refer to manufacturer s recom mended amounts and instructions If you use a detergent to remove stains the wash cycle must be started imme diately International symbols NORMAL WA...

Page 14: ...us Delay start Wool Machine washable wool carrying the labels pure new wool machine washable does not shrink 1 0 kg Rinse hold Night silence plus Delay start Handwash Very delicate items carrying the...

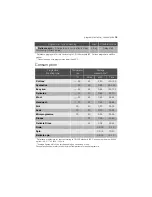
Page 15: ...0 85 90 100 Easy iron 60 55 0 65 125 135 Delicates 40 53 0 55 60 70 Wool 40 48 0 45 55 65 Handwash 40 48 0 45 55 65 Silk 30 40 0 30 25 35 Soak 30 20 0 20 15 25 Mini programme 30 40 0 35 25 35 Rinses...

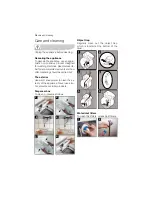
Page 16: ...for recommended amounts and how often descaling should be carried out The exterior Use warm soapy water to clean the ex terior of the appliance Never use alco hol solvents or similar products Dispens...

Page 17: ...e water inlet hose The appliance fills but empties straight away the drainage U piece is fixed too low see instal lation section The washing machine doesn t rinse or doesn t empty the drain hose is bl...

Page 18: ...or has been activated an extra phase has been added to distribute washing more evenly in the drum The washing machine stops during a wash cycle the water or electricity supply is defective a Rinse hol...

Page 19: ...e drum when filling the dispenser box you have gone past the MAX indicator Depending on model On some models the audible signals can sound After solving any problems press the Start Pause pushbutton t...

Page 20: ...s and malfunctions The appliance can also be damaged through physical contact Unpacking DIMENSIONS Height Width Depth 850 mm 400 mm 600 mm LINE VOLTAGE FREQUENCY POWER CONSUMPTION 230 V 50 Hz 2300 W W...

Page 21: ...eed as follows Water supply Install the supplied water inlet hose at the rear of your washing machine by proceeding as follows Do not reuse an old hose Open the water inlet tap Check there are no leak...

Page 22: ...be connected in single phased 230 V Check the fuse size 10 A for 230 V The appliance must not be connected with an extension lead or multi plug adaptor Ensure that the plug is earthed and that it is...

Page 23: ...disposed of cor rectly you will help prevent potential ne gative consequences for the environment and human health which could otherwise be caused by inappro priate waste handling of this product For...

Page 24: ...108 3893 00 02 08 www electrolux com...

Reviews: