background image

OPERATING INSTRUCTIONS

AU

MIXED FUEL

COOKER

ZCM 64

Summary of Contents for ZCM 64

Page 1: ...OPERATING INSTRUCTIONS AU MIXED FUEL COOKER ZCM 64 ...

Page 2: ...AND FOR THAT OF OTHERS WE THEREFORE REQUEST YOU TO READ THEM CAREFULLY BEFORE INSTALLING AND USING THE APPLIANCE touch surfaces or remain in the vicinity of the appliance when in use or when not completely cooled During use the appliance becomes hot Care should be taken to avoid touching heating elements inside the oven WARNING Ensure that the appliance is switched off before replacing the lamp to...

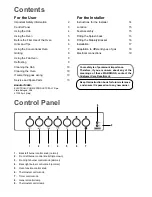
Page 3: ...g the Splash back 16 Fitting the Stability Bracket 16 Installation 17 Adaptation to different types of gas 18 Electrical connections 19 Your safety is of paramount importance Therefore if you are unsure about any of the meanings of these WARNINGS contact the Customer Care Department Keep this instruction book for future reference and ensure it is passed on to any new owner 8 9 1 Back left burner c...

Page 4: ... contact your local Service Centre Using the Hob Using the Wok Stand A wok stand is provided to enable you to use a round bottomed wok on the hob The wok stand must only be used on the triple crown burner and should not be used with any other type of wok or pan When fitting the wok stand ensure the recesses in the frame fit securely onto the bars of the pan supports as shown in the diagram Fig 2 b...

Page 5: ...Thermostat Control Light The thermostat control light will come on when the thermostat control knob is turned The light will remain on until the correct temperature is reached It will then cycle on and off to show the temperature is being maintained Things to note The oven light will come on when the oven function control knob is set The thermostat control light will remain on until the correct te...

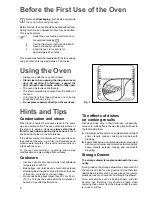
Page 6: ... taken when removing these items from the drawer whilst the oven is in use or still hot Before the First Use of the Oven Remove all packaging both inside and outside the oven before using the oven Before first use the oven should be heated without food During this time an unpleasant odour may be emitted This is quite normal 1 Switch the oven function control knob to conventional cooking 2 Set the ...

Page 7: ...larlyusefulwhenblind bakingpastry It may also be used to finish off quiches or flans to ensure the base pastry is cooked through Cooking Chart Conventional Oven Food Temperature C Shelf Cooking Positions Time mins Biscuits 170 200 6 8 25 30 Bread buns yeast doughs 200 230 5 35 45 Casseroles 140 170 3 5 90 180 Cakes small Queen Victoria sponge 170 190 5 7 18 25 Cakes madeira rich fruit 130 180 5 90...

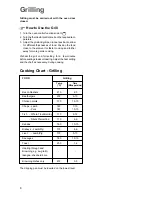
Page 8: ... full setting for a few minutes before sealing steaks or toasting Adjust the heat setting and the shelf as necessary during cooking Cooking Chart Grilling FOOD Grilling Bacon Rashers 210 2 3 Beefburgers 200 6 10 Chicken Joints 170 10 15 Chops Lamb 180 7 10 Pork 180 10 15 Fish Whole Trout Herring 170 8 12 Fillets Plaice Cod 170 4 6 Kebabs 180 10 15 Kidneys Lamb Pig 170 4 6 Liver Lamb Pig 170 5 10 S...

Page 9: ...require higher temperatures best results are achieved if the oven is preheated first e g bread pastries scones souffles etc Lower Temperatures Fan oven cooking generally requires lower temperatures than conventional cooking Follow the temperatures recommended in the cooking table or remember to reduce temperatures by about 20 25 C for your own recipes which use conventional cooking Even Heating fo...

Page 10: ...s spillage can be removed more easily than if it is left to cool The Hob Top Regularly wipe over the hob top using a soft cloth well wrung out in warm water to which a little wasing up liquid has been added Avoid the use of the following household detergent and bleaches impregnated pads unsuitable for non stick saucepans steel wool pads bath sink stain removers Pan Supports When washing the pan su...

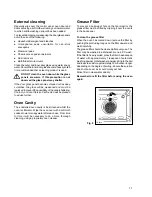
Page 11: ...e pleased to advise further Oven Cavity The enamelled oven cavity is best cleaned whilst the oven is still warm Wipe the oven over with a soft cloth soaked in warm soapy water after each use From time to time it will be necessary to do a more thorough cleaning using a proprietary oven cleaner Grease Filter To prevent a build up of fats on the fan impellor the grease filter must be fitted by clippi...

Page 12: ...ove the back panel use a screwdriver This is a good opportunity to clean the back of the rear panel Wash the panels with very hot water and a detergent using a soft cloth If the shelf supports or the panels become very soiled use a standard caustic product specially made for cleaning ovens The Oven Door Before cleaning the oven door we recommend you to remove it from the oven Proceed as follows a ...

Page 13: ... the thermostat control knob Select a function with the oven function control knob Select a function with the oven function control knob Check the light bulb and replace it if necessary see Replacing the Oven Light The temperature may need adjusting Refer to the contents of this booklet especially to the chapter Using the Oven Leave dishes inside the oven no longer than 15 20 minutes after the coo...

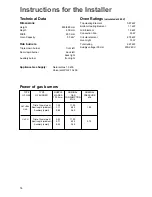
Page 14: ...ulated at 240 V Top Heating Element 0 87 kW Bottom Heating Element 1 1 kW Grill Element 1 9 kW Convection Fan 30 W Circular element 2 18 kW Oven light 15 W Total rating 2 23 kW Supply voltage 50 Hz 230 240 V TYPE TYPE NOZZLE NOMINAL NOMINAL OF GAS OF BURNER MARKS GAS PRESSURE 1 100 mm CONSUMPTION kPa MJ h Triple Crown wok 1 50 11 00 Semi rapid medium 1 11 6 80 1 00 Auxiliary small 0 89 3 80 Triple...

Page 15: ... cooker horizontal levelling by turning the bottom part of the feet until the appliance is completely stable Fig 15 Feet Assembly FO 2285 Fig 15 100 650 100 100 500 650 500 Location Choose a location free of draughts and open doors and clear of combustible materials or other fire hazards such as curtains etc The location should ensure convenience of operation and service Any adjacent wall surface ...

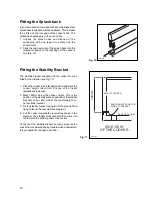
Page 16: ...r in its intended position and mark the cooker height taken from the top of the trivets splashback removed 2 Mark 720mm below the cooker height This is the position of the stability bracket position of the stability bracket can be either side of the counterweight i e not centrally located 3 Fix the stability bracket using two of the provided five fixing holes to the rear wall see diagram 4 Pull th...

Page 17: ...n Important This cooker must be installed by qualified personnel The manufacturer will not accept liability should the above instructions or any of the other safety instructions incorporated in this book be ignored Regulations This appliance shall be installed in accordance with the manufacturer s installation instructions local gas fitting regulations municipal building codes AS5601 AG601 and any...

Page 18: ... appropriate pressure regulator should be installed on the entry tube In case pressure regulators for U LPG are used these should conform to the regulations in force Regulation of the minimum To regulate the minimum bring the tap to the minimum flame position extract the knob in case of conversion from natural gas to U LPG tightly screw the by pass screw Fig 19 when converting from U LPG to natura...

Page 19: ...lations in force should be interposed between the appliance and the supply The yellow green earth cable must not be interrupted by the interrupter The brown coloured phase cable situated at terminal L of the terminal box must always be connected to the network phase The voltage cable must always be positioned in such a manner that it at no point reaches a temperature of 50 C above room tempera tur...

Page 20: ...rld s largest producer of powered appliances for kitchen cleaning and outdoor use More than 55 million Electrolux Group products such as refrigerators cookers washing machines vacuum cleaners chain saws and lawn mowers are sold each year to a value of approx USD 14 billion in more than 150 countries around the world ...

Reviews: