background image

1-CH DVB-T TUNER

MODEL NO:

INSTRUCTION MANUAL

1 CH DVB-T TUNER 

ZE-DVBT1 0 

MODEL NO:

Summary of Contents for ZE-DVBT10

Page 1: ...1 CH DVB T TUNER MODEL NO INSTRUCTION MANUAL 1 CH DVB T TUNER ZE DVBT10 MODEL NO...

Page 2: ...ATIONEN 11 6 6 AUFRUFEN DES EPG 12 6 7 WECHSELN ZWISCHEN DTV UND RADIO 12 6 8 VERWENDEN DER SENDERLISTE 12 13 7 SYSTEMEINSTELLUNGEN 14 17 7 1 EINSTELLEN DER UHRZEIT 14 7 2 SPRACHEINSTELLUNGEN 15 7 3 A...

Page 3: ...icherpl tze mit vielf ltigen Editierm glichkeiten Antenneneingang mit 5V Phantomspeisung 1 x A V Ausgang Separater IR Sensor mit Verl ngerungskabel IR Fernbedienung Zur Nutzung mit der DVB T Antenne Z...

Page 4: ...es und der DVB T Antenne darauf dass sie den Fahrer des Fahrzeuges nicht vom Verkehrsgeschehen ablenkt oder ihm in einer irgendeiner Weise die Sicht versperrt Um die K hlung des Ger tes zu gew hrleist...

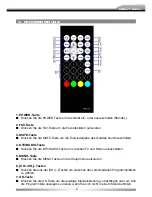
Page 5: ...zu w hlen 7 OK Taste Dr cken Sie die OK Taste um die jeweilige Men einstellung zu best tigen oder um sich die Programmliste anzeigen zu lassen wenn Sie sich nicht in einem Men befinden 1 3 Remote Cont...

Page 6: ...zu t tigen 12 EXIT Taste Dr cken Sie die EXIT Taste um das aufgerufene Men zu beenden 13 AUDIO Taste Dr cken Sie die AUDIO Taste um zwischen der Tonwiedergabe in Mono L oder R oder Stereo zu w hlen 14...

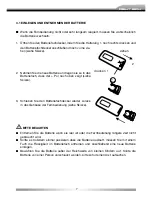
Page 7: ...oben zeigt siehe Skizze 3 Schieben Sie den Batteriefachdeckel wieder zur ck in das Geh use der Fernbedienung siehe Skizze BITTE BEACHTEN Entfernen Sie die Batterie wenn sie leer ist oder die Fernbedie...

Page 8: ...tasten links rechts um die jeweilige Einstellung zu ver ndern 6 Dr cken Sie die EXIT Taste um das Men zu beenden 5 3 AUTOMATISCHER SENDERSUCHLAUF Das Ger t bietet Ihnen die M glichkeit automatisch nac...

Page 9: ...T direction button to select Press SCAN TYPE and press LEFT or RIGHT direction button to select AUT SCAN Press UP or DOWN direction button to select START SCAN and press OK b start searching Press EXI...

Page 10: ...tly by pressing the numeric buttons on the cting the desired channel the function Auto Scan will to how they ve been stored Manual Scan will not delete eated channels that have been stored channels li...

Page 11: ...oben unten um den gew nschten Sender auszuw hlen und dr cken Sie die OK Taste um Ihre Auswahl zu best tigen 5 Dr cken Sie die numerischen Tasten 1 bis 5 um verschiedene Funktionen wie z B Sender hinz...

Page 12: ...e four ways of channels selection by channel list selection by number from t on screen channel list and using the Electronic Program Guide EPG 1 Selection by channel list To navigate through the chann...

Page 13: ...Sie die Pfeiltasten links rechts um den Men punkt on screen channel list and using the Electronic Program Guide EPG 1 Selection by channel list To navigate through the channels press the CH or CH butt...

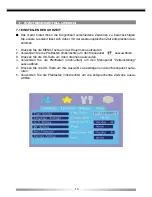
Page 14: ...s OK bu confirm Select TV Shape and press LEFT or RIGHT direction button to select the de shape Press UP or DOWN direction button to select CONVERSION and press LEF direction button to select the desi...

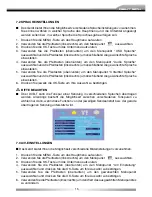
Page 15: ...sten links rechts um anschlie end die gew nschte Sprache einzustellen 5 Verwenden Sie die Pfeiltasten oben unten um den Men punkt Untertitel Sprache auszuw hlen und die Pfeiltasten links rechts um ans...

Page 16: ...NG STARTED System Setup Press MENU button to enter the setup menu Press LEFT or RIGHT direction button to select Press OK button to enter the sub menu Press UP or DOWN direction button to select A V S...

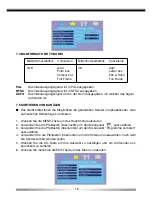
Page 17: ...T or RIGHT direction button to select Press OK button to enter the sub menu Press 1 button on the remote control to add a favorite Select the desired items and press OK button to confirm Press EXIT bu...

Page 18: ...anging the PIN code Press LEFT or RIGHT direction button to select CHANGE PIN CODE Enter new PIN code with Numeric buttons Press UP or DOWN direction button to select ENTER AGAIN and enter new P code...

Page 19: ...with the four TA 3 x 10 screws See figure 1 Step 2 Fixing the player which is installed with the bracket to the car with the four PWM 2 6 x 5 screws See figure 2 6 INSTALLING THE DVB T TUNER FOUR TA3...

Page 20: ...rz Verbinden Sie das schwarze Anschlusskabel mit der Fahrzeugmasse ACC Rot Verbinden Sie das rote Anschlusskabel mit einer 12V Spannungsquelle geschaltet IR Empf nger DVB T Antenne VIDEO GELB AUDIO R...

Page 21: ...hkeit eines externen Monitors und Audioverst rkers Verwenden Sie dazu nach M glichkeit das im Lieferumfang enthaltene A V Anschlusskabel 3 Antenneneingang Antenneneingang f r den Anschluss einer geeig...

Page 22: ...g an Das DVB T Signal ist nicht verf gbar Warten Sie ab bis das DVB T Signal wieder verf gbar ist Der DVB T Empfang wird durch u ere Einfl sse gest rt Warten Sie bis das DVB T Signal nicht mehr gest r...

Page 23: ...gsaufnahme 10 W Betriebstemperatur 10 C 65 C Lagertemperatur 40 C 85 C BITTE BEACHTEN nderungen der technischen Daten und des Designs zum Zwecke der Verbesserung des Produktes vorbehalten Sollten Sie...

Page 24: ...Electronic Program Guide EPG 34 6 7 Switching Between TV and Radio Mode 34 6 8 Channel List ACCESS RESTRICTION 34 35 7 SYSTEM SETUP 36 39 7 1 GMT Settings 36 7 2 Language Settings 37 7 3 A V SettingS...

Page 25: ...annel scan 999 editable preset stations Antenna input with 5V output power for active antennas 1 x A V output Separate IR remote sensor with extension cord IR remote control Matching to the DVB T ante...

Page 26: ...all warnings on the DVB T product and in the operating instructions 4 Power sources This DVB T product should be operated only from the type of power source indicated on the marking label If you are...

Page 27: ...dropped or cabinet has been damaged E When the DVB T product exhibits a distinct change in performance this indicates a need for service 11 Replacement parts When replacement parts are required have...

Page 28: ...item to the previous menu item 13 AUDIO Press to switch between Left Right stereo audio 14 LAG Press to enter the language settings 15 TEXT Press to enter the teletext 16 INFO Press to display the in...

Page 29: ...ply pressure on the recess of the battery tray on the back of remote control with a small tool At the same time pull out the battery holder 2 Insert the new battery with the side up 3 Push to close th...

Page 30: ...he TV Shape and press the LEFT or RIGHT direction button to select the desired shape Press the UP or DOWN direction button to select the menu item CONVERSION and press the LEFT direction button to sel...

Page 31: ...art searching Press EXIT button to quit the menu 4 Press the OK button to enter the sub menu Select the menu item SCAN TYPE and press the LEFT or RIGHT direction button to select the menu item MANUAL...

Page 32: ...on the remote control 2 Selection by number Enter the channels list number directly by pressing the numeric buttons on the remote control After selecting the desired channel the function Auto Scan wil...

Page 33: ...on button to select the desired favorite group Press the OK button to enter the favorite group Select the favorite channels and press the OK button Press the numeric buttons 1 5 to add delete sort or...

Page 34: ...be displayed you can now watch digital television 3 OPERATION Changing Channels There are four ways of channels selection by channel list selection by number from the on screen channel list and using...

Page 35: ...tton to select on screen channel list and using the Electronic Program Guide EPG 1 Selection by channel list To navigate through the channels press the CH or CH buttons on the remote control 2 Selecti...

Page 36: ...direction button to select CONVERSION and press LEFT direction button to select the desired conversion Press EXIT button to quit the menu Automatic Channel Scan Press MENU button to enter the setup m...

Page 37: ...s the LEFT or RIGHT direction button to select the desired language Select the menu item SUBTITLE LANGUAGE and press the LEFT or RIGHT direction button to select the desired language Press the OK butt...

Page 38: ...tton to enter the setup menu Press LEFT or RIGHT direction button to select Press OK button to enter the sub menu Press UP or DOWN direction button to select A V Settings and press OK button to confir...

Page 39: ...code default PIN code is 888888 Press the OK button to enter the sub menu Press the OK button again for confirmation or press the EXIT button to quit the menu Sub menu System Info View the software v...

Page 40: ...Press the LEFT or RIGHT direction button to select Sub menu System Info Here you can view the software version and the date of last upgrade Change PIN Code For changing the PIN code Press LEFT or RIGH...

Page 41: ...0 SCREWS Bracket Figure 1 FOUR PWM2 6 X 5 SCREWS Figure 2 6 INSTALLING THE DVB T TUNER FOUR TA3 X 10 SCREWS Bracket Figure 1 FOUR PWM2 6 X 5 SCREWS Figure 2 Step 1 Fixing the bracket to the player wit...

Page 42: ...2 CONNECTIONS GND Black Connect the black wire to GND of your car ACC RED Connect the red wire to a switchable 12V source IR RECEIVER DVB T ANTENNA VIDEO YELLOW AUDIO R RED AUDIO L WHITE GND BLACK ACC...

Page 43: ...the external IR receiver Power External Remote IR 1 2 3 2 Program database copy Local software upgrade via the PC 1 PART NAMES AND FUNCTIONS 1 1 Left Panel Fig 1 1 1 DC 12V IN Connecting the AC DC ad...

Page 44: ...s scrambled 1 Select alternative channel No response to remote control 1 Receiver off 2 Handset not aimed correctly 3 Front panel obstructed 4 Hand set batteries exhausted 1 Plug in and turn on plug 2...

Page 45: ...II Input Voltage 10V 16V DC Power Consumption 10 W Operating Temperature 10 C 65 C Storage Temperature 40 C 85 C NOTE Design and specifications are subject to change without notice Weight and dimensi...

Page 46: ...s purchasing date and dealer stamp together with the original sales slip 2 Jahre Garantie Sehr geehrter Kunde Vielen Dank dass Sie sich zum Kauf dieses Produktes von ZENEC entschlossen haben Wir bitte...

Page 47: ...WARRANTY 47 ZENEC Model ZE DVBT10 Serial number Date of purchase Your name Your address City State ZIP or postal code Country Dealer s address stamp...

Page 48: ...1 CH DVB T TUNER ZE DVBT10 MODEL NO...

Reviews: