background image


Audio Source Select.


SETC60g3xxxyyy 
xxx is input source. 
xxx = 001,002,…. 
yyy is output source. 
yyy = 001,002,….


RETC60g3xxxyyy 
xxx is input source. 
xxx = 001,002,…. 
yyy is output source. 
yyy = 001,002,….


Video/Audio Source 
select


SETC60j3xxxyyy 
xxx is input source. 
xxx = 001,002,…. 
yyy is output source. 
yyy = 001,002,….


RETC60j3xxxyyy 
xxx is input source. 
xxx = 001,002,…. 
yyy is output source. 
yyy = 001,002,….


Turn off video 
channel


SETC40m3zxxx 
z is in/out port setting. 
z = 0, setting output 
z = 1, setting input 
xxx is port select. 
xxx = 001,002,….


RETC40m3zxxx 
z is in/out port setting. 
z = 0, setting output port. 
z = 1, setting input port. 
xxx is port select. 
xxx = 001,002,….


Turn off audio 
channel


SETC40n3zxxx 
z is in/out port setting. 
z = 0, setting output 
z = 1, setting input 
xxx is port select. 
xxx = 001,002,….


RETC40n3zxxx 
z is in/out port setting. 
z = 0, setting output port. 
z = 1, setting input port. 
xxx is port select. 
xxx = 001,002,….


10 


Turn off video/audio 
channel


SETC40p3zxxx 
z is in/out port setting. 
z = 0, setting output port. 
z = 1, setting input port. 
xxx is port select.


RETC40p3zxxx 
z is in/out port setting. 
z = 0, setting output port. 
z = 1, setting input port. 
xxx is port select.


11 


Volume Level Setting


SETC70V30xxxyyy. 
xxx is output port. 
xxx = 001,002,…. 
yyy is volume level. 
yyy = 001,002,…. 
If xxx = 000, indicates that Volume 
Level will take effect on all the 
Audio Output Port. 


RETC70V30xxxyyy. 
xxx is output port. 
xxx = 001,002,…. 
yyy is volume level. 
yyy = 001,002,…. 
If xxx = 000, indicates that 
Volume Level will take effect on 
all the Audio Output Port. 


12 


Volume Level 
up/down


SETC50r30xxxy 
xxx is output port. 
xxx = 001,002,…. 
y is up/down setting. 
y = 0, Volume up. 
y = 1, Volume down. 
If xxx = 000, indicates that Volume 
Level will take effect on all the 
Audio Output Port. 


RETC70V30xxxyyy. 
xxx is output port. 
xxx = 001,002,…. 
yyy is volume level. 
yyy = 001,002,…. 
If xxx = 000, indicates that 
Volume Level will take effect on 
all the Audio Output Port. 


Summary of Contents for MAX-RGB88A/P

Page 1: ...D display which shows the current system status 2 Fn Function key entering into setup menu 3 Up selection 4 Down selection 5 Enter key 6 Esc key 7 Input Channel Select Selection of the input port 1 to 8 8 Output Channel Select Selection of the output port 1 to 8 2 Back Panel View 2 3 4 5 6 1 7 8 2 4 5 6 1 3 ...

Page 2: ...lanced Audio Input port 1 to 8 3 5xBNC RGBHV Output port 1 to 8 4 Balance Unbalance Audio Output port 1 to 8 5 Power Input plug Before plugging in the power please check if power is AC 100 230V 50 60Hz 6 RS 232 I O control port Balanced Unbalanced Audio connections ...

Page 3: ...T and the Input Select buttons will be blinking Select the desire Input port number by pressing the respective buttons Once selected the LCD will displayed the respective Input port number and the buttons back light will stays ON Select the desired Input and Output ports by pressing the Input and Output Channel Selection buttons or deselect by pressing the same button again Steps are as followed E...

Page 4: ... accordingly Therefore if any other Input Select Channel Port 2 to Port 8 is selected the Output Select Buttons will NOT be lighted up Up and Down can be used to scrow if Output select is more 6 4 And NOW if Input Channel 2 is to be routed to Output port 2 4 and 5 The settings up are as follows Select the Input Select button CH2 and select the Output Select Ch2 Ch4 and CH5 Back light for all selec...

Page 5: ...press the Enter button to confirm and store the setting The LCD Menu display will then return to IN OUT page and the Input Select buttons will now flashing waiting for selection Repeat step number 3 to set another I O routing or if different Video and or Audio channel switching model is required press Esc to return to Select I O Port page and repeat Step number 2 ...

Page 6: ...ut Output port 3 and 8 Follows the steps as followed Follows the steps as shown 6 Base on the above steps press Input Select CH1 then follow by Output Select CH3 and CH8 The buttons will stays ON and it LCD display will the channel selected accusingly Press Enter to confirm setting Notes Setting will NOT be stored if Fn or Esc is press instate of Enter And all setting will remain as before ...

Page 7: ...______ 2 In Select I O Gain Menu making used of the Up Down button to select the desired channel to be adjusted Namely VIDEO IN Gain or VIDEO OUT Gain AUDIO IN Gain _______________________________________________________________ 3 If the above selection was VIDEO IN Gain the LCD display will shows Select Port accordingly and the INPUT SELECT buttons will be flashing indicates that the system is wa...

Page 8: ..._____________________________ The system will then return to Select Port Menu and the INPUT SELECT buttons will be flashing again indicates that the system is waiting for selection Repeat step number 3 to select other ports If a new I O Gain selection is required press Esc return to I O Gain Menu and repeat steps number 2 accordingly Notes Setting will NOT be stored if Fn or Esc is press instate o...

Page 9: ...u OUTPUT SELECT buttons will be flashing indicates that the system is waiting for a selection _______________________________________________________________ 3 Select the desired Output port by selecting form the OUTPUT SELECT buttons Select 2 3 6 4 and press Enter The Output gain level will then base on port 2 as reference _______________________________________________________________ 4 In the V...

Page 10: ...accordingly Notes Setting will NOT be stored if Fn or Esc is press instate of Enter And all setting will remain as before 5 Function 3 Save Preset The Save Preset function allows user to store the Audio Video routing configuration A total of 10 different of such configuration can be stored which also has the availability of Naming each of these Preset accordingly Steps are as followed 1 Press Fn t...

Page 11: ...t Number selected A curser will appear flashing indicate that the system is waiting user to Name the Preset selected A total of 5 characters can be entered accordingly with the use of the Up Down button Press Fn to back space when required 4 Last press Enter to confirm the Preset Name the Preset will be stored and the system will return to it Main Menu page as shown Notes Setting will NOT be store...

Page 12: ...Press Fn to enter Function Menu making use of the Up Down button and select Recall Preset function and select Enter for confirmation _______________________________________________________________ 2 In Load from Preset Menu making used of the Up Down button and select the desire Preset number The respective Preset number will be displayed on LCD display together with the Preset Name e g ROOM1 acco...

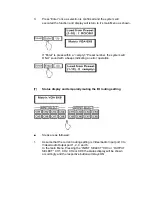
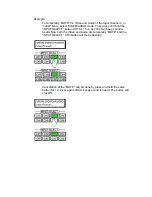
Page 13: ...und with a beeps indicating an error operation 7 Status display and temporally muting the I O routing setting Steps are as followed 1 Assume that the current routing setting is Video Audio Input port 3 to Video Audio Output port 1 2 4 and 6 In the main Menu Pressing the INPUT SELECT CH3 or OUTPUT SELECT CH1 CH2 CH4 or CH6 the status display will be shown accordingly and the respective button will ...

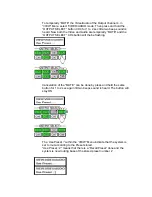
Page 14: ...________________________ 4 If a temporally muting of routing is required One can select the desire routing mode i e VIDEO AUDIO for both Video and Audio channel together VIDEO for Video ONLY or AUDIO for Audio ONLY by using the Up Down button as above Then press and hold the desire Input or Output channel directly from the front panel INPUT SELECT or OUTPUT SELECT respective for 1 to 2 sec and the...

Page 15: ...old the INPUT SELECT button CH3 for 1 to 2 sec till a two beep sound is heard Now both the Video and Audio are temporally MUTE and the INPUT SELECT CH3 button will the be flashing Cancelation of the MUTE can be done by press and hold the same button for 1 to 2 sec again till two beeps sound is heard The button will stay ON ...

Page 16: ...lly MUTE and the OUTPUT SELECT CH4 button will the be flashing Cancelation of the MUTE can be done by press and hold the same button for 1 to 2 sec again till two beeps sound is heard The button will stay ON The Use Preset within the VIEW Menu indicate that the system is set to rout according to the Preset stored Use Preset 2 means that there is a Recall Preset done and the system is now routing b...

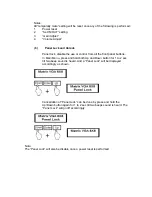
Page 17: ... all the front panel buttons In Main Menu press and hold both Up and Down button for 1 to 2 sec till two beep sound is heard And a Panel Lock will be displayed accordingly as shown Cancellation of Panel Lock can be done by press and hold the Up Down button again for 1 to 2 sec till two beeps sound is heard The Panel Lock will go off accordingly Note The Panel Lock will also be disable once a power...

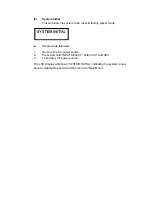
Page 18: ...reset mode Steps are as followed 1 Remove the AC power source 2 Press and hold INPUT SELECT button CH1 and CH3 3 Then apply AC power source The LCD Display will shown SYSTEM INITIAL indicating the system is now back to initial setting and it will then return to Main Menu ...

Page 19: ... 232 Command Code Item Function Command Code Return Code 1 Power on SETC10P31 RETC10P31 2 Power off SETC10P30 RETC10P30 3 Panel Lock SETC10L31 RETC10L31 4 Panel Unlock SETC10L30 SETC10L30 5 Video Source Select SETC60S3xxxyyy xxx is input source xxx 001 002 yyy is output source yyy 001 002 RETC60S3xxxyyy xxx is input source xxx 001 002 yyy is output source yyy 001 002 ...

Page 20: ... 1 setting input port xxx is port select xxx 001 002 10 Turn off video audio channel SETC40p3zxxx z is in out port setting z 0 setting output port z 1 setting input port xxx is port select RETC40p3zxxx z is in out port setting z 0 setting output port z 1 setting input port xxx is port select 11 Volume Level Setting SETC70V30xxxyyy xxx is output port xxx 001 002 yyy is volume level yyy 001 002 If x...

Page 21: ...eo Input or Output Port and the Gain Level will base on the last adjusted port as reference 15 Audio input Gain Level Setting SETC70X31xxxyyy xxx is port select xxx 001 002 yyy is gain level yyy 001 002 If xxx 000 indicates that Audio Input Gain will take effect on all the Audio Port RETC70X31xxxyyy xxx is port select xxx 001 002 yyy is gain level yyy 001 002 If xxx 000 indicates that Audio Input ...

Page 22: ...C30f3xxx xxx is save item xxx 001 002 2 When there isn t any Preset done to be save RETC0 20 Load Preset Item SETC30e3xxx xxx is load item xxx 001 002 1 When there is the Preset stored RETC30e3xxx xxx is load item xxx 001 002 2 When there isn t any Preset stored RETC0 21 Factory reset SETC00U0 RETC00U0 22 Get Power State SETC01P3 RETC11P3x x is power state x 0 is poweroff x 1 is power on 23 Get Pa...

Page 23: ... 002 RETC71W3zxxxyyy z is in out gain select z 0 select output gain z 1 select input gain xxx is port select xxx 001 002 yyy is gain level yyy 001 002 28 Get Audio input Gain level SETC41X31xxx xxx is port select xxx 001 002 RETC71X31xxxyyy xxx is port select xxx 001 002 yyy is gain level yyy 001 002 29 Get Video Channel Mute state SETC41Y3zxxx z is in out port setting z 0 getting output port z 1 ...

Page 24: ... port select xxx 001 002 RETC51b31xxxy xxx is select port xxx 001 002 y is input signal state y 0 no signal detect y 1 had signal detect 32 Get Support stated for Independence Video and Audio switching SETC01i3 RETC11i3x x indicates whether the system support independence Video and Audio switching x 0 NOT Supported x 1 Support 33 RS232 control code no support RETC0 ...

Reviews: