nKeyer
Page 12 of 15
Version 1g
By N7XG / KI6TMF
2.4.2
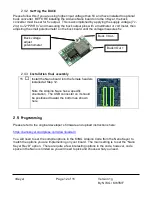
Setting the BUCK
Please follow this if you are using higher input voltage than 5V and have installed to optional
buck converter. BEFORE installing the Arduino Nano board onto the nKeyer, the buck
converter must be set for 5v output. This is accomplished by applying the supply voltage (7v -
23v)
to J2 “PWR In” and measuring the buck output pins with a multimeter or volt meter, then
adjusting the small potentiometer on the buck board until the voltage measures 5v.
2.4.3
Installation final assembly
15
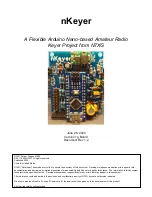
Install the Nano board into the female headers
installed at Step 12.
Note the Arduino Nano has a specific
orientation. The USB connector on it should
be positioned toward the bottom as shown
here
2.5
Programming
Please refer to the
original developer’s firmware and upload instructions here:
https://nanokeyer.wordpress.com/downloads-3/
You will need to set the compile options in the K3NG Arduino Code from the Nano Keyer to
match the options you are implementing on your board. The main setting is
to set the “Nano
Keyer Rev D” option. There are quite a few interesting options in the code, however, code
space in the Nano is limited so you will need to pick and choose what you need.
Buck voltage
adjust
potentiometer
Buck VOut +
Buck VOut -

