©2022
Texas Instruments Incorporated
3
education.ti.com
TI-84 Plus CE Python – Tello Drone
Getting Started
Tello Drone
6.
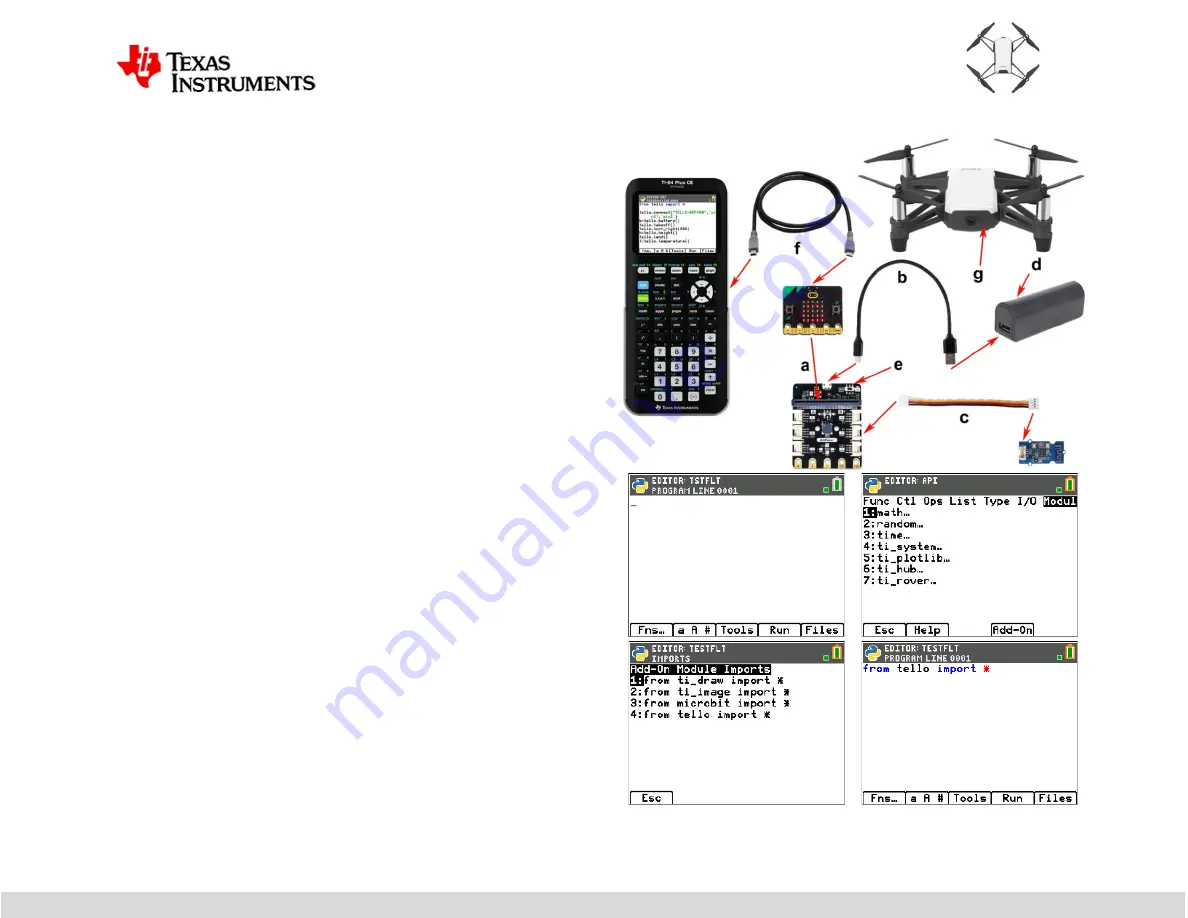
Connect the Tello Drone system.
a.
Insert the micro:bit V2 card into the BitMaker expansion
board. Be sure the 5x5 LED display faces the correct direction.
b.
Connect the external battery to the BitMaker power port.
c.
Connect the Grove WiFi module to the BitMaker ~P1 port.
d.
Ensure the external battery is fully charged and turned ON.
e.
Turn ON the BitMaker board. The LEDs on the micro:bit,
BitMaker board, and the WiFi Module will illuminate.
f.
Connect the unit-to-micro:bit cable to the micro:bit card's USB
port (micro-end) and then to the TI-84 Plus CE Python
calculator (mini-end). Then turn ON the calculator.
g.
Ensure the Tello drone is fully charged and turn it ON. It will
blink several colors and settle on flashing yellow when it is
ready.
7.
Configure the Tello Drone system.
a.
Select [New] to create a program with the name 'TESTFLT'
b.
Select [Ok]. There will be a blank Python editor screen on your
calculator.
c.
Import the tello module into your program. Select the [Fns…]
tab and select [Modul] tab.
d.
Select the [
Add-On
] tab and select
from tello import * the
import statement will paste at the program's top.
e.
Ensure the Tello is quickly blinking yellow; run the program
.
f.
Select the [
Run
] tab. Drone configuration will begin.


