Fidelix FX-RP multiDISPLAY
Programming manual
page 20 of 38
-
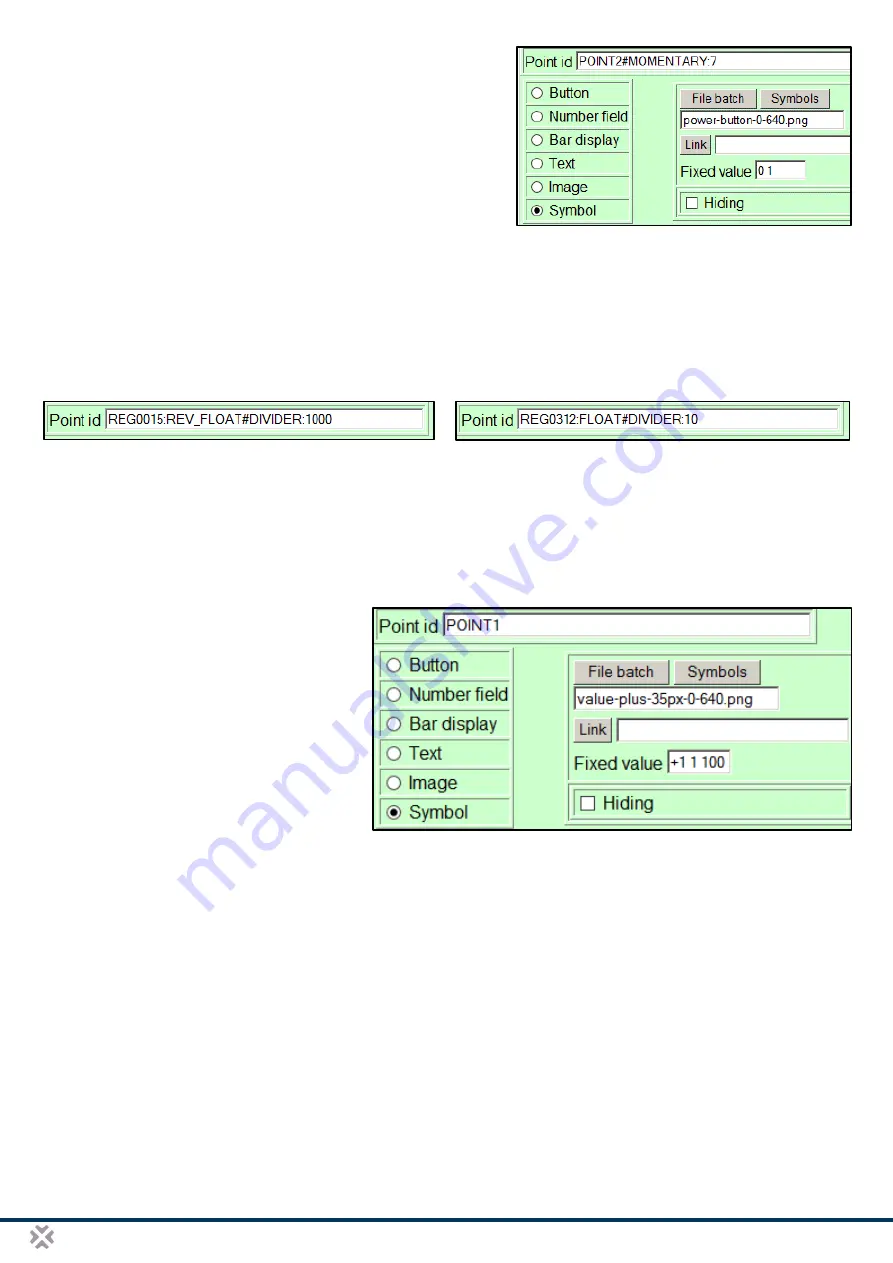
#MOMENTARY:xx can be used to send out ‘impulses’ of ‘xx’
seconds from a Modbus slave display. This should be used
in combination with the ‘fixed value’ box in the EditPoint
dialog box. Pushing the button in the example will set
POINT2 to ‘1’ for 7 seconds, after which the first value, ‘0’ will
be set back to POINT2. Be aware that there is no checking
done if the master has received the impulse; the display
merely sets the value for the defined time. This function is
only available during slave mode operation.
IEEE-754 Floating Point format
Normal points on the display are represented as 32-bit values covering two consecutive registers. If the
connected Modbus master is however sending out values as floating point values, the aforementioned
“REGxxxx” syntax can be used with addition of “:FLOAT” or “REV_FLOAT”, where “REV_FLOAT” is used when
the registers are in reversed order. The register number in the pointID is the first of two consecutive registers
used for the floating-point value.
Pay close attention to the registers attributed to POINTS in the display; you can use a mix of POINTx and
REGyyyy pointID’s, but each POINT uses three registers (see the
register structure later in this document
NOTE:
when using floating point values, the values shown are READ-ONLY and no other graphical elements
can be attributed to it. So only the actual received value can be visualised.
Increment, Decrease, Minimum & Maximum
When a symbol or button is selected, this
can be used to increment or decrease the
value of a point. For this, the pointID just
contains the point name (e.g. POINT145),
and in the “Fixed value” field, 3 numbers,
separated by spaces, define the
incrementation or decrementation step, the
minimum value and the maximum value a
push on the symbol will trigger (e.g. writing
“+1 0 100” means you will increment the
point’s value with steps of 1 to a maximum
of 100). #MIN and #MAX in the pointID field have no influence here, and are ignored, so it best to omit them
completely. Note however that the minimum and maximum value you define in the “fixed value” field must not
only be adjusted to the point’s #DIVIDER (so it is the value before division), but will also overrule any #MIN and
#MAX value you define in the actual displaying of the point’s value.
Special symbols can be defined for points with #MIN and/or #MAX values defined in the pointID field of the
EditPoint dialog box: the symbol with name formatted as “NameOfTheSymbol-min-640.gif” will be displayed
when the point’s value = #MIN, the symbol with name formatted as “NameOfTheSymbol-max-640.gif” will be
displayed when the point’s value = #MAX, the symbol with name formatted as “NameOfTheSymbol-0-640.gif”
will be displayed when the point’s value = zero (this image will be shown if #MIN or #MAX = zero), and the
symbol with name formatted as “NameOfTheSymbol-mid-640.gif” will be displayed when the point has any value
other than #MIN, #MAX or zero.


