© 2016 SBOX
2.4 Network Configuration
2.4.1 DHCP Setup
DHCP is not recommended for appliance installations. If you choose to utilize a
DHCP assigned address, simply let the appliance boot up and an address will be
assigned. To verify the address, log onto the appliance and run the “ip addr”
command.
[sbox@sboxnode1 ~]$
ip addr
1: lo: <LOOPBACK,UP,LOWER_UP> mtu 65536 qdisc noqueue state UNKNOWN
link/loopback 00:00:00:00:00:00 brd 00:00:00:00:00:00
inet 127.0.0.1/8 scope host lo
valid_lft forever preferred_lft forever
inet6 ::1/128 scope host
valid_lft forever preferred_lft forever
2:
nic0
: <BROADCAST,MULTICAST,UP,LOWER_UP> mtu 1500 qdisc pfifo_fast state UP qlen
1000
link/ether 08:00:27:9e:96:c0 brd ff:ff:ff:ff:ff:ff
inet 192.168.1.100
/24 brd 192.168.1.255 scope glo bal dynamic nic0
valid_lft 68091sec preferred_lft 68091sec
After running “ip addr”, locate the output stanza for “nic0”. In that block, there will be
an ip address following the “inet” tag. This is the ethernet address assigned to to the
primary ethernet port. Additional network ports can be assigned using the SBOX
Manager.
2.4.2 Manual Network Setup
The first ethernet port must be configured before the appliance can be managed. To
do so, log onto the appliance as detailed in step 2.3 and type the command “
setup
”.
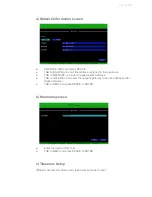
You will be walked through a text based setup screen. While all of these settings
can be changed with SBOX Manager, it is important to get the initial networking
items correct so the appliance can be accessed.
A few notes on navigation in the setup screen:
●
Use TAB to switch between screen areas
●
Use the ARROW keys to switch between selection elements
●
Use SPACE or ENTER to select an element (ie DHCP or STATIC)
●
TAB to the NEXT element and hit SPACE or ENTER to go to the next screen
6


