background image

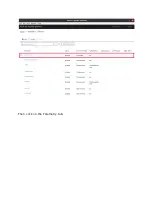
Then, click on the Telemetry tab:

Summary of Contents for ME910C1-WW

Page 1: ...y cloud connected design This page will go over the necessary steps to get started using the Agora platform with Azure IoT Hub If you run into any issues while trying to follow this guide please conta...

Page 2: ...umidity Sensor U7 Si7021 A10 GM 1 R I C Humidity and Temperature Sensor Air Quality U2 BME680 Temperature Humidity Pressure Air Quality Time Of Flight ranging U14 VL53L0X 2 m laser range finding IC Mi...

Page 3: ...page Required Software and Supported Toolchains Build Tools Installation The Agora product development kit supports software development using ARM s IoT RTOS Mbed OS Follow the Mbed OS guide here to i...

Page 4: ...ill need a serial terminal program to view debug output from your Agora board The Flidor development board included in the Agora product development kit has an on board UART to USB converter so no oth...

Page 5: ...upply and the power supply selection jumper For this project you must have the included cellular antenna plugged in to the appropriate U FL connector J7 on the Agora board In the above image the cellu...

Page 6: ...nd as a serial port Your hardware is now set up and ready to connect to AWS Steps 3 and 4 Build SDK and Run Samples and Integration with IoT Explorer Basic Azure IoT Hub Demo The basic Azure IoT Hub D...

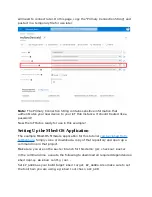
Page 7: ...Setting Up the Mbed OS Application The example Mbed OS firmware application for this tutorial can be cloned from GitHub here Simply clone or download a copy of that repository and open up a command li...

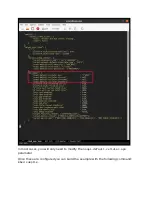
Page 8: ...EADME to integrate the credentials Configuring the Application Before building the application you must configure the APN of your cellular carrier along with any other cellular credentials your SIM ma...

Page 9: ...In most cases you will only need to modify the nsapi default cellular apn parameter Once these are configured you can build the example with the following command mbed compile...

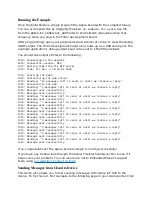
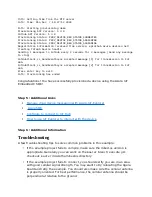
Page 10: ...left to send or until we receive a reply Info Message sent successfully Info Sending 7 messages left to send or until we receive a reply Info Message sent successfully Info Sending 6 messages left to...

Page 11: ...ot below Once the next page loads you can type your message in Message Body text box Before sending the message reset the Agora microcontroller the Flidor development board has a convenient on board r...

Page 12: ...sent successfully Info Sending 7 messages left to send or until we receive a reply Info Message sent successfully Info Sending 6 messages left to send or until we receive a reply Info Message sent su...

Page 13: ...Then click on the Telemetry tab...

Page 14: ...Click on the Start button at the top...

Page 15: ...Reset the Agora board and wait a minute for the connection to Azure IoT Hub to be reestablished Once reconnected Azure IoT Explorer will visualize the messages coming from the Agora board...

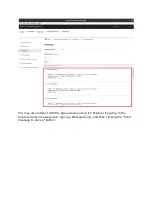
Page 16: ...You may also interact with the Agora device using IoT Explorer by going to the Cloud to device message tab typing a Message body and then clicking the Send message to device button...

Page 17: ...g from the Agora device Info Message received from IoT Hub Info Message body Hello Agora Info The demo has ended Provisioning Client Demo The next demo shows how to perform provisioning using an Azure...

Page 18: ...re you have cloned Embedded Planet s fork of the example and checked out the provisioning test branch Then follow the first few steps under the Simulate first boot sequence for the device section of t...

Page 19: ...ended Congratulations You have successfully provisioned a device using the Azure IoT Embedded C SDK Step 5 Additional Links Manage cloud device messaging with Azure IoT Explorer Azure SDK Configure to...

Page 20: ...d in the on board socket Make sure your cellular APN is configured as appropriate for your carrier You can change this parameter by modifying the nsapi default cellular apn value in the example applic...

Reviews: