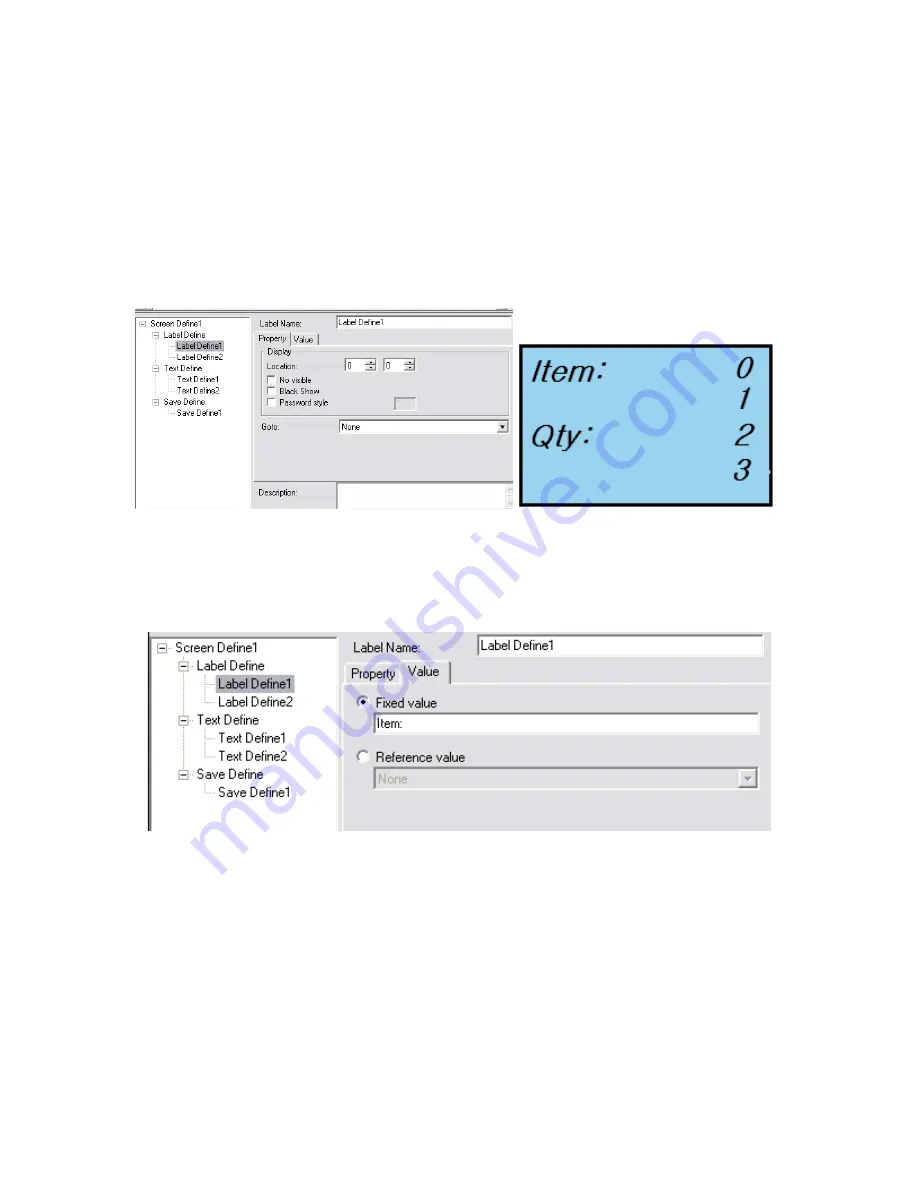
6. In this step we will define the text the user sees as well as set any restrictions on the
length of characters an “ITEM” and “QTY” can be.
In Window 2
, click on “Screen
Define 1” and look in
Window 4
. In
Window 4
select the “Clear” radio button.
In
Window
2
, click on “Label Define 1” and then select the “Property” tab in
Window 4
.
Set the Location for ( 0, 0 ). Do the same for “Label Define 2” but set location to ( 2, 0 ).
This will force the screen to look like the screen show below, there are four (4) printable
lines on the screen of the HT580 (the 0,1,2,3 will
not
be printed on your final application,
they are meant as a visual assist of the 4 printable lines):
In
Window
2
, click on “Label Define 1” and then select the “Value” tab in
Window 4
.
Enter “Item:” into the text field labeled “Fixed Value”. Do the same for “Label Define 2”
but enter “Qty:” into the text field labeled “Fixed Value”.
In
Window 2
, click on “Text Define 1” and select the “Permit Input” tab in
Window 4
.
We want to allow the “Items” to be Scanned-in or Keyed-in, so we must check “Scan”
and “Keyboard”. The
Input Type
can be letters (upper- or lower-case) and/or numbers.
The
Input Length
can be from 1 to 20 characters. We don’t select 0 as the min length
because we don’t want to allow blank/empty data. Do the same for “Text Define 2” but
select keyboard only as the
Input Mode
,
Input Type
of numbers and Min 1, Max 7. See
image below:
4


