12
constants. The use of predefined constants, such a
HIGH
and
LOW
, make the
program much more readable end easier to debug.
The delay is used to pause the program for 0.1 seconds.
Exercise 1
1.
After you get the program: led_01.ino to run, modify it to:
a.
Turn on the Board LED (digital I/O pin 13) and stay lit for 1 second.
b.
After the 1 second, turn off for 0.1 seconds.
c.
Repeat indefinitely.
2.
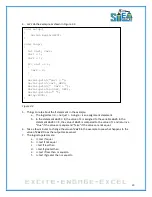
We can use the predefined constants to make our programs easier to read. For example, pin 13
represents the board LED for our robot. We can make a global definition that
Board_LED
is 13,
as shown in Figure 2.3.
3.
Beginner programmers are hesitant to use long descriptive variables. Typing
Board_LED
is more
time-consuming than typing 13, but program led_02.ino is much easier to understand than
led_01.ino. They do the exact same thing. So, make your programs as easy to read as possible.
Figure 2.3: Program – led_02.ino
4.
Now that you understand the use of digital I/O, let’s connect our own LEDs to your STEM Board
microprocessor.
Summary of Contents for Pi-Bot v2.00
Page 67: ...67 Figure 6 15 ...
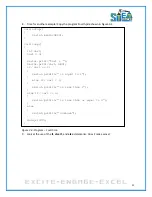
Page 78: ...78 UltraSonicSensorTestwithLED Program ...
Page 80: ...80 ObstacleAvoidance Program ...
Page 82: ...82 ObstacleAvoidancewithLED Program ...
Page 83: ...83 ObstacleAvoidancewithLED Program CONTINUED ...
Page 90: ...90 Download and run the following program LineFollowing Program ...
Page 91: ...91 LineFollowing Program CONTINUED ...
Page 94: ...94 AdvancedLineFollowing Program CONTINUED ...
Page 95: ...95 AdvancedLineFollowing Program CONTINUED ...
Page 96: ...96 AdvancedLineFollowing Program CONTINUED ...
Page 110: ...Appendix B Complete Pi Bot Wiring Schematic ...


