23
e.
Experiment by changing the initial value of count and the logical test.
i.
Note: Make sure that you
SAVE
on a regular basis when you are testing your code. It
is easy to get the program into an infinite loop, and sometime you may need to kill
(stop) the program.
5.
For our last example, before we start controlling the hardware, let’s combine the use of the
if
statement and the
for
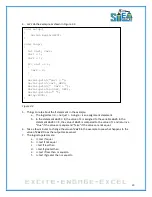
statement. The program shown in Figure 3.6 counts from 1 to 10 and
determines if the number is less than 5, equal to 5, or greater than 5.
Figure 3.6: Program – Sixth.ino
Exercise 3
1.
Write a program based on the Sixth.pde to compute and print the number from 0 to 10 together
with the factorial of the number. The output of the program should look like this:
The factorial of 0 is 1
The factorial of 1 is 1
The factorial of 2 is 2
The factorial of 3 is 6
etc…
void setup()
{
Serial.begin(9600);
}
void loop()
{
int var1=0;
for(int count=1; count<=10; count++)
{
if(count < 5)
{
Serial.print(count, DEC);
Serial.println(" is less than 5 ");
}
else if(count > 5)
{
Serial.print(count, DEC);
Serial.println(" is greater than 5 ");
}
else
{
Serial.print(count, DEC);
Serial.println(" is equal to 5 ");
}
}
while(1==1);
}
Summary of Contents for Pi-Bot v2.00
Page 67: ...67 Figure 6 15 ...
Page 78: ...78 UltraSonicSensorTestwithLED Program ...
Page 80: ...80 ObstacleAvoidance Program ...
Page 82: ...82 ObstacleAvoidancewithLED Program ...
Page 83: ...83 ObstacleAvoidancewithLED Program CONTINUED ...
Page 90: ...90 Download and run the following program LineFollowing Program ...
Page 91: ...91 LineFollowing Program CONTINUED ...
Page 94: ...94 AdvancedLineFollowing Program CONTINUED ...
Page 95: ...95 AdvancedLineFollowing Program CONTINUED ...
Page 96: ...96 AdvancedLineFollowing Program CONTINUED ...
Page 110: ...Appendix B Complete Pi Bot Wiring Schematic ...


