10
Atmel AVR2052
8200M-AVR-11/11
upgrade server, which is the device that sends new firmware images to other devices
on the network. For this purpose, a device programmed with the Runner application is
used. Such device is able to receive and process commands from a PC over the
serial link. To control the Runner device, the Bootloader PC tool included into the
Atmel Serial Bootloader package is used (see Chapter
). Pre-built images of the
Runner application for various configurations are provided with the SDK and are
located in the
\Evaluation tools\Runner
directory.
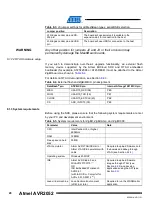
The details of compiling and running WSNDemo with OTAU support differ for each
platform. Please refer to the appropriate section listed in the table below for platform-
specific instructions.
Table 4-3.
Platform-specific settings for WSNDemo with OTAU support.
For platform
Refer to Section
ZigBit
megaRF
XMEGA
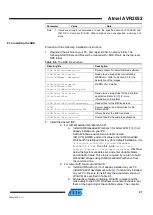
After WSNDemo device(s) with OTAU support are configured, programmed and
joined to the network, follow the step-by-step instructions below to execute an over-
the-air upgrade:
1. Connect the Runner device to the PC.
2. Start the Bootloader PC tool (from the Microsoft
®
Windows
®
Start Menu, select
Atmel > Bootloader > Bootloader
):
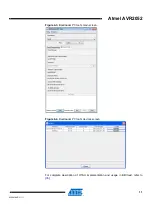
a. On the
OTAU
tab, select the network parameters, as shown in
b. Specify
Connection
settings to match the port where the Runner device
is connected.
c. Click the
Init
button to force the program to collect information about the
node’s configuration; for example, security settings or network
parameters.
d. Click the
Set keys
button to manually set keys; for example network key,
TC link key, public and private keys.
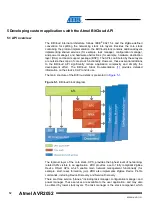
e. The utility will automatically populate the list of devices that support OTA
functionality (that is, applications that include OTA cluster). By default,
only devices programmed with WSNDemo with OTA support should be
3. Start the Image Converter PC utility (from Windows Start Menu, select
Atmel >
Bootloader > Converter
):
a. Select the
*.srec
image(s) you wish to upload to a remote, OTA-capable
device over the air.
b. Fill in image metadata information in the fields below and click
Convert
.
4. Return to the Bootloader PC tool:
a. Click on the
Update
button next to the device information.
b. In the Open File dialog, select the
*.zigbee
file that was converted in
step 3.
c. Click
OK
, and the upload process will begin. It usually takes 5-10 minutes
to upload a single image to a router device; sleeping end device upgrade
may last considerably longer.
d. Once the image is uploaded, the progress bar indicating the upload
progress will be replaced with the button. The device will not reset and
switch to the new image, until the command for this is sent by pressing
this button.


