BT900-Sx Hardware Integration Guide
Intelligent BTv4.0 Dual Mode Module
Embedded Wireless Solutions Support Center:
http://ews-support.lairdtech.com
www.lairdtech.com/bluetooth
27
Americas: +1-800-492-2320
Europe: +44-1628-858-940
Hong Kong: +852 2923 0610
Add decoupling capacitors for filtering the external source. The power-on reset circuitry within BT900
series module incorporates brown-out detector, which simplifies the power supply design. Upon
application of power, the internal power-on reset ensures that the module starts correctly. You may
add a bulk capacitor (if required) to smooth out any noise that may be present on the VCC supply due
to BT900 activity.
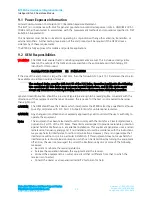
Decide if BT900 is to be powered by 3.3V or 1.8V external Power Supply
The BT radio chip in the BT900 has two internal regulators, a high voltage (input pin BT_VREG_IN_HV)
and a low voltage (input pin BT_VREG_OUT_HV). ONLY one regulator can be used to power radio
chip.
-
Method 1: If the BT900 is required to operate from 3.3V, connect the external 3.3V supply to pin
31 BT_VREG_IN_HV, pin 5 (VCC), and pin 43 (BT_VDD_IO). Customer MUST leave pin 32
BT_VREG_OUT_HV UNCONNECTED.
-
Method 2: If the BT900 is required to operate from 1.8V, connect the external 1.8V supply to pin
32 BT_VREG_OUT_HV, Pin 5 (VCC), and pin 43 (BT_VDD_IO). Customer MUST leave pin 31
BT_VREG_IN_HV UNCONNECTED.
Note that 1.8V operation is not supported in the current
smart
BASIC runtime engine FW v9.1.2.0).
You must operate the BT900 from nominal 3.3V supply (2.8-3.6V).
Place decoupling capacitor 0.1 uF on pin 43 (BT_VDD_IO) to GND.
Value 0.1uF or value suitable to filter the noise present.
VCC Turn on/off in the following order or preferably at the same time.
Turning on: VCC(BT_VREG_IN_HV, BT_VDD_IO) > AVCC > AVRH.
Turning off: AVRH > AVCC > VCC(BT_VREG_IN_HV, BT_VDD_IO).
If not using the ADC convertor, connect AVCC=VCC.
You must connect a 100 K pull-down resistor on BT_#SEL externally to GND.
AIN (ADC) and SIO pin IO voltage levels
BT900 SIO voltage levels are at VCC. Ensure that input voltage levels into SIO pins are also at VCC. (if
VCC source is a battery whose voltage will drop). Ensure that the ADC pin maximum input voltage for
damage is not violated.
Filter the external supply that is being connected to BT900 AVCC and AVREF pins.
Filter depends on the noise present on your external supply. See the DVK-BT900-V01 schematic.
UART
This is required for loading your
smart
BASIC application script during development (or for subsequent
upgrades). Add connector to allow UART to be interfaced to PC (via UART–RS232 or UART-USB).
UART_RX and UART_CTS
SIO_0 (alternative function UART_RX) is an input, set with internal pull-up (in FW). The pull-up prevents
the module from going into deep sleep when UART_RX line is idling.
SIO_3 (alternative function UART_CTS) is an input, set with external pull-down. This pull-down ensures
that the default state of the UART_CTS will be asserted; this means it can send data out of the
UART_TX line (in the case when UART_CTS is not connected, which we do not recommend).
nAutoRUN pin and operating mode selection
The nAutoRUN pin must be externally held high or low to select between the two BT900 operating
modes at power-up:
- Self-contained Run mode (nAutoRUN pin held at 0V).
- Interactive/development mode (nAutoRUN pin held at VCC).
Make provisions to allow operation in the required mode. Add a jumper to allow nAutoRUN pin to be
held high or low (via 10K resistor) or driven by host GPIO.
I2C
I
MPORTANT
: Pull-up resistors on both I2C_SCL and I2C_SDA lines are not provided in the BT900
module and MUST be provided externally to the module as per I2C standard.
SPI
Implement SPI chip select using any unused SIO pin within your
smart
BASIC application script to
control SPI_CS from the
smart
BASIC application to allow multi-dropping.


