background image

1/22/2018

LilyPad ProtoSnap Plus Hookup Guide - learn.sparkfun.com

https://learn.sparkfun.com/tutorials/lilypad-protosnap-plus-hookup-guide?_ga=2.234157401.659504291.1516640116-204410570.1509632255

16/23

COPY CODE

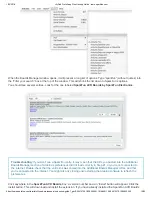
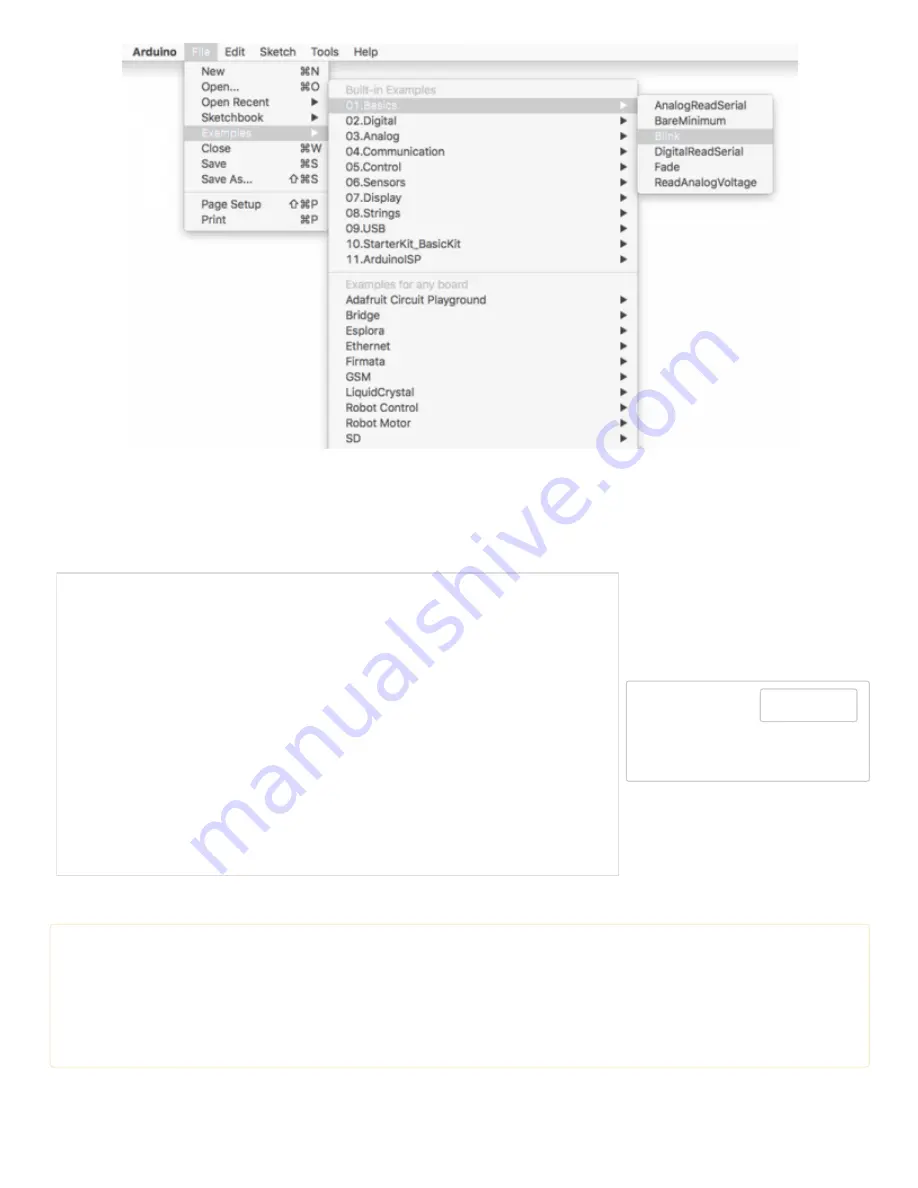
Arduino will compile the code, then send it to the LilyPad USB Plus via the USB cable. While the code is uploading,
the built-in LED will blink to signal the code is transferring. When the code finally runs, the RGB LED at the center of
the board will slowly blink green. Success!

If this all works, congratulations! You’re all set up and ready to prototype with the LilyPad ProtoSnap Plus. Check out
our activity guide for more information on writing your own code to prototype for the ProtoSnap Plus:

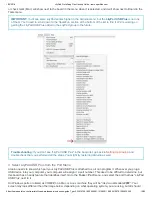
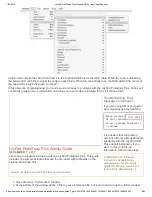
Troubleshooting: Error

Messages on Upload?

If you are using a Mac and get an
error message like the following:

Board LilyPad U
SB Plus (platfo
rm avr, package SparkFun) i
s unknown 

It is possible that old Arduino
versions left over after updates are
interfering with the LilyPad USB
Plus support installation. If you
want to clear out this old
information, follow these steps:

 WARNING: The following
instructions will delete any
extensions you've previously
applied to Arduino, returning it
to its factory-default state. It

should not delete any sketches that you've created.

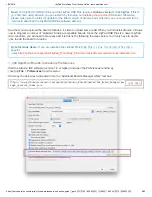
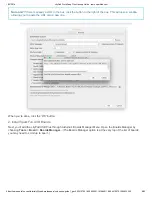
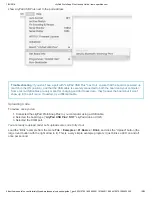
1. Open Arduino’s “Preferences” window.
2. At the bottom of the window will be a link to your preferences file. Click on it and it will open a finder window.

LilyPad ProtoSnap Plus Activity Guide

DECEMBER 7, 2017

Learn how to program in Arduino with the LilyPad ProtoSnap Plus. This guide
includes 10 example activities that use the pre-wired LilyPad boards on the
LilyPad ProtoSnap Plus.

Summary of Contents for LilyPad ProtoSnap Plus

Page 1: ...totype and test your project before you start sewing The LilyPad ProtoSnap Plus features twelve LilyPad components connected to a LilyPad microcontroller by conductive pathways called traces For refer...

Page 2: ...input These sew tabs can read sensors that output a varying voltage like the light sensor built into the ProtoSnap Plus A symbol in front of the number indicates that tab supports PWM Pulse Width Mod...

Page 3: ...LilyPad USB Plus LilyPad Switch A9 LilyPad USB Plus receives switch state on off input to change modes Expansion Port A9 A9 Clippable pads to connect another LilyPad piece to Shares connection with th...

Page 4: ...ached to the board you ll be able to prototype and test your project before you start sewing The LilyPad ProtoSnap Plus ships with pre loaded code that showcases all of the LilyPad pieces connected to...

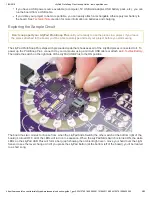
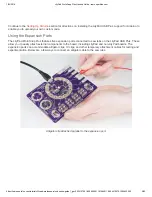
Page 5: ...ou to upload your own custom code Using the Expansion Ports The LilyPad ProtoSnap Plus features five expansion ports connected to sew tabs on the LilyPad USB Plus These allow you to easily attach exte...

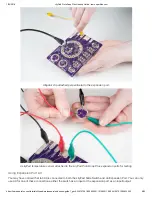
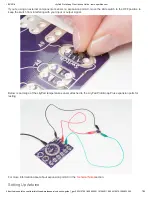
Page 6: ...lligator clip attached perpenticular to the expansion port A LilyPad temperature sensor attached to the LilyPad ProtoSnap Plus expansion ports for testing Using Expansion Port A9 You may have noticed...

Page 7: ...If you re using an external component or sensor on expansion port A9 move the slide switch to the OFF position to keep the switch from interfering with your input or output signal Below is an image of...

Page 8: ...you first install Arduino it knows how to program a number of standard Arduino compatible boards Since the LilyPad USB Plus is a newer LilyPad microcontroller you will need to manually add it to this...

Page 9: ...L in the box click the button to the right of the box This will open a window allowing you to paste the URL onto a new line When you re done click the OK button 2 Install SparkFun AVR Boards Next you...

Page 10: ...by SparkFun Electronics Troubleshooting If you don t see a SparkFun entry it may mean that the URL you pasted into the Additional Boards Manager section of Arduino s preferences did not load correctl...

Page 11: ...blue INSTALLED note should appear next to the SparkFun AVR Boards title You re ready to start programming Uploading Code Once you ve installed the LilyPad USB Plus extensions to Arduino you re ready...

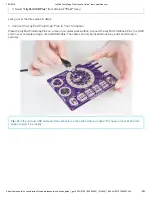
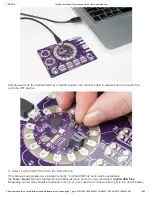
Page 12: ...et s go over the three steps in detail 1 Connect the LilyPad ProtoSnap Plus to Your Computer Place the LilyPad ProtoSnap Plus on a clean non metal work surface Connect the LilyPad ProtoSnap Plus to a...

Page 13: ...N position You will not be able to upload code to the board if it is set to the OFF position 2 Select LilyPad USB Plus from the Board Menu If the Arduino board support was installed correctly LilyPad...

Page 14: ...uture Troubleshooting If you don t see LilyPad USB Plus in the board list go back to Setting Up Arduino and double check that you performed all the steps You might try restarting Arduino as well 3 Sel...

Page 15: ...Some micro USB cables are only meant for charging and don t pass data they ll power the board but it won t show up in the port menu If needed try a different cable Uploading Code To review once you ve...

Page 16: ...r Messages on Upload If you are using a Mac and get an error message like the following Board LilyPad U SB Plus platfo rm avr package SparkFun i s unknown It is possible that old Arduino versions left...

Page 17: ...ur Arduino installation is now clean Restart Arduino and repeat the LilyPad installation instructions from the previous page Stitching Into a Project Once you are done exploring the parts of the Proto...

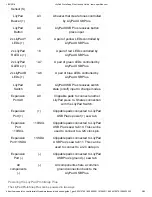
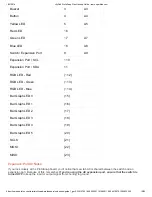
Page 18: ...very similar to other Arduinos but has some special features and limitations you ll want to know about Pin Numbering Below is a list of the LilyPad USB Plus I O pins and each function Legend n digita...

Page 19: ...SCL 10 Expansion Port SDA 11 RGB LED Red 12 RGB LED Green 13 RGB LED Blue 14 Bar Graph LED 0 15 Bar Graph LED 1 16 Bar Graph LED 2 17 Bar Graph LED 3 18 Bar Graph LED 4 19 Bar Graph LED 5 20 SCLK 21 M...

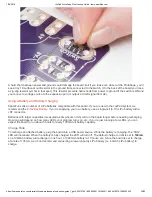
Page 20: ...board If you are new to the LilyPad system we recommend the E Textiles Battery If you re supplying your own battery use a single cell 3 7V LiPo battery with a JST connector Batteries with larger capac...

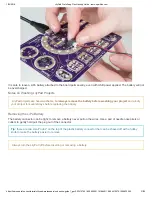
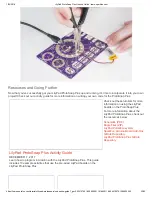
Page 21: ...projects are hand washable but always remove the battery before washing your project and air dry your project for several days before replacing the battery Removing the LiPo Battery The battery conne...

Page 22: ...on writing your own code for the ProtoSnap Plus Check out these tutorials for more information on using the LilyPad boards on the ProtoSnap Plus For more information about the LilyPad ProtoSnap Plus...

Page 23: ...640116 204410570 1509632255 23 23 LilyPad Light Sensor Hookup Guide How to hook up the LilyPad Light Sensor as well as some project ideas and example code Powering LilyPad LED Projects Learn how to ca...

Reviews: