N
EW
F
EATURES
(S
OFT
M: 7.
XX
)
Page 25 of 48
80
40 CNC
Improvement in the
tool measuring
cycle PROBE1
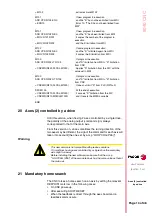
Parameters J, L, D, E, S, M, C, N are optional. If not programmed,
the following values are assumed:
J0 (calibration). L0 (the tool is not rejected due to length wear). D=
tool radius (length probing is carried out on the tip). E0, S0 (spindle
stopped). M0 (the tool is not rejected due to radius wear). C0
(interrupts the execution for the user to select another tool). N0 (the
cutting edges are not measured separately).
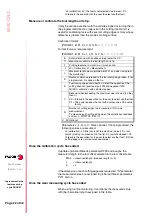
Once the calibration cycle has ended
It uses global arithmetic parameters P298, P299 and assigns the
measured length and radius to the tool offset selected in the tool
offset table.
If the dimension of each cutting edge was requested, parameter "N",
the measured lengths are assigned to global arithmetic parameters
P271 and on, and the measured radii to global arithmetic parameters
P251 and on.
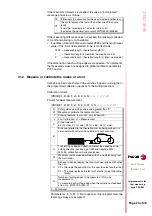
Once the wear measuring cycle has ended
When using tool life monitoring, it compares the measured radius
and length values with the theoretical values assigned in the table.
If the maximum allowed is exceeded in any of them, it issues a "tool
rejected" message and acts as follows:
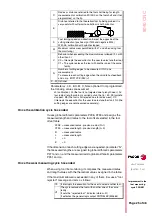
D
Radius or distance referred to the tool shaft being for length
measurement or calibration. With D0 on the tool shaft and if not
programmed, on the tip.
E
Distance referred to the theoretical tool tip being probed. It is
very useful with cutters whose bottom is not horizontal.
S
Tool turning speed and direction. Select the opposite of the
cutting direction (positive sign if M3 and negative if M4)
With S0, calibration with spindle stopped.
M
Maximum radius wear permitted (with J1 and when using tool
life monitoring).
C
Behavior when exceeding the maximum wear allowed (if L or M
other than 0).
C0 = Interrupts the execution for the user to select another tool.
C1 = The cycle replaces the tool with another one of the same
family.
N
Number of cutting edges to be measured. If N0, one
measurement.
To measure each cutting edge when the spindle has feedback
and s.m.p. M19TYPE (P43) =1.
X...W Optional
P298 = measured radius - previous radius (R+I)
P299 = measured length - previous length (L+K)
R
= measured radius
L
= measured length
I
= 0
K
= 0
C0
It interrupts the execution for the user to select another tool.
C1
The cycle replaces the tool with another one of the same
family.
It sets the "rejected tool " indicator (status = R)
It activates the general logic output PRTREJEC (M5564)
Summary of Contents for 8040 CNC - FEATURES
Page 1: ...REF 0307 SOFT M 7 XX SOFT M 7 1X 8040 CNC NEW FEATURES ...
Page 2: ...Page 2 of 2 8040 CNC NEW FEATURES SOFT M 7 XX SOFT M 7 1X ...
Page 45: ...User notes NEW FEATURES SOFT M 7 XX Page 41 of 48 8040 CNC ...
Page 46: ...User notes NEW FEATURES SOFT M 7 XX Page 42 of 48 8040 CNC ...
Page 52: ...User notes NEW FEATURES SOFT M 7 1X Page 48 of 48 8040 CNC ...
Page 53: ...Operating Manual MC option Ref 0204 ing ...
Page 143: ...Self teaching Manual MC option Ref 0112 ing ...
Page 147: ...Chapter 1 Theory on CNC machines ...
Page 156: ...Chapter 2 Theory on tools ...
Page 164: ...Chapter 3 Hands on training ...
Page 186: ...Chapter 4 Automatic Operations ...
Page 201: ...Chapter 5 Summary of work cycles ...
Page 220: ...Chapter 6 Conversational part programs ...
Page 235: ...Appendix I Programming example ...
Page 237: ...Self teaching Manual Appendix I Page 3 MC Model Programming example Step 1 Surface milling 1 ...
Page 239: ...Self teaching Manual Appendix I Page 5 MC Model Programming example Step 3 Rectangular boss 3 ...
Page 240: ...Self teaching Manual Appendix I Page 6 MC Model Programming example Step 4 Circular pocket 4 ...


