2. Assembly
If you have a
[https://www.pololu.com/product/2509]
or a separate
[https://www.pololu.com/product/2508]
and
[https://www.pololu.com/product/1418]
, this section
will guide you through assembling them into a complete robot.
If you purchased an assembled
[https://www.pololu.com/product/2510]
, this
assembly work has been done for you, although you might want to configure your Zumo by adding or
removing some
[https://www.pololu.com/docs/0J57/3.c]
. Otherwise, you can simply
install four AA batteries and an Arduino (or compatible controller) and skip to
to start
learning how to use your Zumo!
2.a. What you will need
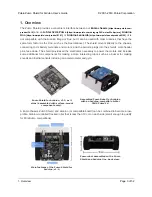
The Zumo Shield is designed to be mounted on a
[https://www.pololu.com/product/
, which is included (along with a
[https://www.pololu.com/product/1410]
) if you have a
[https://www.pololu.com/product/2509]
. In addition, you will require these
items to construct a working Arduino-controlled Zumo robot:
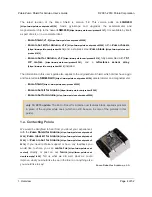
Additional required components
• Two
[https://www.pololu.com/category/60/micro-metal-gearmotors]
(we
recommend 100:1, 75:1, or 50:1 gear ratio versions with
[https://www.pololu.com/category/
173/6v-high-power-hp-micro-metal-gearmotors]
or
[https://www.pololu.com/category/174/6v-high-
power-carbon-brush-hpcb-micro-metal-gearmotors]
motors). The
[https://www.pololu.com/product/2510]
includes two
micro metal gearmotors.
• An
Arduino
or
compatible
board
(we
recommend
an
[https://www.pololu.com/category/165/a-star-32u4-prime]
[https://www.pololu.com/product/2192]
• Four AA batteries (we recommend rechargeable
Please see the
product description for the chassis kit
[https://www.pololu.com/product/1418]
for more
information and recommendations about selecting these components.
Additional optional components
•
[https://www.pololu.com/product/1419]
•
Basic sumo blade for the Zumo chassis
[https://www.pololu.com/product/1410]
•
[https://www.pololu.com/category/7/sensors]
, such as our
Pololu Zumo Shield for Arduino User’s Guide
© 2001–2019 Pololu Corporation
2. Assembly
Page 8 of 52


