background image

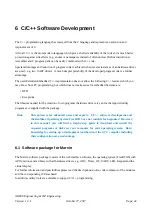
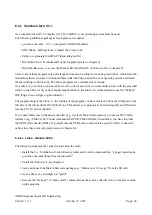
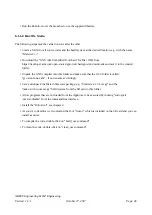
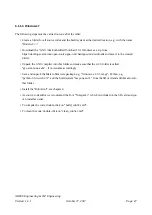
4.3 Bootload hex-files (C/C++ code)

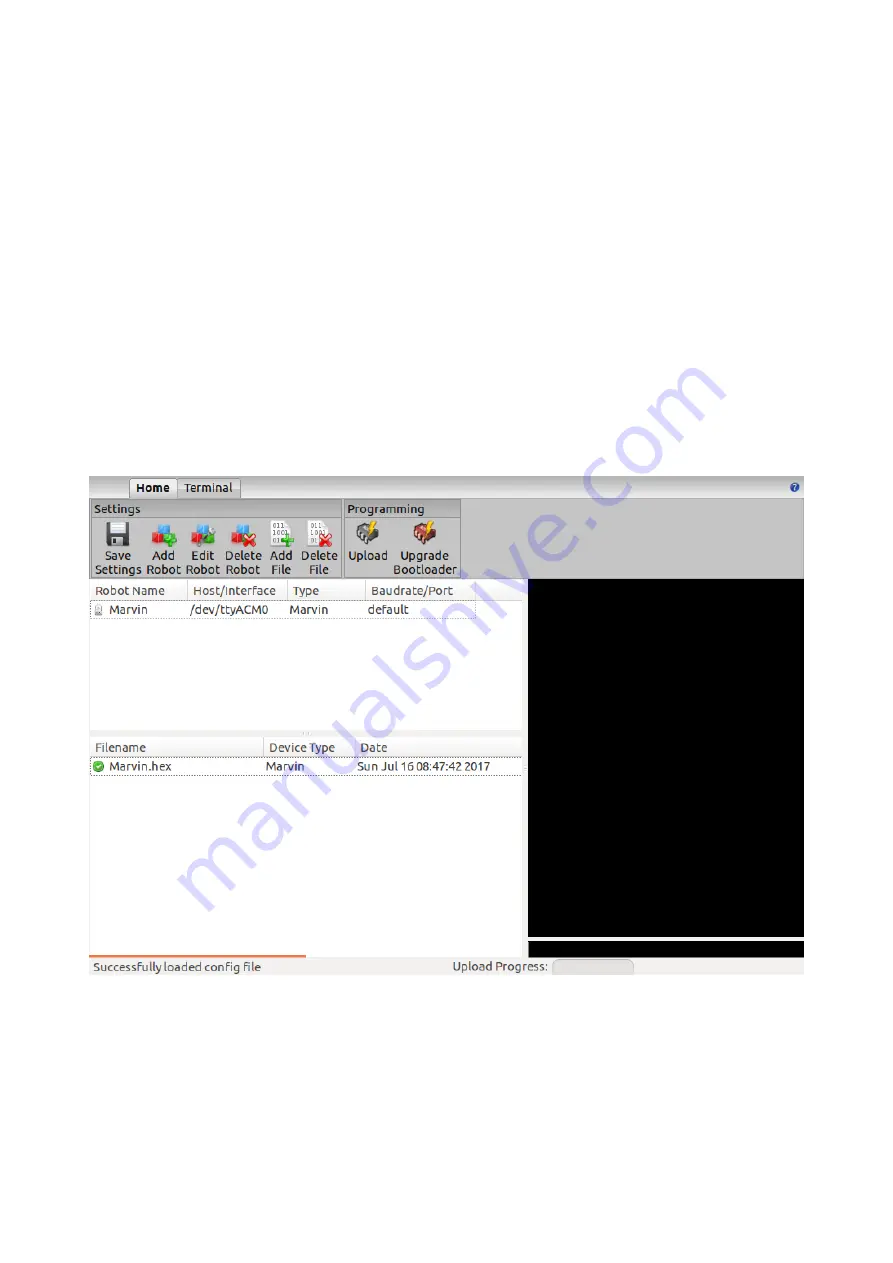
To upload a self-written program “myProg.hex” or upgrade the Bootloader “bootloader-xx.hex” into the

micro-controller you must have installed the

JM3 Robot-Tool

before you can continue (Figure 4.2).

Hint:

The JM3 Robot-Tool differentiates two types of hex programming:

• “Upload” - iRP-Firmware or application program code upload, like “irpxxx.hex”

file or own C++ program code “myprogram.hex”.

• “Upgrade Bootloader” - the Blootloader itself can be updated, a file will look like

“bootloader-xx.hex”.

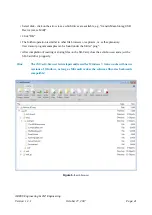
Figure 4.2

The JM3 Robot-Tool

4.3.1 iRP Firmware update

The procedure for a iRP Firmware update is described in this chapter.

AREXX Engineering & JM³ Engineering

Version: 1.3.1

October 27, 2017

Page: 36

Summary of Contents for Marvin

Page 1: ...Engineering User Manual Marvin IoT Robot 2015 2017 AREXX Engineering und JM Engineering www arexx com The latest updates are available at http jm3 engineering com AREXX Engineering JM Engineering Version 1 3 1 October 27 2017 Page I ...

Page 2: ...use of the robot This excludes claims that fall under the legal prescription of product responsibility As soon as you make irreversible changes for example soldering other components drilling holes etc on the robot or its accessories or the robot is damaged as a result of non observance of these instructions will void any warranty claim It cannot be guaranteed that the supplied software will satis...

Page 3: ...ite sensitive to electrostatic discharge ESD Only handle devices at the edges and avoid direct contact to the parts on the PCB Normal use This product has been designed as an experimental tableau for all persons who feel interested in robotics The main goal for this platform is the experience to learn programming the device in C C language The robot is not to be considered as a toy The device is n...

Page 4: ...vice is being operated within the range and operating conditions as specified in the data sheets by ST Microelectronics the optical laser output power will be restricted to the specified limits The optical laser output may never be raised and under no circumstances any optical lenses are allowed to be used for focusing the light beam For security reasons we discourage to look into the laser light ...

Page 5: ...cope 20 2 4 6 Calibration of the proximity sensors 20 2 4 7 Calibrierung of the Temperatur Sensor 22 2 4 8 Calibration of the LineFollower 22 2 5 Command line interface CLI 23 3 Programming with iRP 24 3 1 Basic operation 24 3 1 1 The language setting symbol 26 3 1 2 The light bulb symbol 26 3 1 3 The Worksheet symbol 26 3 1 4 Remote control and display Tab 26 3 1 5 Program Tab 26 3 2 iRP help 27 ...

Page 6: ...ftware Library 48 6 1 3 Marvin function buttons 48 6 2 Demo software description 48 6 3 User task for own C C Programs 49 6 3 1 C code example 49 6 3 2 user_code h file 49 6 3 3 user_code cpp file 50 6 4 iRP extract of the C code 50 6 4 1 Copy IRP_program h into user_code h file 51 6 4 2 Copy IRP_program cpp into user_code cpp file 52 7 Technical data 53 7 1 Dimensions and weight 53 7 2 Power supp...

Page 7: ...emote Control and Status Display 1 Apple iPAD can store programs only on the robot not on local disk MacBook with Firefox for Mac can store data on the local disk 2 Firefox Chromium PC Notebook Samsung Galaxy Tab A and Safari iPad Pro MacBook Air are tested Internet Explorer or Edge are not supported AREXX Engineering JM Engineering Version 1 3 1 October 27 2017 Page 1 ...

Page 8: ... The powerful micro gearbox motors with high resolution odometry guarantee a high speed of the robot with its rubber drive The power is supplied by 6 standard AA or NiMH batteries A virtual display can be found in the browser Firefox Google Chrome Safari on a PC Notebook Mac or Tablet In addition the Marvin robot can be remote controlled The graphical programming interface Marvin iRP allows beginn...

Page 9: ...Kabel Micro B Type A Marvin extensions Gripper Arm Arduino compatible iRP programable Shovel and Line Follower Arduino compatible iRP programable Extension Board Arduino compatible iRP programable Interface with socket prepared for barometer or GPS module For your own hardware extensions AREXX Engineering JM Engineering Version 1 3 1 October 27 2017 Page 3 ...

Page 10: ...ensors optional Button Main Switch Charge Plug for rechargeable batteries Figure 2 1 Marvin robot hardware Hint The best thing to handle the Marvin robot is to grab it on the battery compartment or on the chains In addition it should be avoided to touch directly to the electronics microcontrollers etc as precaution agaist electrostatic discharge ESD AREXX Engineering JM Engineering Version 1 3 1 O...

Page 11: ...tion Micro USB connector Micro SD Card reader SMD button Arduino expansion plug separate UART SPI I2C 6 ADC up to 8 GPIOs Interrupt capable up to 4 PWM channels for servos 6 Cell power supply for AA batteries or rechargeable batteries for long operating times Slide switch and AUX battery input Switching regulator for high efficiency of the power supply Powerful micro transmission motors with high ...

Page 12: ...wisted at 15 or 15 to the robot zero axis to achieve a wider angle of detection The representation of the resulting detection range shows a slight overlap of the individual sensors This ensures that all obstacles in the travel path are recognized The picture also applies to the optional rear sensors FoV Proximity sensors Representation of all three sensors Figure 2 2 Field of View of the proximity...

Page 13: ...is recommended to first solder only one pin then align the sensor and then solder all other pins Hint After installing the new sensors you have to configure the Robot accordingly The details about the configuration you can find under section 3 8 Figure 2 3 Marvin with rear proximity sensors Hint It is best to exercise soldering on a PCB before be economical with the solder Too much solder can caus...

Page 14: ...l Philips screw driver The LineFollower sensor signals can be used together the special iRP Bloc for the sensor Figure 2 4 Marvin with LineFollower Hint After mounting the extension you have to configure the Robot accordingly The details about the configuration you can find under section 3 8 For safetey reasons you should not look directly into the IR LED of the sensor during operation AREXX Engin...

Page 15: ... accessed by an special iRP Bloc Possible are open close up down Figure 2 5 Marvin with Gripper Extension Hint After mounting the extension you have to configure the Robot accordingly The details about the configuration you can find under section 3 8 AREXX Engineering JM Engineering Version 1 3 1 October 27 2017 Page 9 ...

Page 16: ...re a variety of micro SD cards that have different characteristics and are available in Marvin may not work properly SD XC cards as well as SanDisk Ultra cards are generally not supported Marvin software updates consist of the disk image with the iRP software It also contains the appropriate firmware hex file The versions of iRP software version and firmware version are always the same Hint The iR...

Page 17: ...serted in the robot please do so carefully now Figure 2 6 Marvin with inserted SD Karte Hint The Micro SD card usually does not have to be removed from the robot It is protected so that it is protected from damage However you should not touch the robot so the Micro SD card is damaged AREXX Engineering JM Engineering Version 1 3 1 October 27 2017 Page 11 ...

Page 18: ... set when the robot is delivered It provides the fastest way to program or control the robot To connect the robot to the PC Notebook perform the following steps 1 Switch on PC Notebook with WiFi interface 2 Turn on the robot the green WiFi status LED is lit 3 Search for wireless networks on the PC Notebook in the WiFi menu here you should find the SSID Marvin 4 Pair the robot with the PC by enteri...

Page 19: ...ceed as follows a Connect robot via USB b Change to terminal window tab c Send the following commands to the robot wlan DEFAULT Enter Turn the robot OFF and ON when it is displayed in the window wlan STA addprofile SSID of your router password of your router Enter Hint Please note that the terminal history should be switched off when the addprofile command is sent Otherwise your password will be s...

Page 20: ...it you can now familiarize yourself with the menu and load and run a first small program 6 Load the sample program running lights 7 You should now see the status LED light up in different colors changing every 1 sec Figure 2 7 Marvin WebIDE Welcomescreen AREXX Engineering JM Engineering Version 1 3 1 October 27 2017 Page 14 ...

Page 21: ...linking firmware programming red functional malfunction please turn robot On and Off There are also three LEDs to display the status of the WIFI subsystem red Connection problem with WiFi network yellow blinking transmitting data yellow permanent WiFi connection stuck green connected to WiFi network this is always the case in AdHoc mode and is independent of the HTTP connection AREXX Engineering J...

Page 22: ...via iRP Plotter area which shows battery voltage and the speed pulses for left right chain speed pre defined by firmware Command line interface and buttons for calibration etc The most important features are explained in the next subsections Figure 2 8 Remote Control and Display Hint The Remote Control and Display Screen Figure 2 8 is self explanatory just try it out AREXX Engineering JM Engineeri...

Page 23: ...Display 2 4 2 Calibration of sensors and set system time The Marvin robot supports the calibration of compass gyro rotational speed sensor the optional LineFollower and distance sensors These functions are initiated in the Remote Control and Display window see also section 3 1 with the specific command buttons or via the command line interface Figure 2 10 In addition the real time clock of the rob...

Page 24: ...Step 1 preparation Turn on the Marvin robot and connect the robot to the web interface in the browser Take a compass and determine the directions for north east south and west remember the points Hint You can skip this step if no compass is availble Important is to cover the full circle 2 4 4 2 Step 2 calibration mode on Go to the remote control and display page and click the button Calibrate comp...

Page 25: ... west or a complete circle if possible with intermediate values which increases accuracy Hint Do not tilt the Marvin too quickly during calibration 2 4 4 4 Step 4 finalization of calibration After completing the procedure close the calibration mode by clicking on the corresponding button Finalize calibration and check the result by aligning the robot with the corresponding and known direction of t...

Page 26: ... 10 and stored there Hint The calibration of the distance sensors is not absolutely necessary and provides an option to get more accurate results Beginners should not do this 2 4 6 1 Step 1 preparation Turn on the Marvin robot and connect the robot to the web interface in the browser Place the ruler in front of the respective sensor so that the imaginary line of sight of the sensor is coincident w...

Page 27: ...er Figure 2 12 iRP auxiliary program data on user screen Enter the following in the command line cal prox FM 23 135 0 300 170 Enter In this example the front mid sensor FM with the lower raw value of 23 and the measured distance 13 5 together with the measured distance 300 and the upper raw value of 170 would be used for calibration Hint All distances must be entered in mm After calibration of the...

Page 28: ...ure sensor is not very high because it is embedded in the 9D Sensor 2 4 8 Calibration of the LineFollower The Marvin Robot supports easy calibration of the optical IR LineFollower sensor First put the Linefollower sensor above the black field and execute the calibration command cal line BLACK and then above the white area cal line WHITE to complete the calibration Figure 2 13 Utility fields to cal...

Page 29: ...r between 0 and 13 ch 0 for automatic channel selection wlan AP MODE Switches Marvin to AdHoc mode wlan STA addprofile SSID passwd Joins the network with the SSID SSID and the password passwd In the future it will automatically try to connect to this network wlan STA delprofile ID Deletes the WLAN profile with ID ID The ID 1 deletes all profiles wlan STA txpwr pwr Set transmit power in Infrastrukt...

Page 30: ...is a prerequisite Program Menu Worksheet Help Menu Light Bulb Language Menu Tabs Link Indicator Figure 3 1 Marvin WebIDE Menu bar The link indicator is located to the left of the language menu A green light indicates a good connection A red light indicates a short term interruption or use of the entire bandwidth for downloading documents from the SD card If there is a longer error a pop up message...

Page 31: ...nload Program Start program Figure 3 2 Marvin WebIDE program buttons Help Con guration Source code Figure 3 3 Marvin WebIDE Configuration help and source code buttons AREXX Engineering JM Engineering Version 1 3 1 October 27 2017 Page 25 ...

Page 32: ...your programs e g load store etc Marvin SD card programs menu to load and save You can also select the iRP mode Beginner Intermediate Expert set to The dark gray color indicates the selection 3 1 4 Remote control and display Tab Here are two displays a remote control panel and a plotter area The two virtual displays are divided into a fixed area where system values are displayed for example the ba...

Page 33: ... light bulb symbol picture shown at the top left or Click on the question mark on the right side of the screen The help sidebar scrolls to the currently used block automatically see Figure 3 4 Figure 3 4 The Marvin WebIDE Helpbrowser AREXX Engineering JM Engineering Version 1 3 1 October 27 2017 Page 27 ...

Page 34: ...e breakpoint the download button the zoom function and the trashcan for blocks which are no longer required Stop a program with the stop button 3 5 Program load or saved Here you can load or save your programs refer to Figure 3 6 The location can be selected as usual It is also interesting to insert already developed parts of the program So you can build up a more comprehensive program from differ...

Page 35: ...hted see Figure 3 7 Hint A very useful feature is the ability to set breakpoints to stop the program and display an interesting value or state in the virtual display This simplifies the debugging since the internal state of the software can be displayed easily Figure 3 7 Example of a compiler error AREXX Engineering JM Engineering Version 1 3 1 October 27 2017 Page 29 ...

Page 36: ...ut this is rather something for advanced and experts The selection is made by means of the program tab source code in this case outputs as C source C header and assembler are possible Figure 3 8 Figure 3 8 Example for generated C code AREXX Engineering JM Engineering Version 1 3 1 October 27 2017 Page 30 ...

Page 37: ...ily achieved via the iRP WebIDE Simply click on the drop down menue Figure 3 9 or tick mark the selection field To confirm the configuration you have to tick mark the accept configuration field on the lower left corner of the configuration screen and follow the instruction to power cycle the robot Figure 3 9 Marvin WebIDE Configuration Screen AREXX Engineering JM Engineering Version 1 3 1 October ...

Page 38: ...the system configuration the USB port is usually dev ttyACM0 Just type in the correct USB port e g dev ttyACM0 As interface type select UART with a baud rate 0 default Click OK Click on Add File to select the hex file with the new program The search simply goes over the path with SelectFile Select the hex file you want to load into the micro controller As a further step select the type e g Marvin ...

Page 39: ...e top of the toolbar Click Save at the top of the toolbar if you want to save the created robots and programs Hint The JM3 Robot Tool is developed for and tested on MacOS Sierra newer versions will work as long as Apple will maintain the backward compatibility of the libraies 4 1 3 Windows 7 Copy the JM3 Robot Tool to a folder and run the file robottool exe Click on the Add Robot icon enter the na...

Page 40: ... at the top of the toolbar if you want to save the created robots and programs Hint The JM3 Robot Tool is developed for and tested on Windows 7 newer versions will work as long as Microsoft will maintain the backward compatibility of the libraies AREXX Engineering JM Engineering Version 1 3 1 October 27 2017 Page 34 ...

Page 41: ...Connect allows data to be received Disconnect connection to robot Disconnect Send data to the robot Right side lower window commands can be entered here at any time Please set line ending characters to LF line feed The program supports undo using the arrow keys up and down and refresh with F5 Figure 4 1 The JM3 Robot Tool Terminal window AREXX Engineering JM Engineering Version 1 3 1 October 27 20...

Page 42: ... differentiates two types of hex programming Upload iRP Firmware or application program code upload like irpxxx hex file or own C program code myprogram hex Upgrade Bootloader the Blootloader itself can be updated a file will look like bootloader xx hex Figure 4 2 The JM3 Robot Tool 4 3 1 iRP Firmware update The procedure for a iRP Firmware update is described in this chapter AREXX Engineering JM ...

Page 43: ... program code Marvin C program code written by yourself Start the JM3 Robot Tool It is assumed that the robot tool has already been prepared as described above Click on Add File to select the hex file with the new program The search simply goes over the path with SelectFile Select the hex file you want to load into the micro controller As a further step select the type e g Marvin Click OK Now sele...

Page 44: ... A click on Upgrade Bootloader executes the update Ready the new bootloader is permanently flashed AREXX Engineering JM Engineering Version 1 3 1 October 27 2017 Page 38 ...

Page 45: ...writing of files is supported by the normal file explorer Image files can be written or created as well 5 1 2 MacOS Sierra Unpack the compressed ext4 browser into the application folder and execute the file ext4 browser app done Add the program to the a program bar so it can be more easily accessed 5 1 3 Windows 7 Unpack the compressed ext4 browser into a folder and execute the file ext4 browser e...

Page 46: ... Device xxxxx MiB Click OK The further operation is similar to other file browsers or explorers i e self explanatory User data or program examples can be found under the folder prog After completion of reading or storing files on the SD Card close the ext4 browser and eject the SD Card drive propperly Hint The JM3 ext4 browser is developed for and tested on MacOS Sierra newer versions will work as...

Page 47: ...ples can be found under the folder prog After completion of reading or storing files on the SD Card close the ext4 browser and eject the SD Card drive propperly Hint The JM3 ext4 browser is developed and tested for Windows 7 it also works with newer versions of Windows as long as Microsoft makes the software libraries backwards compatible Figure 5 1 ext4 browser AREXX Engineering JM Engineering Ve...

Page 48: ...e is written with the command dd Insert the SD Card with the USB adapter Open a terminal window Check the ID dev sdX of the SD Card by running the command sudo fdisk l Note the ID of the SD Card it must have a size of approximately 2GBytes and contain exactly one Linux partition Unmount the SD Card with the command sudo umount dev sdX Start the image update with the command sudo dd bs 1M if myImag...

Page 49: ...e to disk Select the image file and the disk drop down selection if you press on the arrow e g GenericMass Storag USB Device xxxxx MiB and click Write Image Wait until the image is completely transfered to the SD Card After completion close the ext4 browser and eject the SD Card drive propperly Attention If a pop up messages from the operating system ask for Format SD Card this message must be ign...

Page 50: ... own programs hardware driver etc and a the required utility programs are supplied with the package Hint This option is for advanced users and experts C C software development and the Realtime Operating System FreeRTOS are not suitable for beginners However in this manual you will find a step by step guide to download and install the required programs or links on your computer for your operating s...

Page 51: ...w eclipse org downloads The programming of the robot i e the loading of the program you have created is done via USB port on the left side of the robot and the JM3 Robot Tool This allows your program to be loaded quickly and effectively into the TIVA C microcontroller If you need full access to the microcontroller e g low level driver development you need a TIVA JTAG interface e g TM4C1294 Connect...

Page 52: ...he GCC folder is called gcc arm none eabi if not rename accordingly Save and unpack the Marvin firmware package e g firmware v1 3 1 tar gz and the make 4 2 bin osx tar gz build system from the SD card to this folder Allow programs that are not loaded from the AppStore to be executed by running sudo spctl master disable from the command line interface Install the Robottool see chapter 4 As source c...

Page 53: ...d make sure that the GCC folder is called gcc arm none eabi if not rename accordingly Save and unpack the Marvin firmware package e g firmware v1 3 1 tar gz Python e g python 3 6 3 win32 7z and the build system msys nano 7z from the SD card and add this also into this folder Install the Robottool see chapter 4 As source code editor we recommend the Tool Notepad which is included on the SD card and...

Page 54: ...on the SD Card documentation C code generated with iRP can be exported and transferred to a new C project This also simplifies the transition from iRP to C code development 6 1 3 Marvin function buttons The Marvin function buttons in the Remote Control and Display tab Figure 6 1 can only be used with your own C programs Figure 6 1 Marvin function buttons in Remote control and display tab 6 2 Demo ...

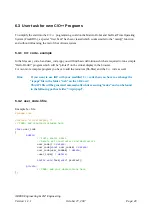
Page 55: ... to add the resources lib files and the C code as well Hint If you want to use iRP with your modified C code then you have to exchange the irpapi file in the folder web on the SD Card This API file will be generated automatically while executing make and can be found in the following path or folder irp irpapi 6 3 2 user_code h file Example h file pragma once include virtualDisplay h TODO add requi...

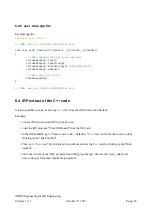
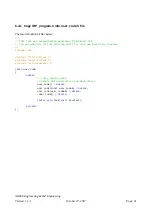
Page 56: ...code It is also possible to extract and copy C code from the iRP domain into this task Example Connect Marvin and start iRP in your browser Load the iRP program ClockWithSound from the SD Card In the iRP WebIDE go to Show source code default is C view and store the source code by clicking on the Disk Symbol Then go to h view by clicking on the symbol and store the h code by clicking on the Disk Sy...

Page 57: ... Marvin C program pragma once include lib rtcDriver h include userInterface h include virtualDisplay h class user_code public Fully static class Delete all constructors and destructors user_code delete user_code const user_code delete user_code user_code delete user_code delete static void Task void pContext private AREXX Engineering JM Engineering Version 1 3 1 October 27 2017 Page 51 ...

Page 58: ...ten seconds for virtualDisplay Lock virtualDisplay ClearLine 0 virtualDisplay WriteString 0 My Clock virtualDisplay WriteInt 0 driver rtc GetHours virtualDisplay WriteString 0 virtualDisplay WriteInt 0 driver rtc GetMinutes virtualDisplay WriteString 0 virtualDisplay WriteInt 0 driver rtc GetSeconds virtualDisplay Unlock Beep every 10 seconds if driver rtc GetSeconds 10 0 userInterface webAudio am...

Page 59: ... h Driving operation engines at 50 ca 10 h while programming with iRP 7 3 Supply voltages experiment board VDD_3V3 Iout max 50 mA VDD_5V0 Iout max 50 mA VBat_M VSS Iout max 200 mA 7 4 Further information All other data can be taken from the following IC data sheets Controller Texas Instruments TM4C1294KCPDT Motor Driver Texas Instruments DRV8833CPWP 9D Sensor ST Microelectronics LSM9DS1TR Proxi Se...

Page 60: ... cycles Table 8 1 Pin out Arduino compatible header Pin 1 IOREF Pin 2 RESET Pin 3 VDD_3V3 Pin 4 VDD_5V0 Pin 5 GND Pin 6 GND Pin 7 VSS V_Bat Pin 8 ADC_X5 Pin 9 ADC_X4 Pin 10 ADC_X3 Pin 11 ADC_X2 Pin 12 ADC_X1 Pin 13 ADC_X0 Pin 14 RX_X Pin 15 TX_X Pin 16 IO_0 Pin 17 IO_1 Pin 18 IO_2 Pin 19 IO_3 Pin 20 IO_4 Pin 21 IO_5 Pin 22 IO_6 Pin 23 IO_7 Pin 24 CS_X Pin 25 MOSI_X Pin 26 MISO_X Pin 27 SCK_X Pin 2...

Page 61: ...Figure 8 1 Marvin Arduino header schematic AREXX Engineering JM Engineering Version 1 3 1 October 27 2017 Page 55 ...

Page 62: ...e left front side of the robot next to themicro controller Table 8 2 Pinout of the JTAG TIVA C compatible header Pin 1 TCK Pin 3 TDO Pin 5 TMS Pin 7 TDI Pin 2 GND Pin 4 VDD_3V3 Pin 6 RST_N Pin 8 GND Figure 8 2 Marvin JTAG Header Schematic AREXX Engineering JM Engineering Version 1 3 1 October 27 2017 Page 56 ...

Page 63: ...PQ3 SSI3DAT1 WIFI_SPI_MISO 28 VDD 29 PH0 GPIO PROX_RL_CS 30 PH1 GPIO PROX_RM_CS 31 PH2 GPIO PROX_RR_CS 32 PH3 GPIO NC Pin Name Function Signal 33 PA0 U0RX RX_X 34 PA1 U0TX TX_X 35 PA2 SSI0CLK SCK_X 36 PA3 SSI0FSS CS_X 37 PA4 SSI0DAT0 MOSI_X 38 PA5 SSI0DAT1 MISO_X 39 VDD 40 PA6 GPIO REAR_R 41 PA7 GPIO REAR_L 42 PF0 M0PWM0 Motor_L AINT1 43 PF1 M0PWM1 Motor_L AINT2 44 PF2 M0PWM2 Motor_R BIN1 45 PF3 M...

Page 64: ...IFI_LED_RED 95 PB0 GPIO ODO_L 96 PB1 GPIO ODO_R Pin Name Function Signal 97 TDO TDO TDO 98 TDI TDI TDI 99 TMS TMD TMS 100 TCK TCK TCK 101 VDD 102 PQ4 GPIO nHIB 103 PP2 GPIO PROX_FR_CS 104 PP3 GPIO PROX_FM_CS 105 PP4 GPIO PROX_FL_CS 106 PP5 GPIO NC 107 PN0 GPIO INT_FL 108 PN1 GPIO INT_FM 109 PN2 GPIO INT_FR 110 PN3 GPIO INT_RL 111 PN4 GPIO INT_RM 112 PN5 GPIO INT_RR 113 VDD 114 GND 115 VDDC 116 PJ0...

Page 65: ...8 4 PCB Print Figure 8 3 Marvin PCB Print AREXX Engineering JM Engineering Version 1 3 1 October 27 2017 Page 59 ...

Page 66: ... iRP auxiliary program data on user screen 21 2 13 Utility fields to calibrate the Linefollower 22 3 1 Marvin WebIDE Menu bar 24 3 2 Marvin WebIDE program buttons 25 3 3 Marvin WebIDE Configuration help and source code buttons 25 3 4 The Marvin WebIDE Helpbrowser 27 3 5 Mismatch of block types in iRP 28 3 6 Menue Programs at the SD Card 29 3 7 Example of a compiler error 29 3 8 Example for generat...

Page 67: ...2 1 CLI Kommandos 23 8 1 Pin out Arduino compatible header 54 8 2 Pinout of the JTAG TIVA C compatible header 56 8 3 TM4C129EKCPDT Pin mapping 57 AREXX Engineering JM Engineering Version 1 3 1 October 27 2017 Page 61 ...

Reviews: