background image

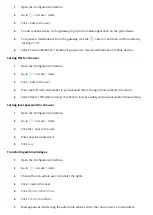
Changing other settings

1

Open the Con guration Interface.

2

Go to 

 > Scenes.

3

Click > to expand the scene.

4

Edit scene settings:

Allow to restart a running scene – if set to

Yes

, every new activation of the scene restarts it, if

set to 

No

, scene can’t be activated again if it is already running.

Category – categories are used for  ltering scenes by type.
Scene hidden – check to hide scene from interfaces.
Require PIN to run – check if you want to protect the scene by requiring PIN to run it.
Icon – icon that will represent the scene.

5

Save

.

Running scenes

1

Open the Con guration Interface.

2

Go to 

 > Scenes.

3

Click 

Play

 button next to the scene which you want to run.


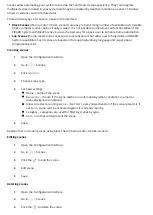
Variables

Variables allow you to create more advanced scenes and home automations which goes beyond just a scene
setup. There are situations and things that you want to keep track outside the particular scene, or you want
to share the variable across di erent scenes.

Standard variable – The Standard variable can store any value you wish. The value stored in the Standard
variable can be set manually in the HC’s 

 > General > Variables or from a scene. It can then be used as

part of a condition in other scenes.

Enumerated variable – The Enumerated variable has set values that you con gure when you create the
variable. The variable can then only be set to one of these preset values. It is useful having de ned values
such as Night, Day, Home, Away etc.

1

Open the Con guration Interface

2

Go to 

 > General > Variables.

3

Click 

Add Variable

.

4

Choose Standard or Enumerated variable.

5

Enter the Name and Value/Values.

6

Click 

Add

.


Summary of Contents for HC3L-001

Page 1: ...nter 3 Lite is the core element of the FIBARO System It enables the integration of smart home devices into a single system to provide convenient control and a powerful automation platform The gateway is now even more secure reliable and versatile Features Provides a reliable foundation for FIBARO System Capable of controlling all FIBARO and other compatible devices using the following radio standa...

Page 2: ... Top Speci cations General information Model HC3L 001 Power supply 5V DC max 1A adapter included Operating temperature 0 40 C Operating humidity max 75 relative humidity non condensing Power connector USB Micro B Dimensions 178x110x31 mm Radio Communication Protocol Radio frequency band Max transmitting power Z Wave 700 series 868 0 868 6 MHz 869 7 870 0MHz 9dBm Wi Fi 802 11 b g n 2400 2483MHz 20d...

Page 3: ...et and connect it to the gateway 2 The gateway will turn on wait for the indicator to turn solid red 3 Connect your computer to Wi Fi network created by the gateway You will nd Wi Fi SSID name and password on the bottom of the device First con guration First use of the device 1 After connecting to Wi Fi network created by the gateway go to nd baro com https nd baro com or http 10 42 0 1 http 10 42...

Page 4: ...om http nd baro com 2 List of all gateways in your home network will be displayed 3 Click Open next to the gateway you want to con gure 4 Login with your local credentials default login admin default password admin Using Remote Access 1 In your Internet browser go to home baro com https home baro com 2 Login using FIBARO ID account 3 List of all gateways in your Remote Access will be displayed 4 C...

Page 5: ...t allows to start scenes and view their status Climate a list of all heating and cooling schedules in your system It allows to view their status or quickly set them to manual vacation mode Additionally in the lower left hand corner there are four more views that you may nd important if you want to con gure your system something does not work properly or you want better insight in the gateway opera...

Page 6: ... debug trace warning error 5 reset button to clear the search and lter parameters Using tags for better console management Console logs may be lled with di erent messages which may not interest us at the moment To narrow down the messages to the interesting ones we may introduce tags in our scenes and Quick Apps to quickly nd the right messages in the log Tags and Quick Apps Quick Apps create tags...

Page 7: ...stall the Home Center app https www baro com en smart home app You can download the Home Center mobile app here FIBARO Home Center for iOS iPhone https apps apple com app baro home center id1421839464 FIBARO Home Center for Android https play google com store apps details id com baro homecenter hl en You can also scan the codes on your mobile device directly Z Wave devices Adding Z Wave devices 1 ...

Page 8: ...Interface 2 Go to Devices 3 Click on the Z Wave tab 4 Click 5 Follow instructions of the device Removing Z Wave devices If added 1 Open the Con guration Interface 2 Go to Devices 3 Click next to the device you want to remove from the system 4 Set learning mode duration and click Continue 5 Follow instructions of the device Force removing Z Wave devices 1 Open the Con guration Interface 2 Go to Dev...

Page 9: ... the device is battery powered wake it up manually or wait for next automatic wake up Parameters FIBARO devices allows to customize their operation to user s needs using con gurable parameters The settings can be adjusted via Z Wave controller to which the device is added In the FIBARO interface parameters are presented as simple options in Advanced Settings of the device Setting parameters for th...

Page 10: ...at s why you can create a Linked Device which can act as the given Thermostat How does the linked device work When you choose the main device for the thermostat it means that the actions of the switches selected in the Linked Device will depend on the readings from the main device Depending on the selected devices di erent operating modes will be available If you select a device Switch Wall Plug a...

Page 11: ... humidi er or dehumidi er you won t be able to set the full range just the minimum or maximum threshold Creating Humidi ers 1 Open the Con guration Interface 2 Go to Devices 3 Click 4 Choose Other Device 5 Click Humidi er 6 Enter the name of the humidi er 7 Choose a Room 8 Choose the Humidity Sensor 9 Set desired humidity range 10 Select humidi ers and dehumidi ers 11 Save Video gates Video gate i...

Page 12: ...act as a device of a few types RGBW Controller linked devices follow parameters such as brightness color and power state Binary switch linked devices follow the power state of the master device appropriate for simple switches smart plugs Color controller linked devices follow color parameters of the master device Multilevel switch linked devices follow the voltage output of the master device appro...

Page 13: ...you want to group 9 Choose Master Device the one that other devices will follow 10 Set the Device Role according to your devices Blind without positioning Blind with positioning Venetian blind Garage door without positioning Garage door with positioning 11 Save Sprinklers If you don t have dedicated watering devices that support Z Wave or other wireless technology you can create Sprinklers using L...

Page 14: ...tiple binary sensors of the same type to create one main sensor It will calculate its value from the values of the linked devices using the logical operator you choose Available operators AND OR Creating Binary sensors 1 Open the Con guration Interface 2 Go to Devices 3 Click 4 Choose Other Device 5 Choose Binary Sensor 6 Enter the name 7 Choose a room 8 Choose Sensor Type 9 Choose sensors that sh...

Page 15: ... 1 Open the Con guration Interface 2 Go to Devices 3 Click 4 Choose Other Device 5 Choose Multilevel Sensor 6 Enter the name 7 Choose a room 8 Choose Sensor Type 9 Choose sensors that should be linked 10 Choose which function should be used to calculate the value 11 Save Cameras Adding Cameras Supported cameras Your camera must use MJPEG video compression format H 264 H 265 RTSP and other streamin...

Page 16: ...sible to use Quick Apps to prepare integrations with the devices which are not Z Wave but o er some API which can be implemented in our Quick App Advantages of the new Quick Apps approach easier development simple installation quick con guration usable in scenes Creating Quick Apps 1 Open the Con guration Interface 2 Go to Devices 3 Click 4 Choose Other Device 5 Choose Quick App 6 Enter the name o...

Page 17: ... 5 Click Download Uploading le 1 Open the Con guration Interface 2 Go to Devices 3 Click 4 Choose Other Device 5 Choose Upload File 6 Choose le from your computer Types of Quick App devices Binary sensor Binary switch Color controller Door lock Door sensor Energy meter Generic device Flood sensor Humidity sensor Multilevel sensor Multilevel switch Player Power sensor Remote controller Roller shutt...

Page 18: ...ery day at 12 00 Once per week Monday at 12 00 3 Choose the channel of communication E mail Push 4 That s all You will now be informed every selected time interval the device will be in one of the states you chose Settings Changing Name 1 Open the Con guration Interface 2 Go to Devices 3 Click on the frame next to the device you want to rename 4 Enter new name Changing Room 1 Open the Con guration...

Page 19: ...e Con guration Interface 2 Go to Devices 3 Click next to the device 4 Click ADD ICON Size of the icon must be 128px 128px Theoretical power consumption For switches without a built in power metering feature you can de ne the theoretical power consumption Whenever the device is turned on the meter will assume that it consumes power set by the user in Watts 1 Open the Con guration Interface 2 Go to ...

Page 20: ... plus icon Deleting sections 1 Open the Con guration Interface 2 Go to Rooms 3 Click Manage sections 4 Click next to the section you want to delete Rooms Rooms represent rooms and other places in your house e g living room corridor and devices can be assigned to them Adding rooms 1 Open the Con guration Interface 2 Go to Rooms 3 Click Add room 4 Set room information Category categories are used fo...

Page 21: ...ill represent the room 6 Save Deleting rooms 1 Open the Con guration Interface 2 Go to Rooms 3 Click in the top right corner of the room icon 4 Click Delete 5 Con rm Default room New devices will be automatically assigned to the default room To choose the default room 1 Open the Con guration Interface 2 Go to General 3 Set Default room under the section Main Sensors Network settings Checking netwo...

Page 22: ...k name SSID and security details 5 Click Connect How to set static IP Address Setting static IP address on a gateway consists of at least three steps 1 Determine the IP of the gateway and decide whether is it the IP you want to leave permanently 2 Con gure the home router so that it also keeps the IP for this device 3 Set the selected IP in the Con guration Interface 1 Open the Con guration Interf...

Page 23: ...ional encryption HTTPS secure encrypted connection HTTP HTTPS the gateway will accept both types of connection 4 Save REMEMBER Your browser might show you a warning when connecting via HTTPS in this case do the following 1 Download certi cate from the Secure Connection section in Network settings and install it on your system and browser 2 Use the gateway s serial number to connect locally i e use...

Page 24: ...on 4 Click Add user button 5 Enter FIBARO ID e mail address of the user you want to give access to your gateway 6 Click Add 7 Open the Con guration Interface 8 Go to Access Users 9 Click Synchronize 10 User with access via FIBARO ID will have icon on the list 11 If the user didn t already have an account message with local password for the new account will be sent to entered e mail address Giving ...

Page 25: ... to the user 4 Enter the PIN code Remember it you will need this to change it and to disarm the alarm 5 Select Ask for PIN when arming checkbox to increase safety and prevent unintentional arming Setting local password for the user 1 Open the Con guration Interface 2 Go to Access Users 3 Click the next to the user 4 Enter new local password 5 Click Save Transferring admin privileges 1 Open the Con...

Page 26: ...faster Enabling Support Access To enable support access 1 Open the Con guration Interface 2 Go to Access Remote Access 3 Enable Support Access toggle Installer Access The FIBARO System can be con gured on your own or by a certi ed FIBARO Installer In case your system has been con gured by the FIBARO Installer the Installer Access may facilitate his later work by allowing him to monitor and access ...

Page 27: ...r set manually NTP server Date format Hour format 12 hour 24 hour Date Time Units and separators Temperature unit Celsius Fahrenheit Wind speed unit km h mph Decimal mark comma dot Location Setting location in the gateway allows you to personalize your smart home experience Location is used for weather retrieving and can also be useful for automation purposes Once you set your home and or work loc...

Page 28: ... Z Wave This screen is dedicated to Z Wave con guration The gateway is capable of supporting a variety of devices and integrations available in your browser for example as Quick Apps or real Z Wave devices Z Wave Settings allows to Recon gure all devices Recon gure mesh network You can choose if you want to con gure entire Z Wave network or single devices Broadcast Node Information frame Add secon...

Page 29: ...bilities Such scenes are based on the Lua programming language and require basic programming skills Creating scenes 1 Open the Con guration Interface 2 Go to Scenes 3 Click Add scene 4 Choose scene type 5 Set basic settings Name name of the scene Run scene choose if the scene will be run automatically when conditions are met or manually ignore conditions Allow to restart a running scene if set toY...

Page 30: ...ng name 1 Open the Con guration Interface 2 Go to Scenes 3 Click on the frame next to the scene you want to rename 4 Enter new name Disabling enabling 1 Open the Con guration Interface 2 Go to Scenes 3 Click Disable Enable button next to the scene you want to disable enable Changing triggering mode manual auto In auto mode the scenes runs automatically when triggers and conditions are met in manua...

Page 31: ... to create more advanced scenes and home automations which goes beyond just a scene setup There are situations and things that you want to keep track outside the particular scene or you want to share the variable across di erent scenes Standard variable The Standard variable can store any value you wish The value stored in the Standard variable can be set manually in the HC s General Variables or ...

Page 32: ...eginning of the name special characters only letters from English alphabet spaces 5 Fill in the description 6 Click Add Back To Top Block Scenes Check here to see documentation for Block Scenes home center 3 block scenes Back To Top Lua Scenes Check here to see documentation for Lua Scenes home center 3 lua scenes Climate schedules Temperature schedules allow for automatic control of heating and c...

Page 33: ... Schedule zone works according to the set schedule Manual constant temperature is set for a speci ed time duration Vacation constant temperature is set until disabled Con guring zone schedule 1 Open the Con guration Interface 2 Go to Climate 3 Click to expand the zone 4 Select operating mode Heating devices increase the temperature to reach the temperature setpoint Coolin devices decrease the temp...

Page 34: ...g schedules allow for automatic control of your sprinklers You need to create sprinklers rst in order to con gure watering schedules Creating sprinklers 1 Open the Con guration Interface 2 Go to Devices 3 Click 4 Choose Other Device 5 Choose Sprinklers 6 Fill in new sprinkler settings Enter the name Choose a room Choose watering devices Choose watering default time Select soil moisture sensor opti...

Page 35: ... the schedule for 7 Click Save Adding watering sequences to a schedule 1 Click to expand the schedule 2 Click ADD SEQUENCE to add new sequence to the schedule 3 Choose devices to use in this sequence 4 Click next to the sequence to con gure it 5 Set order of the sprinklers and modify duration if needed 6 Repeat steps 2 5 to add and con gure more sequences 7 Click Save Pro les Pro les are sets of s...

Page 36: ...Open the Con guration Interface 2 Go to Pro les 3 Set how your scene devices and zones should work in each pro le Editing pro le name and icon 1 Open the Con guration Interface 2 Go to Pro les 3 Next to pro le name click 4 Click Edit 5 Change name or click new icon 6 Save Deleting pro les 1 Open the Con guration Interface 2 Go to Pro les 3 Next to pro le name click 4 Click Delete 5 Con rm Activati...

Page 37: ...ng zones 1 Open the Con guration Interface 2 Go to Alarm 3 Click Add Zone 4 Name the new zone 5 Select rooms or devices to be included in the new zone Arming disarming zones Arming zone will arm all devices in this zone and disarming the zone will disarm all devices in this zone 1 Open the Con guration Interface 2 Go to Alarm 3 Under Arming column click the toggle to arm disarm the zone 4 Enter PI...

Page 38: ... Interface 2 Go to Alarm 3 Click the to edit the zone 4 Change name or devices in the zone 5 Save System report The system allows to print a full report of the con guration for easier management and diagnostics The report gives you all the necessary information about the system at rst glance This can be useful for example for nding devices needing battery replacement or creating scenes The report ...

Page 39: ... performed on the inactive system then the gateway switches to it thus maintaining copy of your data from before the update In case of any problems you can switch back to it Entering Recovery Mode Using button on the cover 1 Unplug the power supply from the gateway 2 Press and hold the D button 3 Plug the power supply into the gateway 4 Release the D button when the indicator starts pulsing red 5 ...

Page 40: ...tem will be available for repairing inactive when entered via con guration interface or active when entered using button Switch system to repair the other one 1 Enter the Recovery Mode 2 Click Repair System A B 3 Choose if you want to restore Latest version or use Local le 4 Con rm Resetting network settings In some cases problems with the gateway may be caused by changes in the network con gurati...

Page 41: ...e deleted users devices scenes etc 1 Enter the Recovery Mode 2 Click Factory Reset button under Network Status section 3 Check Yes I m sure and I know what I m doing checkbox 4 Con rm action Updates Updating the gateway The gateway will inform you if there are any new updates with red badge and number on icon in the top bar Updates may include new features improvements and bug xes We recommend ins...

Page 42: ...operation In order to check the limit and how many devices and integrations are already added 1 Open the Con guration Interface 2 On the top bar click 3 You will see the current number of devices and integrations as well as the limits Backups Backups of your entire system are the best way to prevent losing con guration data in case of any issues or unintentional changes We recommend creating backu...

Page 43: ...or the new backup 5 Con rm 6 Wait for the process to end interface will be unavailable while creating backup 7 The backup will be added to your local backups Downloading local backup le 1 Open the Con guration Interface 2 Go to Backup 3 Click Download next to the local backup you want to download 4 File with last local backup will be downloaded on your computer Restoring backups Cloud backups requ...

Page 44: ...kup click Restore next to it Back To Top Diagnostics Diagnostics screen presents technical data about actual use of particular components i e CPU RAM Storage Z Wave This can help in troubleshooting or understanding how certain actions in uence our system There are 4 tabs CPU shows the actual use of each core RAM shows the actual use of RAM memory and indicated how much percent is used for what pur...

Page 45: ...faq Downloads Declarations Description and features First installation Interfaces Devices Con guration Automation Maintenance Integrations SUPPORT FIBARO forum https forum baro com FAQ https manuals baro com faq Warranty https www baro com les FIBARO_Guarantee pdf Privacy Policy https www baro com en privacy policy CUSTOMER FIBARO ID https id cloud baro com Marketplace https marketplace baro com C...

Page 46: ...com us app baro installer id1414461902 ls 1 mt 8 FIBARO Installer Android App https play google com store apps details id com baro installer hl en ABOUT Newsroom http newsroom baro com en About us https www baro com en about us Why FIBARO https www baro com en why baro Works with FIBARO https www baro com en compatibility Where to Buy https www baro com en where to buy Contact https www baro com e...

Reviews: