19
: P
an
el D
es
ig
ne
r •
10
5
© 2017 Telos Alliance - Rev 1.2
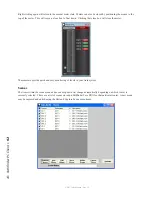
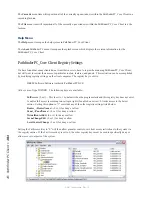
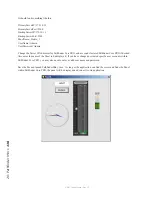
Next, with the button selected, double click on the caption property, and change the caption for the button. This
will alter what the button says. You can also click in the BackColorOn and BackColorOff properties and then click
on the button that appears in the property bar to open a color palette. This will allow you to define the colors to be
used when the button is on or off. The button will change colors to the new color if you are changing the backcolor
that matches the State drop-down for the control. You can change the state drop-down to on and off to view in the
designer how the button will look when it is on or off. After changing the state drop-down you have to click on
another property (leave the state property) before the change will appear. Make sure you leave the state property
in the state you wish it to default to when the form is loaded. The state is usually used in routing panels to show
whether a route exists, but when paired with stacking events or logic flows can be used to show any condition in the
system you want. Finally, double-click in the name property and create a name for the button. If you are going to
define custom roles for the user panel button through logic flows, the button will be identified in the logic flow by
PanelName.ButtonName.
You could also drag and drop labels onto the panel. Labels are simply textual information that will be displayed in
any color you like on the panel.
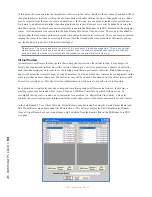
At this point, we have a panel that has a named button with a nice caption, but the button does not yet do anything
in the system. Find the three properties MapRouter, MapSource, and MapDestination. If you enter numbers into
these three properties that match the number of a router within Pathfinder, as well as the number of a source and
destination within that router this button will activate that route when pushed from within PathfinderPC_Core Client
and/or PathfinderPC_Core Mini.
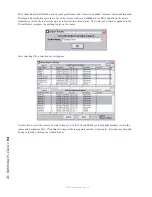
To determine what numbers to use in these properties, open PathfinderPC_Core Client and find the source or
destination you want using the ellipsis buttons next to source and destination in the routing tool bar. Find the
number of the router that has the source and destination to be used. Enter this number into the MapRouter property.
Find the numbers of the source and destination to be activated as a route when the button is pushed and enter those
numbers into the MapSource and MapDestination properties.
Remember that pushing the button from within the Panel Designer will do nothing as it is just the designer program.
The panel must first be saved to a Pathfinder Core PRO device, and then the panel should be opened using either
PathfinderPC_Core Client or PathfinderPC_Core Mini. Assuming that our Audio Router is router 1 and our button
is going to route Source 1 to Destination 1, make MapRouter, MapSource, and MapDestination all 1. Before we try
to use this new panel, add one more button. Create a caption and name for this button as well, and set MapRouter
and MapDestination also to 1 (or whatever number router your audio router is), but set the Source to 2. This will
mean that when we run the panel clicking the top button will route 1 to 1 and clicking the second button will route
2 to 1. Furthermore, the Mapping process will automatically change the state of either button if the route for that
button is active so that it will toggle the backcolor colors. Next, save the Panel, giving it a name.
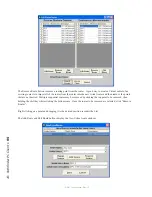
Launch the PathfinderPC_Core Client application and make sure it is connected to Pathfinder Core PRO. If it is
already started, you may have to restart it before the panel will be available. You will notice that there should now
be a menu in PathfinderPC_Core Client called User Panels. Under that menu item you will find your newly created
user panel. If you create additional panels and save to Pathfinder Core PRO, they also will appear under this menu
item. Click on the name of the panel to open the panel. If the MapRouter, MapSource, and MapDestination fields
have valid entries, clicking the buttons should now cause the routes to be made and the button colors to change
accordingly.


