166
Chapter 11 Deploying Files
Deploying directly
When you deploy a project directly, you are copying the files to the host server(s) at
the time of deployment. You can deploy to the same computer that you are currently
using (localhost), or you can deploy to one or more remote servers.
To deploy a project:
1
On the Projects resource tab, open a project.
For more information, see
“Managing project files” on page 145
.
2
Select
Projects > Deployment Wizard
.
3
In the first pane of the Deployment Wizard, click Direct Deployment and click
Next. The second pane displays.
4
Specify options for deploying to local host or to one or more remote servers:
•
To deploy to local host, select Local/Network Deployment, set file handling
options, and click Next.
•
To deploy to one or more remote servers, click Remote RDS/FTP Deployment
and click Next.
In the third pane, highlight entries in the Select Remote Deployment Server
list if you must deploy to defined servers other than those already associated
with the project. Click Next.
5
Click Finish.
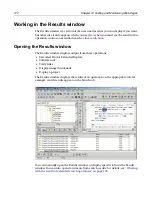
The Results window Deployment tab opens and shows the progress of the file
transfer. When deployment is complete, the Results window also displays the status
of each file and the amount of time required for the deployment.
Using a deployment script
You can create a deployment script to run at any time, and you can modify a script
with custom code after it has been generated.
About deployment scripts
Deployment scripts are based on the Visual Tools Object Model (VTOM), and are
generated in JScript or VBScript. For more information, see
“Scripting the Visual
Tools Object Model” on page 223
.
You can generate three types of deployment scripts:
•
Project-wide upload script
Copies the files in a project to the host server(s),
just as if you were deploying the project directly. During a project-wide upload,
the project is opened, uploaded, then closed.
You can only add custom code before and after deployment.
•
File-by-file deployment script
Uploads each of the project files individually.
During a file-by-file upload, the project is opened, each file is uploaded
individually, and the project is closed. A file must be in a project to be uploaded.
Summary of Contents for HOMESITE
Page 11: ...Contents xi Table of CommandID values 310 Table of SettingID values 314 Glossary 323...
Page 12: ...xii Contents...
Page 20: ...xx About This Book...
Page 28: ...8 Chapter 1 Setting Up the Product...
Page 70: ...50 Chapter 4 Managing Files...
Page 88: ...68 Chapter 5 Writing Code and Web Content...
Page 116: ...96 Chapter 6 Editing Pages...
Page 148: ...128 Chapter 7 Using Web Development Languages...
Page 190: ...170 Chapter 11 Deploying Files...
Page 210: ...190 Chapter 12 Testing and Maintaining Web Pages...
Page 216: ...196 Chapter 13 Extending the Help System...
Page 350: ...330 Glossary...
Page 358: ...338 Index...


