| Installation and Upgrades |
19
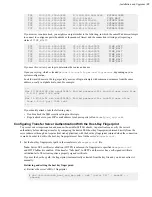
TCP 10.0.111.200:53865 173.194.202.188:5228 ESTABLISHED
TCP 10.0.111.200:53876 10.0.9.16:445 TIME_WAIT
TCP 10.0.111.200:55164 208.85.40.20:443 ESTABLISHED
TCP 10.0.111.200:55335 207.200.35.240:443 ESTABLISHED
TCP 10.0.111.200:55444 67.199.110.81:443 ESTABLISHED
TCP 10.0.111.200:56278 104.24.11.90:443 ESTABLISHED
If your server is under attack, you might see output similar to the following, in which the same IP address attempts
to connect to contiguous ports (hundreds or thousands of times) and the connection is timing out (reporting a
status of
TIME_WAIT
):
TCP 10.0.111.200:53402 72.21.81.109:60974 TIME_WAIT
TCP 10.0.111.200:53865 72.21.81.109:60975 TIME_WAIT
TCP 10.0.111.200:53876 72.21.81.109:60976 TIME_WAIT
TCP 10.0.111.200:55164 72.21.81.109:60977 TIME_WAIT
TCP 10.0.111.200:55335 72.21.81.109:60978 TIME_WAIT
TCP 10.0.111.200:55444 72.21.81.109:60979 TIME_WAIT
TCP 10.0.111.200:56278 72.21.81.109:60980 TIME_WAIT
If you see this, review your logs to determine the source and cause.
Open your syslog, which is located in
/var/log/auth.log
or
/var/log/secure
, depending on your
system configuration.
Look for invalid users in the log, especially a series of login attempts with common user names from the same
address, usually in alphabetical order. For example:
...
Mar 10 18:48:02 sku sshd[1496]: Failed password for invalid user alex from
1.2.3.4 port 1585 ssh2
...
Mar 14 23:25:52 sku sshd[1496]: Failed password for invalid user alice
from 1.2.3.4 port 1585 ssh2
...
If you identify attacks, take the following steps:
• Double-check the SSH security settings in this topic.
• Report attackers to your ISP's email address for abuse reports (often
abuse@
your_isp
.com
).
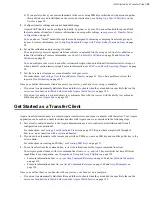
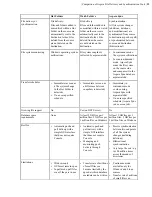
Configuring Transfer Server Authentication With the Host-Key Fingerprint
To prevent server impersonation and man-in-the-middle (MITM) attacks, Aspera clients can verify the server's
authenticity before starting a transfer by comparing the trusted SSH host key fingerprint (obtained directly from the
server admin or through an Aspera client web application) with the host key fingerprint returned when the connection
is made. In order to do this, the host key fingerprint must be set in the server's
aspera.conf
.
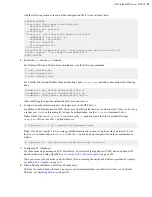
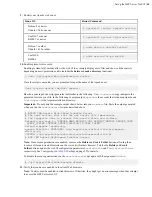
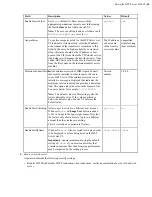
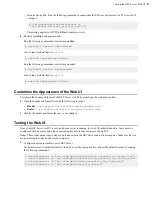
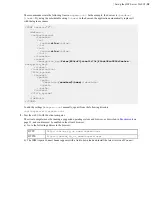
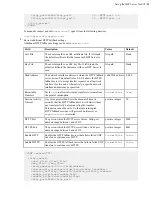
1.
Set the host key fingerprint or path in the transfer server's
aspera.conf
file.
Note:
Server SSL certificate validation (HTTPS) is enforced if a fingerprint is specified in
aspera.conf
and HTTP fallback is enabled. If the transfer "falls back" to HTTP and the server has a self-signed certificate,
validation fails. The client requires a properly signed certificate.
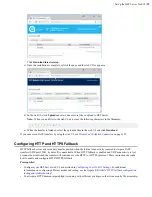
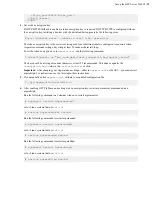
If you set the host key path, the fingerprint is automatically extracted from the key file and you do not extract it
manually.
Retrieving and setting the host key fingerprint:
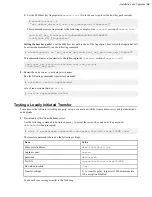
a) Retrieve the server's SHA-1 fingerprint.
# cat /etc/ssh/ssh_host_rsa_key.pub | awk '{print $2}' | base64 - |
shasum

