A-4
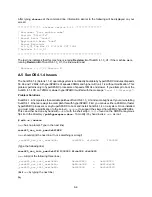
This same procedure should be repeated on the file
/sys/sun4m/OBJ/module_ross625_asm.o
. This
will allow you to build future custom kernels and not have to do the above procedure on every vmunix.
# adb –w /sys/sun4m/OBJ/module_ross625_asm.o
. (same procedure as above for vmunix).
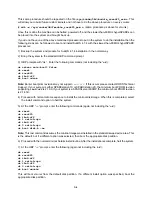
Once this is done the machine can be halted, powered off, and the slower-than-90MHz hyperSPARCs can
be placed into the system and brought back up.
If you do not have one of the above mentioned processors to put in the system to do the installation then the
following steps can be followed to boot and install SunOS 4.1.4 with the slower-than-90MHz hyperSPARC
processors:
1) Backup the system and prepare for SunOS 4.1.4 installation in the normal way.
2) Bring the system to the standard OBP command prompt.
3) OBP prompts with “ok.” Enter the following commands (not including the “
ok
”):
ok setenv auto–boot? false
ok reset
ok ross625
ok ibuf–off
ok boot cdrom
Note: Earlier boot prom revisions may not support
ibuf–off
. If this occurs please contact ROSS Technical
Support. If your system is either SPARCstation 10 or SPARCstation 20, the minimum boot PROM revision
supporting
ibuf–off
is 2.19.3. If your system is a SPARCserver 600MP, the minimum boot PROM revision
is 2.14.3H.
4) Proceed with normal cdrom sequence to install the miniroot disk image. When this is completed, select
the install command option to halt the system.
5) At the OBP “
ok
” prompt, enter the following commands (again not including the “
ok
”):
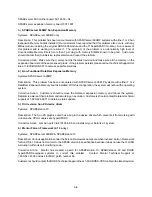
ok reset
ok ross625
ok ibuf–off
ok 1 switch–cpu
ok ibuf–off
ok 0 switch–cpu
ok boot disk:b –sw
Note: This last command assumes the miniroot image was installed in the standard swap device area. This
is the default, but if a different option was selected, then boot the appropriate disk partition.
6) Proceed with the normal miniroot Solaris install routine. After the installation is complete, halt the system.
7) At the OBP “
ok
” prompt, enter the following (again not including the “
ok
”):
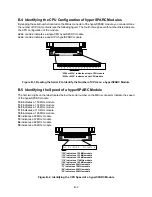
ok reset
ok ross625
ok ibuf–off
ok 1 switch–cpu
ok ibuf–off
ok 0 switch–cpu
ok boot vmunix
This will boot vmunix from the default disk partition. If a different install option was specified, boot the
appropriate disk partition.
Summary of Contents for hyperSPARC
Page 2: ...hyperSPARC Module Installation Guide TM...
Page 9: ...1 4...
Page 21: ...2 12...
Page 55: ...5 10...


